Cravings for bold, comforting meals often arrive after a long day. We want big flavor without a lot of fuss.
These recipes layer smoky, tangy, and savory notes so every bite feels richly flavored.
In this roundup you'll find quick soups, one-pan skillet dinners, sheet-pan roasts, bright salads, and a few simple sweets. We add small twists-smoky chiles, bright citrus, or fresh herbs-that turn familiar dishes into something more interesting.
Most recipes use ingredients you likely keep on hand.
These ideas fit into busy nights without a long ingredient list or extra cleanup. We chose options that reheat well for lunches, let you swap proteins or veggies, and pair with easy sides.
That way we get bold meals that still leave time for other things.
1. Garlic Sautéed Green Beans
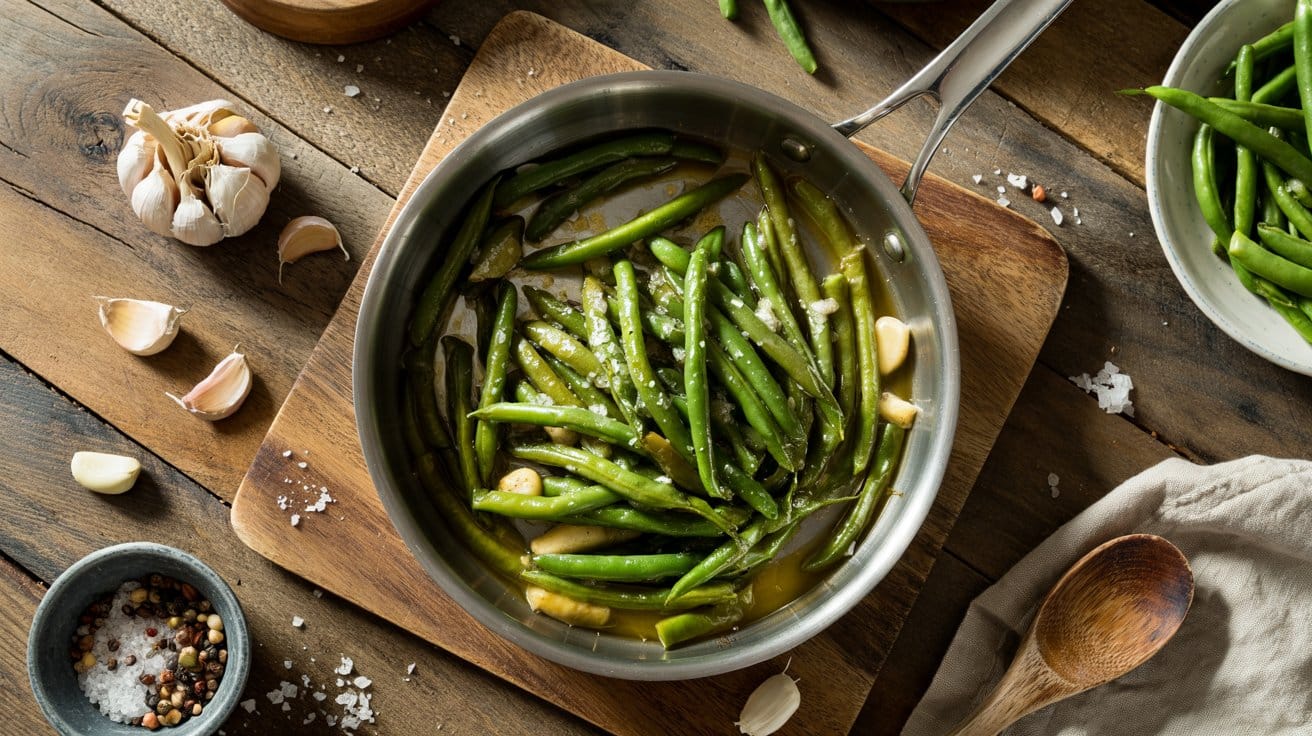
The garlic adds warm aroma while a squeeze of lemon brightens the finish, making this a great match for grilled or roasted mains - try garlic butter shrimp side ideas for a complementary pairing.
Why This Recipe Works
You get crisp-tender beans with concentrated garlic flavor. The quick pan method preserves color and texture.
- High-heat sear - Searing in a hot pan creates light char and keeps the beans crisp-tender.
- Garlic-forward finish - Adding garlic near the end preserves its aroma without burning and gives a fresh savory note.
- Lemon brightener - A squeeze of lemon at the end lifts the flavors and balances richness.
- Quick skillet method - The whole dish takes about 8-10 minutes so you can time it with mains.
Ingredient Swap Ideas
Simple swaps help you adjust to pantry items or dietary needs while keeping the same method and bright flavor.
- Green beans - Use broccolini or asparagus for a similar crisp-tender texture and seared flavor.
- Olive oil - Substitute butter or ghee for a richer, slightly nutty finish that browns the garlic differently.
- Garlic - Use ½ teaspoon garlic powder if fresh garlic is not available; add it earlier to bloom the flavor.
- Lemon - Swap rice vinegar or a splash of white wine for acidity if no lemon is on hand.
Ingredients
- 1 pound green beans - trimmed.
- 2 tablespoons olive oil - for sautéing.
- 3 cloves garlic - minced.
- ½ teaspoon kosher salt - or to taste.
- ¼ teaspoon black pepper - freshly ground.
- ½ lemon - juiced.
Instructions
- Trim the ends of the green beans and pat them dry.
- Heat a large skillet over medium-high heat until hot, then add the olive oil and swirl to coat.
- Add the green beans in a single layer and cook, tossing occasionally, until they are blistered and crisp-tender, 6-8 minutes.
- Push the beans to the side, add the garlic to the pan, and cook until fragrant, about 30 seconds; toss to combine.
- Season with salt and pepper, squeeze the lemon over the beans, toss once more, and serve immediately.
2. Microwave Steamed Broccoli
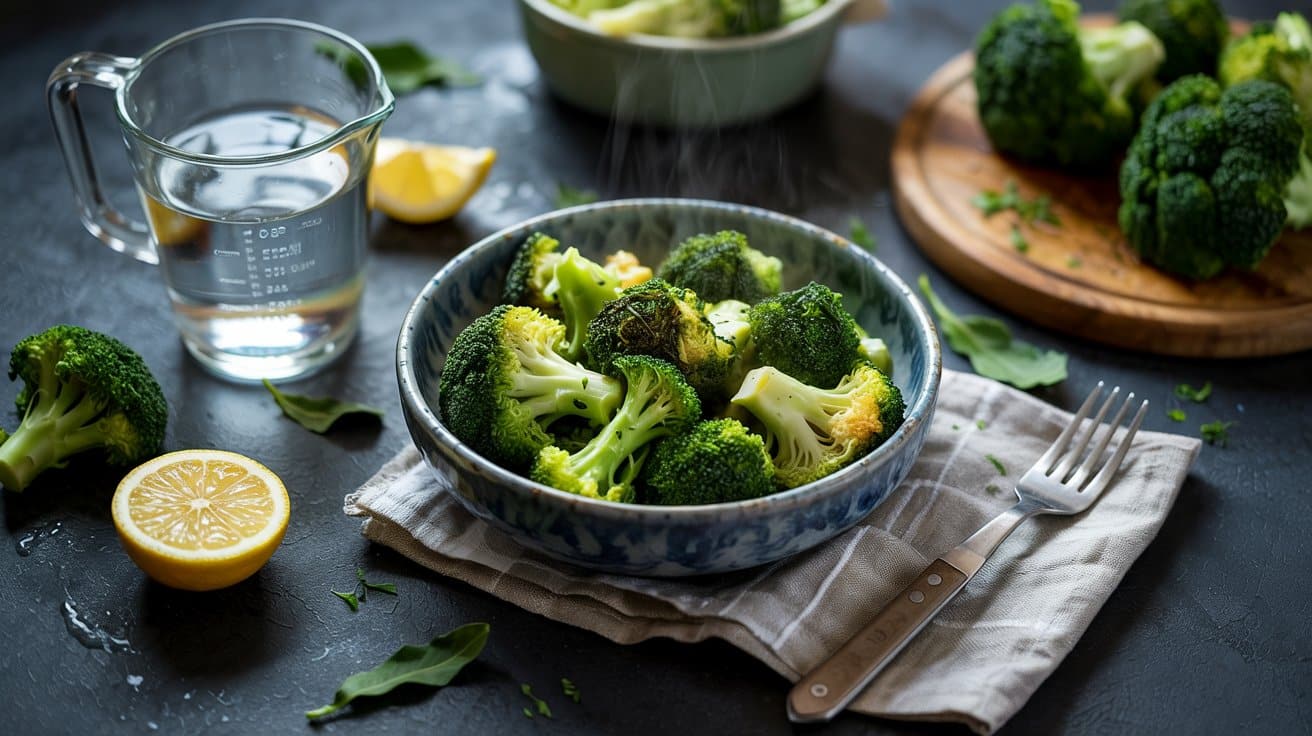
It's a simple, healthy side that pairs well with weeknight mains or packed lunches and finishes with a squeeze of lemon for brightness - see beef and broccoli side ideas for complementary pairings.
Why This Recipe Works
It speeds up steaming without losing texture. The microwave traps steam so you get even results every time.
- Fast, hands-off steaming - The microwave uses trapped steam to tenderize florets in minutes, so you save time without overcooking.
- Bright green color - Short, covered cooking preserves the broccoli's color for a fresher presentation.
- Lemon bright finish - A squeeze of lemon adds acidity that balances the vegetable's natural sweetness.
- Single-bowl cleanup - You steam and dress the broccoli in the same dish for minimal washing.
Ingredient Swap Ideas
Small swaps help you adapt the recipe for taste or pantry limits while keeping the same method.
- Broccoli - Use cauliflower florets instead for a milder, nuttier side that steams the same way.
- Extra-virgin olive oil - Swap melted butter for a richer finish if you prefer a creamier mouthfeel.
- Lemon - Use a splash of rice vinegar or apple cider vinegar for gentle acidity if you don't have a lemon.
- Salt - Replace with a light splash of soy sauce or tamari for a savory alternative that still seasons well.
Ingredients
- 1 large head broccoli (about 1 lb) - cut into florets.
- 3 tablespoons water - for steaming.
- 1 tablespoon extra-virgin olive oil - for tossing.
- 1 lemon - juiced.
- ¼ teaspoon salt - or to taste.
- ⅛ teaspoon black pepper - freshly ground.
Instructions
- Place the florets and water in a microwave-safe bowl and cover with a microwave-safe plate or vented plastic wrap.
- Microwave on high for 3 minutes for tender-crisp broccoli, or 4 minutes for softer florets; check doneness and add 30-second bursts if needed.
- Let the bowl sit covered for 1-2 minutes so residual steam finishes cooking the broccoli.
- Carefully remove the cover and drain any excess water.
- Drizzle with olive oil, squeeze the lemon over the broccoli, season with salt and pepper, and toss to coat; serve immediately.
3. Oven-Roasted Baby Carrots
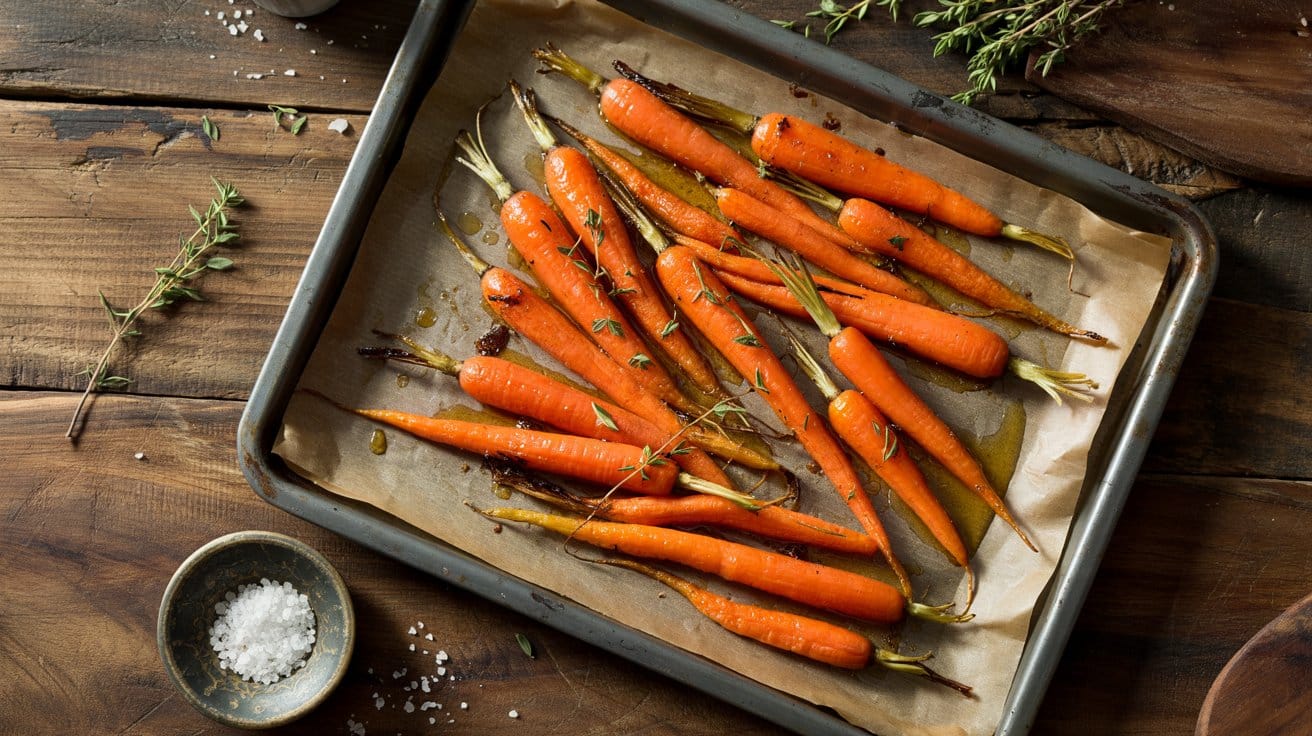
These carrots roast until tender with sweet, caramelized edges and a bright herb finish. They're simple to prepare and pair well with weeknight meals or holiday plates.
For a very different kind of flavor reference, the baby formula flavor guide explains common taste notes and how they're described.
Why This Recipe Works
The roasting concentrates the carrots' natural sugars while the oil promotes browning. Minimal seasoning lets the vegetable flavor shine through.
- Sweet caramelized edges - High heat encourages natural sugars to brown and create a lightly sticky glaze.
- Tender interior with a slight bite - Roasting at the right temperature cooks carrots through without turning them mushy.
- Herb-scented finish - Fresh thyme infuses a savory note that balances the carrots' sweetness.
- One-pan roast method - You cook and caramelize on a single sheet for straightforward timing and serving.
Ingredient Swap Ideas
Swaps let you adjust flavor, pantry items, or diet while keeping the same method.
- Baby carrots - Use small whole carrots or regular carrots cut into 2-inch sticks; larger pieces will need more roasting time.
- Olive oil - Substitute avocado oil or melted butter for similar browning and mouthfeel.
- Fresh thyme - Use ½ teaspoon dried thyme or swap for rosemary for a woodier aroma that pairs well with carrots.
- Honey - Swap maple syrup or a light sprinkle of brown sugar to achieve the same caramelized sweetness.
Ingredients
- 1 ½ lb baby carrots - trimmed if any are very large.
- 2 tablespoon olive oil - for coating and browning.
- 1 tablespoon honey - optional for glaze.
- 1 teaspoon kosher salt - adjust to taste.
- ½ teaspoon freshly ground black pepper - for seasoning.
- 1 teaspoon fresh thyme leaves - stripped from stems.
- 1 tablespoon fresh parsley - chopped; for garnish.
Instructions
- Preheat your oven to 425°F and arrange a rack in the center position.
- In a large bowl, toss the carrots with olive oil, honey, thyme, salt, and pepper until evenly coated.
- Spread the carrots in a single layer on a rimmed baking sheet, leaving space between pieces.
- Roast for 20-25 minutes, stirring or shaking the pan once halfway through, until edges are browned and carrots are tender when pierced with a fork.
- Transfer to a serving dish, sprinkle with parsley, and serve warm.
4. Sautéed Zucchini Noodles
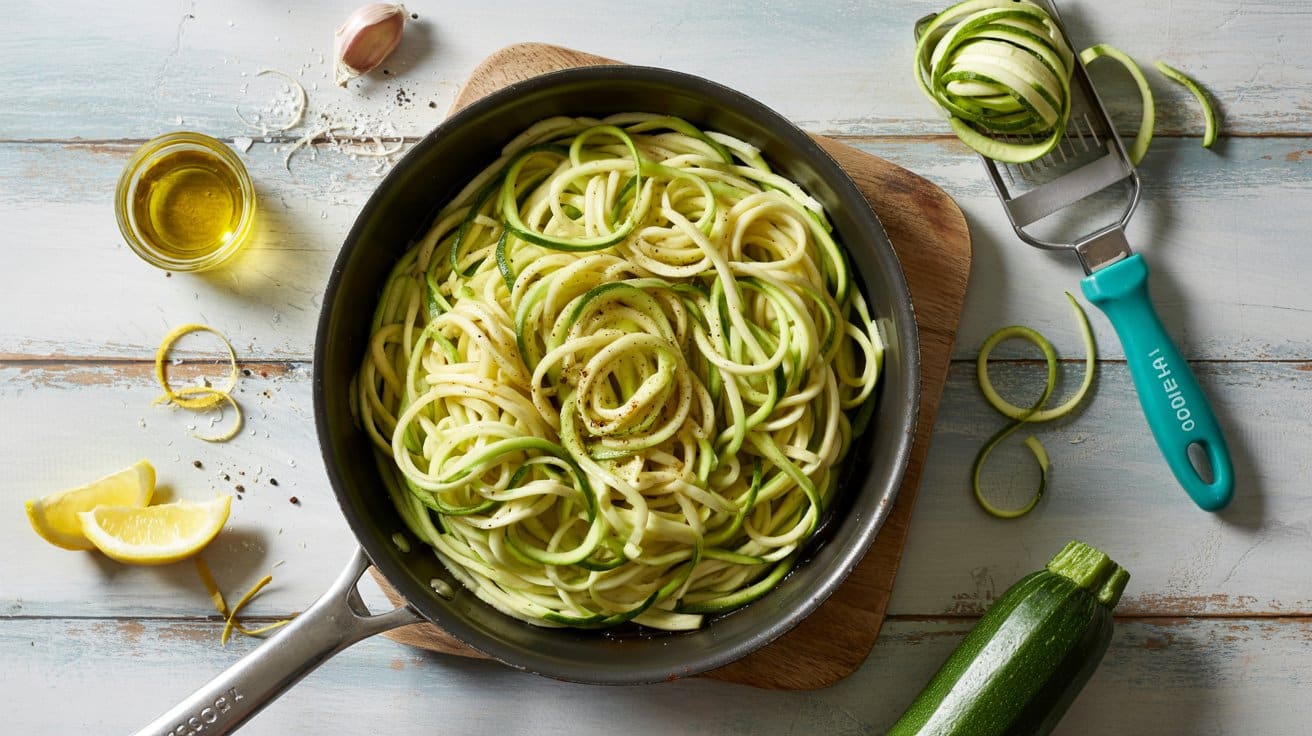
Spiralized zucchini cook in minutes for a light, low-carb meal that still feels satisfying. You get garlicky warmth, juicy bursts from cherry tomatoes, and a bright squeeze of lemon.
Serve it as a quick weeknight main with protein or as a fresh side for a family dinner - and pair with zucchini boats side suggestions for a cohesive veg-forward meal.
Why This Recipe Works
This method keeps the zucchini tender while avoiding sogginess. Bright tomatoes and lemon lift the mild squash for a lively finish.
- Quick high-heat sear - A hot pan cooks the strands fast so they soften but keep a slight bite.
- Tomato pockets of juice - Halved cherry tomatoes release just enough liquid to coat the noodles without making them watery.
- Garlic-infused oil - Briefly browning garlic flavors every strand without overpowering the dish.
- Lemon-finished brightness - Fresh lemon juice added off the heat keeps the flavor fresh and bright.
Ingredient Swap Ideas
Swaps let you work with what you have or fit dietary needs while keeping the same cooking method and flavor.
- Zucchini - Use yellow summer squash in the same quantity for a slightly sweeter noodle that cooks the same way.
- Olive oil - Swap with avocado oil to raise the smoke point if you prefer a hotter sear.
- Cherry tomatoes - Use halved grape tomatoes or a few tablespoons of sun-dried tomatoes (reconstituted) for concentrated tomato flavor.
- Parmesan - Replace with 2 tablespoons nutritional yeast for a nutty, dairy-free finish.
Ingredients
- 1 lb zucchini - spiralized into noodles (about 3 medium).
- 1 tablespoon olive oil - for sautéing.
- 2 cloves garlic - minced.
- 1 cup cherry tomatoes - halved.
- 1 tablespoon lemon juice - freshly squeezed.
- 2 tablespoon fresh basil - chopped.
- ½ teaspoon kosher salt - adjust to taste.
- ¼ teaspoon black pepper - freshly ground.
- ¼ cup grated Parmesan - for serving; optional.
Instructions
- Heat a large skillet over medium-high heat and add 1 tablespoon olive oil until shimmering.
- Add 2 cloves garlic and cook 30 seconds, stirring, until fragrant and lightly golden.
- Add 1 cup cherry tomatoes and cook 3-4 minutes, stirring, until they soften and begin to release juices.
- Add the 1 lb zucchini noodles and toss for 2-3 minutes until just tender but not mushy.
- Remove from heat, stir in 1 tablespoon lemon juice and 2 tablespoon basil, then season with ½ teaspoon kosher salt and ¼ teaspoon black pepper; serve with ¼ cup grated Parmesan if desired.
5. Crispy Air Fryer Brussels Sprouts
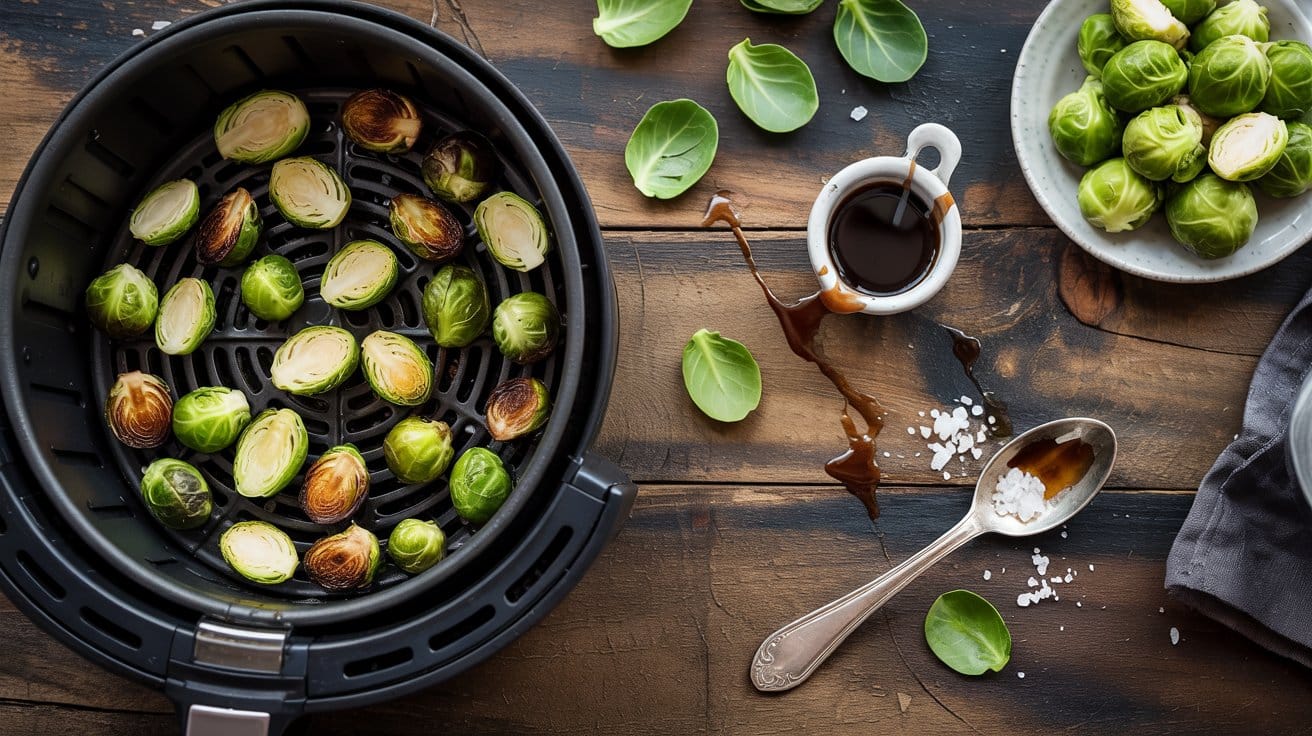
This quick recipe turns Brussels sprouts into a crisp, slightly sweet side with a sticky balsamic finish. You can make it for weeknight dinners or to bring to a potluck where bright, caramelized vegetables are welcome.
The method gives consistent browning and a glossy glaze that clings to each sprout.
If using an air fryer, consider air fryer parchment paper substitutes that still protect the basket without compromising browning.
Why This Recipe Works
These sprouts toast at high heat for crunchy edges while staying tender inside. The balsamic-honey glaze adds balance and shine.
- Crispy, charred edges - Air frying at a high temperature produces deep browning on the outer leaves for a satisfying crunch.
- Sticky balsamic glaze - A short reduction of balsamic and honey creates a glossy coating that adds sweetness and acidity.
- Quick hands-off cooking - The air fryer cooks evenly so you can shake the basket once and carry on with other tasks.
- Simple seasoning build - Salt, pepper, and a touch of garlic powder improve the sprouts without masking their natural bite.
Ingredient Swap Ideas
Swaps let you adapt to diet, pantry limits, or texture preferences while keeping the same method and flavor.
- Brussels sprouts - Use halved baby potatoes tossed in oil and roasted in the air fryer for a firmer, starchy side.
- Olive oil - Substitute avocado oil for a higher smoke point and similar browning results.
- Balsamic vinegar - Swap for apple cider vinegar plus 1 teaspoon brown sugar to mimic sweetness and tang.
- Honey - Use maple syrup for a vegan-friendly glaze that still caramelizes under heat.
Ingredients
- 1 pound Brussels sprouts - trimmed and halved.
- 1 tablespoon olive oil - for tossing the sprouts.
- ½ teaspoon kosher salt - adjust to taste.
- ¼ teaspoon black pepper - freshly ground if possible.
- 2 tablespoons balsamic vinegar - for the glaze.
- 1 tablespoon honey - or maple syrup for a vegan option.
Instructions
- Preheat the air fryer to 375°F (190°C) and pat the halved sprouts dry so they crisp properly.
- Toss the sprouts with olive oil, salt, and pepper in a bowl until evenly coated.
- Arrange sprouts cut-side down in a single layer in the air fryer basket and cook 10-12 minutes, shaking the basket halfway, until edges are browned and centers are tender.
- While sprouts cook, heat balsamic vinegar and honey in a small saucepan over medium heat and simmer 2-3 minutes until slightly reduced and syrupy.
- Transfer the cooked sprouts to a bowl, pour the glaze over them, toss to coat, and serve immediately.
6. Herbed Cucumber Salad

This crisp salad pairs cool cucumbers with a tangy yogurt-dill dressing for a refreshing side. You can make it in minutes and it's ideal for light lunches, barbecues, or a bright accompaniment to grilled proteins.
For chilled-course ideas, cucumber soup side pairings lists several light accompaniments that complement cool, herby flavors.
Why This Recipe Works
This salad stays cool and bright while offering creamy, herby balance. It assembles quickly with minimal slicing and no cooking.
- Cooling cucumber base - Thinly sliced cucumbers provide crisp texture and a neutral backdrop for the dressing.
- Creamy yogurt-dill dressing - Greek yogurt and fresh dill create a tangy, silky coating that clings to each slice.
- Quick marination - A short rest lets flavors meld without losing cucumber crunch.
- Flexible serving temperature - It tastes great chilled or at cool room temperature, so you can make it ahead.
Ingredient Swap Ideas
Swaps help you adjust fat, acidity, or herbs to match preferences or what's on hand. Use these to keep the same method and similar flavors.
- Greek yogurt - Swap with plain full-fat yogurt for a slightly looser texture while keeping tang and creaminess.
- Fresh dill - Use chopped fresh mint for a brighter, sweeter herb note that still complements cucumber.
- Lemon juice - Substitute white wine vinegar for a cleaner acid that still lifts the dressing.
- Shallot - Replace with thinly sliced red onion for a sharper bite that holds up during resting.
Ingredients
- 2 medium cucumbers - thinly sliced; English or Persian work well.
- 1 cup plain Greek yogurt - full-fat or low-fat depending on preference.
- 2 tablespoons fresh dill - finely chopped.
- 1 small shallot - very thinly sliced.
- 1 tablespoon lemon juice - freshly squeezed.
- 1 tablespoon extra-virgin olive oil - for smoothness.
- 1 clove garlic - minced.
- ½ teaspoon kosher salt - adjust to taste.
- ¼ teaspoon black pepper - freshly ground.
Instructions
- Slice the cucumbers thinly and place them in a large bowl so they cool evenly.
- Whisk the yogurt, lemon juice, olive oil, minced garlic, dill, salt, and pepper in a small bowl until smooth.
- Add the thinly sliced shallot to the cucumbers and pour the dressing over the top.
- Toss gently to coat each cucumber slice, then taste and adjust salt or lemon juice.
- Chill for 15-30 minutes to let flavors meld, then serve cold or at cool room temperature.
7. Spicy Garlic Roasted Cauliflower
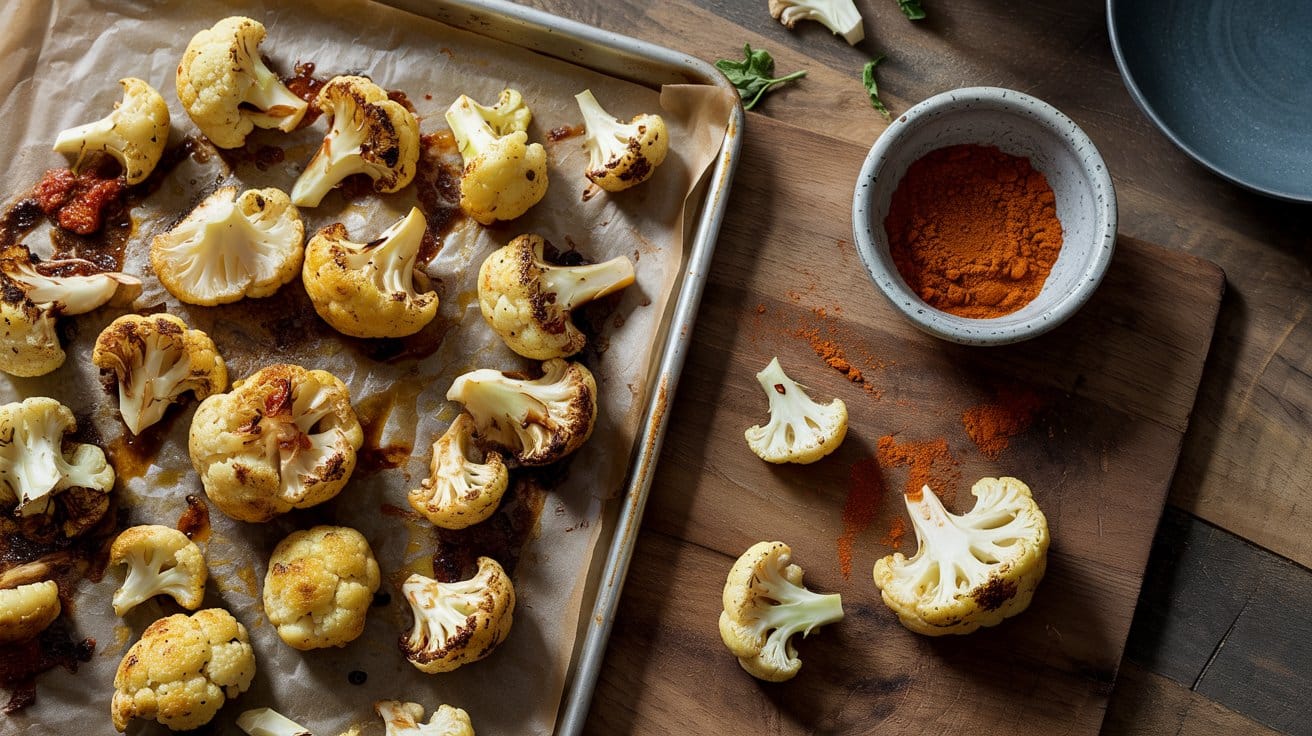
It's simple to prep and works well with grilled meats, bowls, or a weeknight dinner - also pairs nicely with spicy shrimp side pairings for a bolder meal.
Why This Recipe Works
The high oven heat crisps the edges while keeping the centers tender. The garlic and red pepper infuse the florets with concentrated savory heat.
- Garlicky caramelization - Minced garlic browns and becomes sweet during roasting, improving each bite.
- Bold chili finish - Crushed red pepper gives a steady, warm heat that goes with the roasted flavor.
- High-heat browning - Roasting at a hot temperature creates crisp, browned edges for contrast in texture.
- Bright lemon lift - A squeeze of lemon brightens the dish and balances the spice for a finished flavor.
Ingredient Swap Ideas
Swaps help you adapt to what you have or dietary needs while keeping the same method and punchy flavors.
- Cauliflower - Use romanesco or broccoli florets for a similar texture and roasting time.
- Olive oil - Swap for avocado oil for a higher smoke point and a neutral finish.
- Crushed red pepper flakes - Use ½ teaspoon hot smoked paprika for smoky heat with less bite.
- Lemon juice - Replace with 1 teaspoon white wine vinegar for acidity if you lack citrus.
Ingredients
- 1 medium head cauliflower - cut into florets.
- 3 tablespoons olive oil - extra-virgin preferred.
- 4 cloves garlic - minced.
- 1 teaspoon crushed red pepper flakes - adjust to taste.
- 1 teaspoon kosher salt - or to taste.
- ½ teaspoon black pepper - freshly ground.
- 1 tablespoon lemon juice - from about ½ lemon.
Instructions
- Preheat the oven to 425°F and line a baking sheet with foil or parchment for easier cleanup.
- Toss the cauliflower florets with olive oil, minced garlic, crushed red pepper flakes, salt, and pepper until evenly coated.
- Spread the florets in a single layer on the prepared sheet with space between pieces for browning.
- Roast for 25-30 minutes, flipping once at about 15 minutes, until edges are deep golden and centers are tender.
- Transfer to a serving bowl, drizzle with lemon juice, toss lightly, and serve warm.
8. Fast Lemon Asparagus
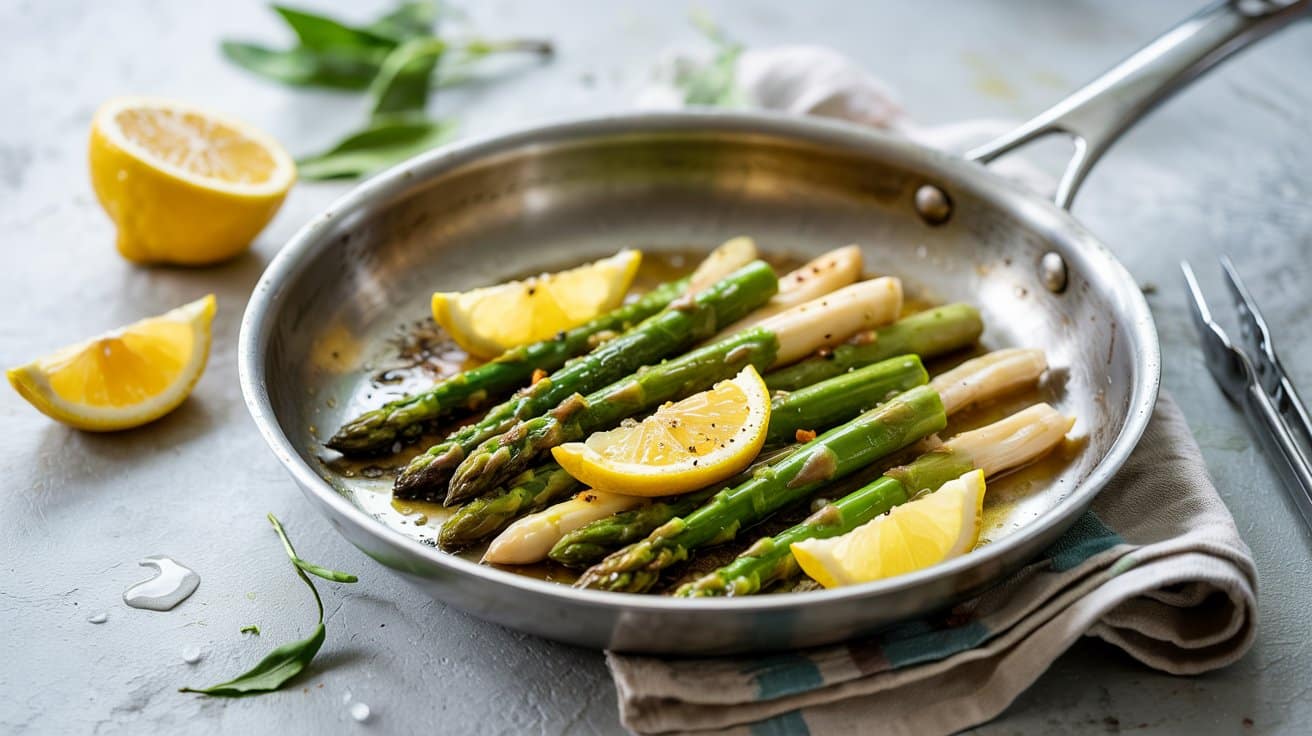
This quick vegetable side keeps asparagus bright, crisp-tender, and citrusy with minimal fuss. You get vivid color and a fresh lemon finish that pairs well with grilled proteins or a light dinner.
It's a great make-ahead side for warm-weather meals.
If preserved lemon isn't available, preserved lemon substitutes guide lists savory alternatives that keep the bright citrus character.
Why This Recipe Works
This method locks in color and texture while concentrating lemon flavor for a bright side. The simple dressing clings to each spear so every bite tastes balanced.
- Bright lemon finish - Zest and juice add a clean, tangy lift that goes with the asparagus natural sweetness.
- Blanch-and-shock color lock - Brief boiling followed by an ice bath preserves the vivid green and crisp-tender bite.
- Even coating from a quick toss - Olive oil and citrus stick to each spear for consistent seasoning.
- Flexible serving temperature - You can serve the spears warm at the table or chilled in a salad-style side dish.
Ingredient Swap Ideas
Swaps let you tune richness, acidity, or heat without changing the quick blanch-and-toss method.
- Olive oil - Swap with melted butter for a richer finish that still coats the asparagus evenly.
- Lemon juice - Swap with white wine vinegar for tang without extra citrus, which still brightens the dish.
- Black pepper - Swap with crushed red pepper flakes for a bit of heat that pairs well with the lemon.
- Ice water - Swap with very cold tap water and a handful of ice cubes if you lack a full ice bath; it still stops cooking quickly.
Ingredients
- 1 pound asparagus - trimmed.
- 1 lemon - zested and juiced.
- 1 tablespoon olive oil - extra-virgin.
- ½ teaspoon kosher salt - or to taste.
- ¼ teaspoon freshly ground black pepper - or to taste.
- 2 cups ice water - for shocking.
Instructions
- Bring a large pot of lightly salted water to a rolling boil.
- Trim woody ends from the asparagus by snapping or cutting where they naturally break.
- Blanch the spears in the boiling water 2-3 minutes until bright green and just tender when pierced with a fork.
- Transfer asparagus to the ice water for 1 minute to stop cooking, then drain and pat dry.
- Toss the asparagus with olive oil, lemon zest, lemon juice, salt, and pepper.
- Serve warm or chill for later.
9. Sautéed Spinach with Garlic
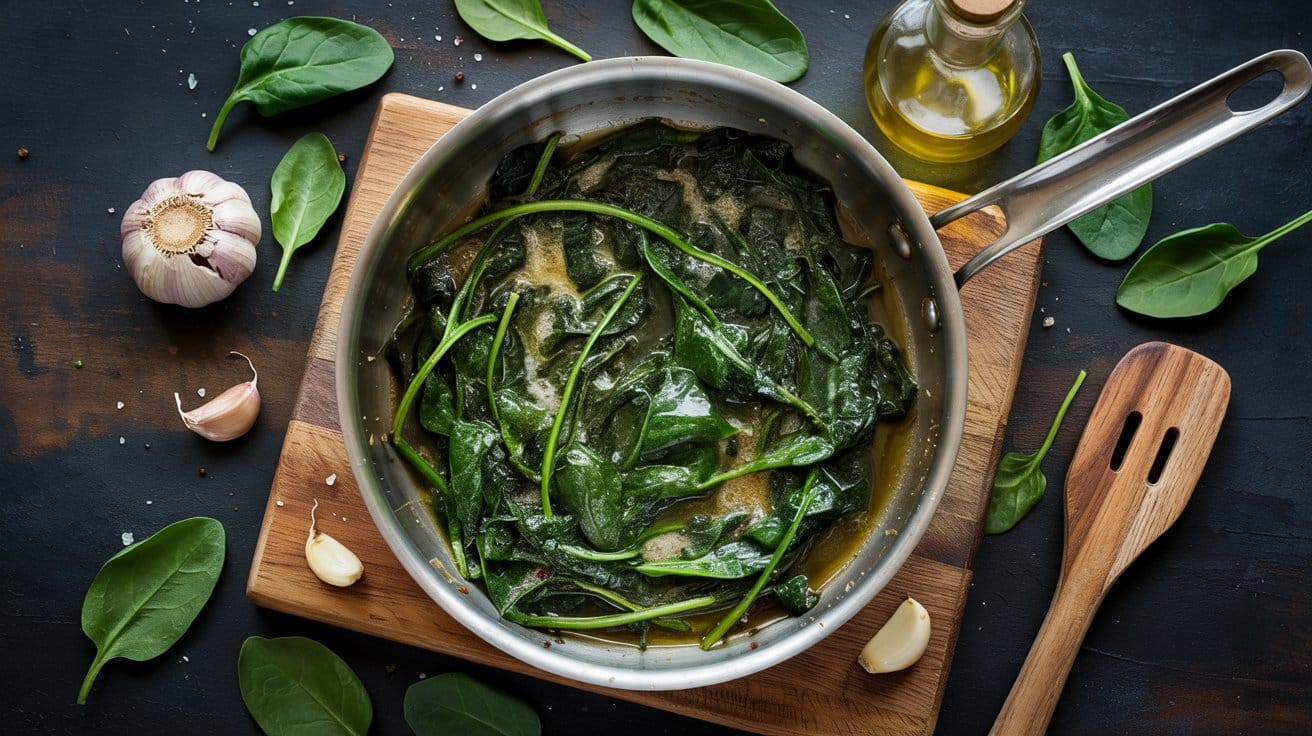
This garlicky spinach cooks in minutes and makes a bright, savory side for weeknight meals. You get tender, glossy leaves with a light citrus finish that pairs well with fish, chicken, or grain bowls.
Why This Recipe Works
It cooks quickly so the greens stay bright and tender. The garlic flavors the oil so every leaf has a savory lift.
- High-heat wilt - Cooking over medium-high heat keeps the spinach bright and prevents it from becoming soggy.
- Garlic-infused oil - Gently sautéing garlic releases aroma that coats the leaves without burning.
- Quick-cook timing - A total cook time of about 2-4 minutes preserves texture and color.
- Bright lemon finish - A squeeze of lemon balances the richness and freshens the dish.
Ingredient Swap Ideas
Small swaps let you match pantry items or adjust the dish for taste or diet.
- Fresh spinach - Substitute baby spinach or washed mixed greens for a milder texture that wilts even faster.
- Olive oil - Use avocado oil or light vegetable oil for a higher smoke point while keeping a neutral base.
- Garlic - Swap with thinly sliced shallot or chopped scallion for a gentler allium note.
- Lemon juice - Replace with a splash of rice vinegar or white wine vinegar for similar brightness.
Ingredients
- 1 lb fresh spinach - washed and tough stems removed.
- 2 tablespoon extra-virgin olive oil - for sautéing.
- 3 garlic cloves - minced.
- ½ teaspoon kosher salt - or to taste.
- ¼ teaspoon freshly ground black pepper - or to taste.
- 1 tablespoon lemon juice - freshly squeezed.
Instructions
- Heat the oil in a large skillet over medium-high until it shimmers.
- Add the minced garlic and cook, stirring, about 30 seconds until fragrant and lightly golden.
- Add the spinach in batches, tossing with tongs until just wilted, about 2-3 minutes total.
- Season with salt and pepper, squeeze in the lemon juice, toss once more, and serve immediately.
10. Oven-Charred Corn on the Cob
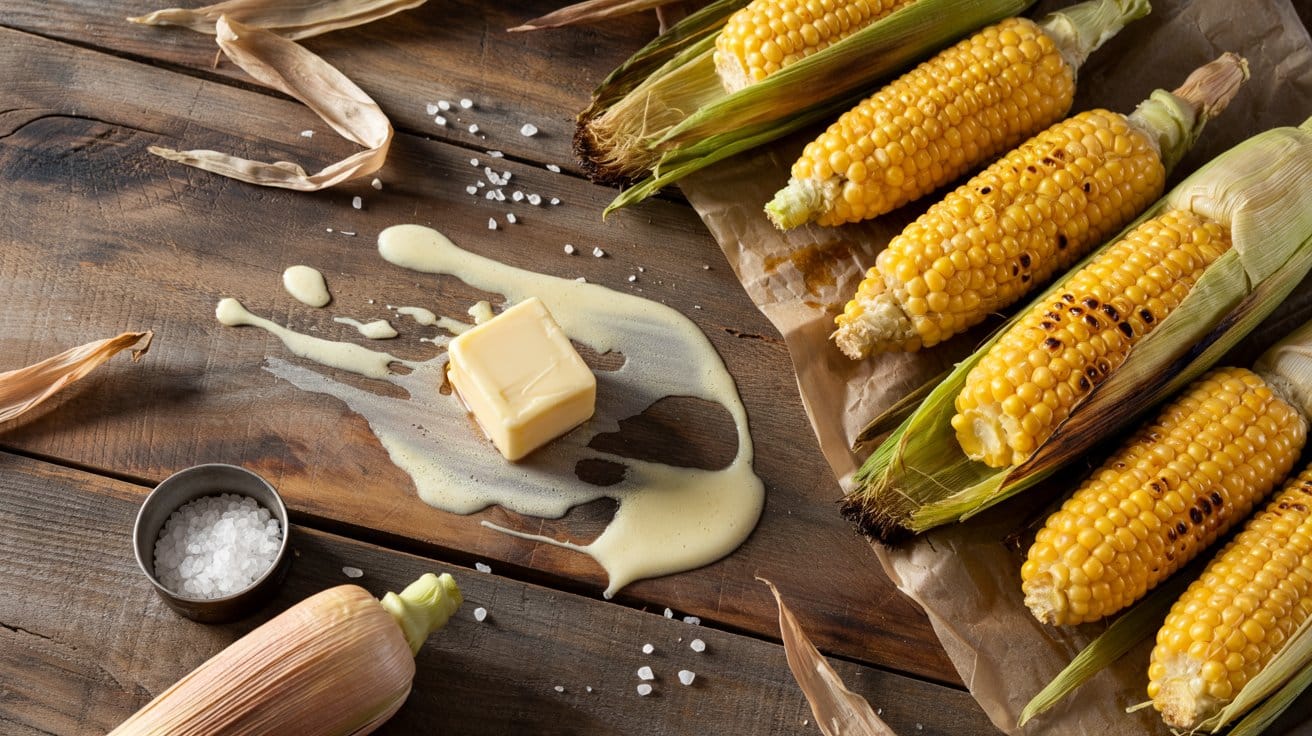
This oven method gives sweet corn a smoky, slightly blistered finish without firing up an outdoor grill. It's fast, reliable, and great for summer meals or a weeknight side that pairs with roasted proteins.
The char adds texture while butter and salt highlight the natural sweetness.
Why This Recipe Works
This technique recreates grill-style charring using steady high heat. It keeps kernels juicy while developing crisp, flavorful spots.
- High-heat charring - Roasting at 475°F creates darkened kernels that add smoky flavor and texture.
- Even caramelization - Turning the ears during roasting ensures all sides develop sweet, browned spots.
- Short hands-on time - You only need a few quick turns while the oven does the main work.
- Buttered finish - A warm pat of butter melts into the charred crevices for rich contrast.
Ingredient Swap Ideas
Simple swaps let you adapt to pantry items or dietary needs while keeping the roasted-char method intact.
- Olive oil - Swap for avocado oil for a higher smoke point and similar neutral flavor.
- Unsalted butter - Swap for plant-based margarine or a drizzle of extra olive oil to keep richness with no dairy.
- Kosher salt - Swap for fine sea salt for even seasoning that dissolves quickly.
- Fresh ears of corn - Swap for thawed frozen corn on the cob, roasting slightly longer to develop color.
Ingredients
- 4 ears fresh sweet corn - husks removed and silk cleaned.
- 2 tablespoons olive oil - for coating the corn.
- 2 tablespoons unsalted butter - softened for finishing.
- 1 teaspoon kosher salt - for seasoning.
- ½ teaspoon freshly ground black pepper - for seasoning.
Instructions
- Preheat the oven to 475°F and place a rimmed baking sheet on the middle rack.
- Brush each ear with olive oil and sprinkle evenly with salt and pepper.
- Arrange the corn on the baking sheet and roast 20-25 minutes, turning every 7-8 minutes, until kernels show browned spots and feel tender when pierced.
- For extra char, switch to broil and broil 1-2 minutes while watching closely for dark blistering.
- Remove the corn, brush with butter, and serve warm.
11. Crispy Air-Fried Sweet Potato Fries
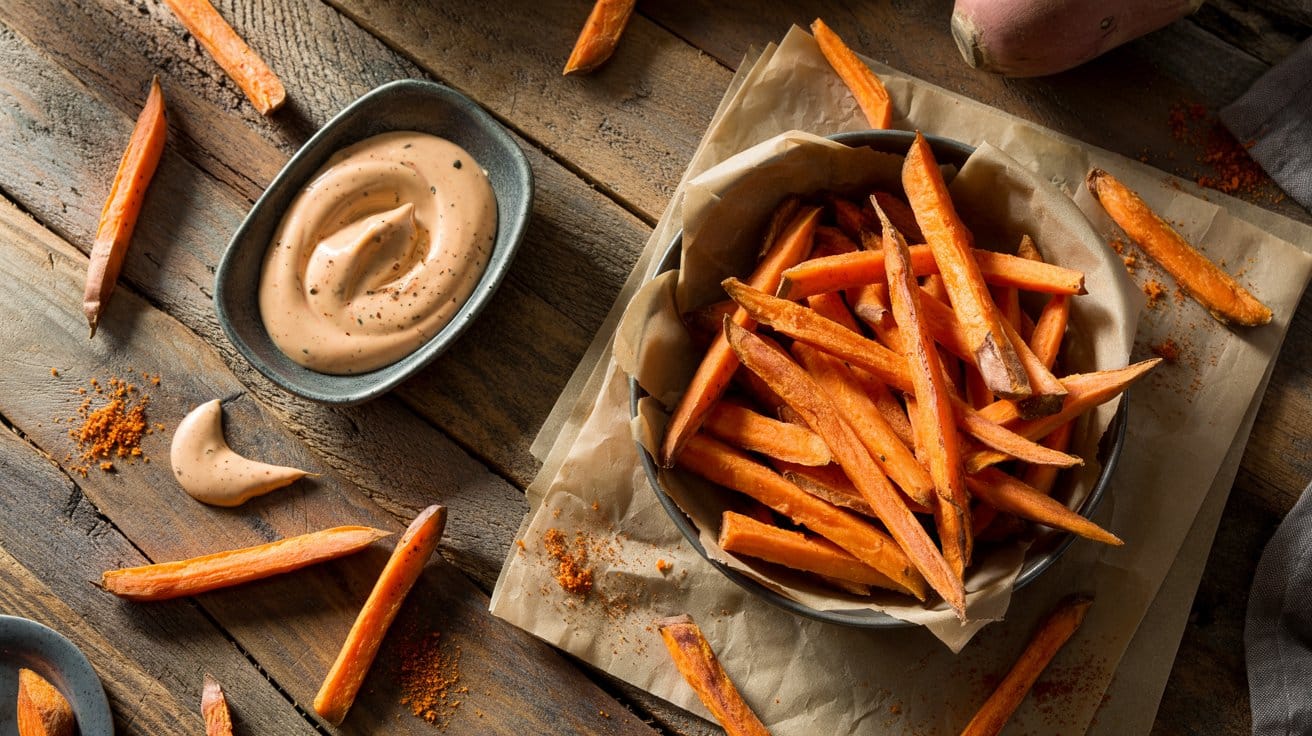
These fries are crisp on the outside and tender inside, with a smoky spice that feels homemade.
They use a simple cornstarch trick and high heat to get a crunch without deep-frying, so they work well as a weeknight side or snack.
Why This Recipe Works
These fries brown quickly and keep a soft interior while staying crunchy on the edges.
Air frying uses hot circulating air to mimic deep-frying results with less oil.
- Starch-first coating - A light dusting of cornstarch creates a thin crust that crisps up under high heat.
- High-temperature finish - Cooking at 400°F encourages rapid browning and crisp edges.
- Soak-and-dry step - Briefly soaking removes surface starch so fries crisp instead of steaming.
- Single-layer air circulation - Cooking in a single layer prevents overcrowding and promotes even crisping.
Ingredient Swap Ideas
Swaps help you adapt to what you have or to dietary needs while keeping the method intact. Try these if you need alternatives.
- Sweet potatoes - Use Yukon gold potatoes for a milder, starchier fry that still crisps well.
- Olive oil - Swap for avocado oil for a higher smoke point and neutral flavor.
- Cornstarch - Use arrowroot powder as a gluten-free option that also gives a crisp coating.
- Smoked paprika - Replace with regular paprika plus a pinch of cumin for a similar warm note.
Ingredients
- 2 large sweet potatoes - peeled and cut into ¼-inch sticks.
- 2 teaspoons cornstarch - for a light crisp coating.
- 1 tablespoon olive oil - for tossing the fries.
- 1 teaspoon kosher salt - adjust to taste.
- ½ teaspoon freshly ground black pepper - for seasoning.
- 1 teaspoon smoked paprika - adds smoky warmth.
Instructions
- Soak the cut fries in cold water for 20 minutes to remove surface starch.
- Drain and pat the fries completely dry with a clean towel.
- Toss the dry fries with cornstarch until evenly coated, then add oil, salt, pepper, and smoked paprika and mix.
- Preheat the air fryer to 400°F and arrange fries in a single layer (cook in batches if needed).
- Air fry for 12-16 minutes, shaking or flipping once at about 8 minutes, until edges are browned and crisp; season again if needed and serve.
12. Marinated Tomato Salad
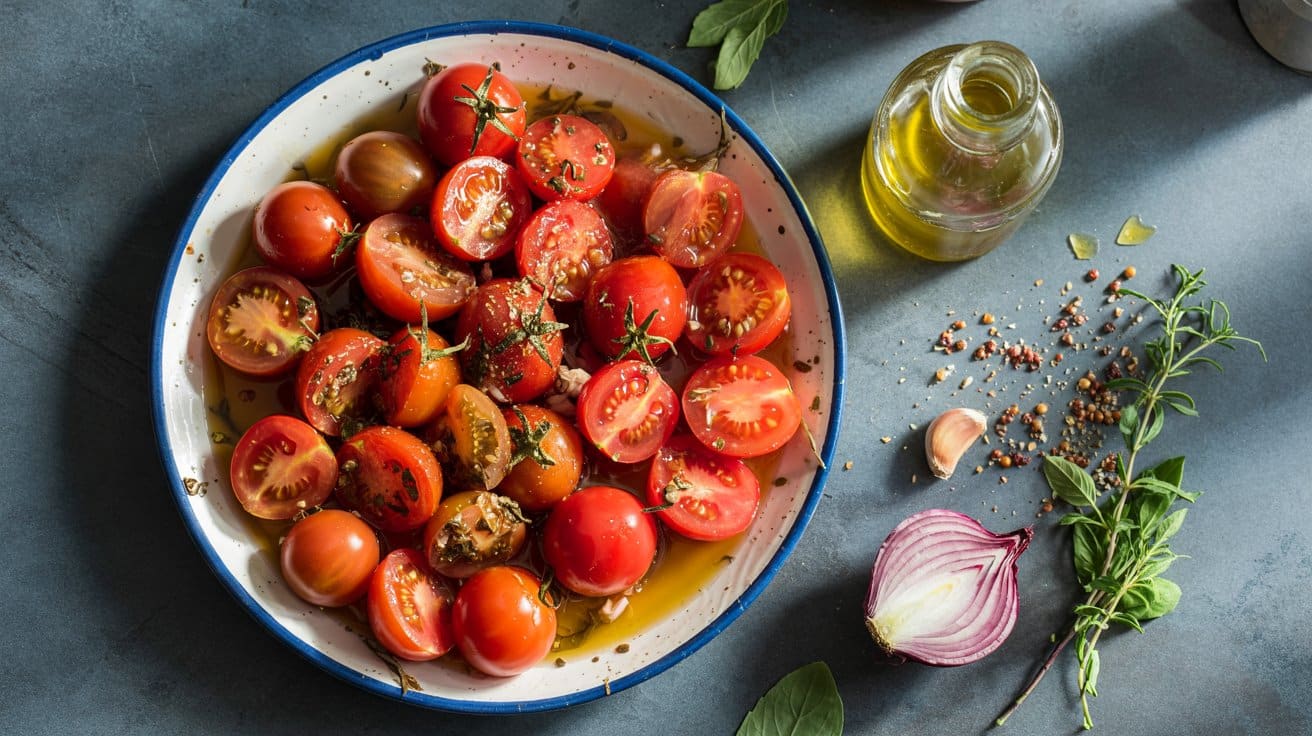
This is a bright, pantry-friendly salad that turns ripe tomatoes into a simple dressed side. The tomatoes release juices that mix with olive oil and vinegar, giving a natural, tangy dressing.
Serve it at room temperature for weeknight dinners, barbecues, or light lunches.
Why This Recipe Works
The salad uses a small number of ingredients that play off each other for fresh results. Quick marination keeps tomato texture while boosting flavor.
- Tomato-forward dressing - The tomatoes release their juices to form the base of the dressing so you need less oil and vinegar.
- Short marinating window - A 15-30 minute rest deepens flavor without turning the tomatoes mushy.
- Aromatic basil finish - Fresh basil adds a fragrant contrast that brightens the whole dish.
- Simple seasoning lift - Salt and a touch of garlic bring out natural sweetness and balance acidity.
Ingredient Swap Ideas
Swaps help you adapt to what you have or dietary needs while keeping the same method and flavor. Use these to change texture, acidity, or herb notes.
- Tomatoes - Use cherry or grape tomatoes halved for a sweeter, bite-sized version that soaks up the marinade faster.
- Red wine vinegar - Swap with sherry vinegar or apple cider vinegar for a milder, fruitier acidity.
- Basil - Substitute with fresh oregano or flat-leaf parsley for a different herbal character that still pairs with tomatoes.
- Red onion - Use a thinly sliced shallot or scallion for a gentler onion flavor that keeps the salad bright.
Ingredients
- 1 ½ lb ripe tomatoes - chopped into 1-inch pieces.
- ½ small red onion - thinly sliced.
- ¼ cup extra-virgin olive oil.
- 2 tablespoons red wine vinegar.
- 1 garlic clove - minced.
- ¼ cup fresh basil leaves - torn.
- ½ teaspoon kosher salt - plus more to taste.
- ¼ teaspoon freshly ground black pepper.
Instructions
- Chop the tomatoes and place them in a medium bowl with the sliced red onion.
- Whisk the olive oil, red wine vinegar, minced garlic, salt, and pepper in a small bowl until combined.
- Pour the dressing over the tomatoes and toss gently so pieces stay intact.
- Add torn basil, taste, and adjust seasoning with more salt or vinegar if needed.
- Let the salad sit at room temperature for 15-30 minutes before serving, or refrigerate up to 2 hours for a cooler salad.
13. Peppers and Onions Sauté
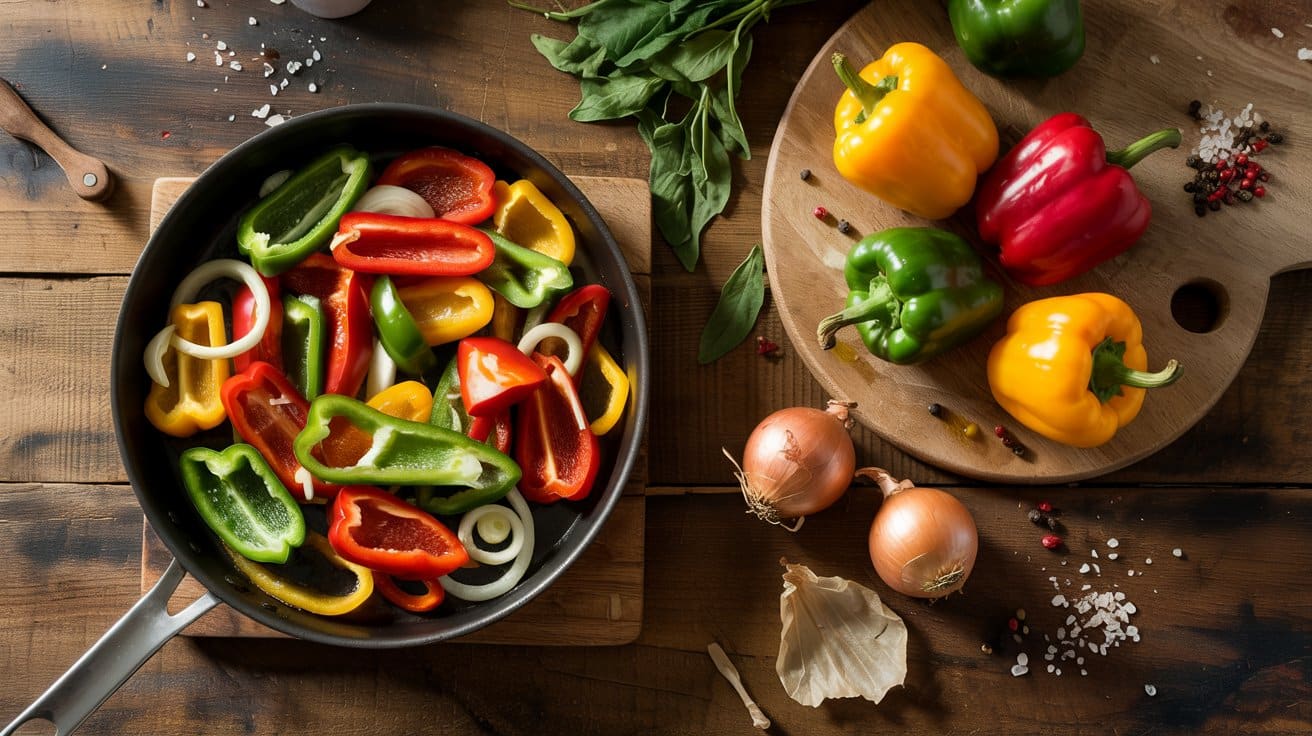
This simple stovetop sauté turns sweet bell peppers and onions tender with lightly caramelized edges and a bright finish. It's quick to make and pairs well with grilled meats, sandwiches, tacos, or a grain bowl.
The blend of sweetness, savory notes, and a splash of acidity makes it a versatile side for weeknight meals.
Why This Recipe Works
We get tender, caramelized peppers and onions in a short time. The method is reliable for consistent results.
- Sweet caramelized edges - Slow browning of the vegetables adds natural sweetness that complements savory main dishes.
- High-heat sear then gentle cook - Starting on higher heat creates color, and lowering heat finishes the vegetables without burning.
- Bright vinegar finish - A small splash of vinegar brightens the dish and balances the natural sugars.
- Multi-use topping - The sauté works as a side, sandwich topper, or mixed into pasta for quick weeknight meals.
Ingredient Swap Ideas
Swaps help you adapt to what's in the pantry or dietary needs while keeping the same method and flavor balance.
- Bell peppers - Use poblano or cubanelle for a milder, smokier flavor that still softens well in the pan.
- Yellow onion - Substitute red onion for a sharper bite or sweet onion for a milder, sweeter result that caramelizes similarly.
- Olive oil - Swap with avocado or grapeseed oil for a neutral high-heat option that tolerates searing.
- Red wine vinegar - Use lemon juice or sherry vinegar for acidity that brightens the sauté without changing texture.
Ingredients
- 2 tablespoons olive oil - for sautéing.
- 1 large yellow onion - sliced into ½-inch strips.
- 3 medium bell peppers - mixed colors, sliced into ½-inch strips.
- 2 cloves garlic - minced.
- 1 tablespoon red wine vinegar - or lemon juice.
- ½ teaspoon kosher salt - adjust to taste.
- ¼ teaspoon black pepper - freshly ground.
- 2 tablespoons fresh parsley - chopped; for garnish.
Instructions
- Heat a large skillet over medium-high and add the olive oil until shimmering.
- Add the onion and bell peppers and toss to coat, then cook 8-10 minutes, stirring occasionally, until edges begin to brown and vegetables soften.
- Add the garlic and cook 30-45 seconds until fragrant.
- Stir in the red wine vinegar, salt, and pepper, and cook 1-2 minutes until the liquid mostly evaporates and flavors meld.
- Remove from heat, stir in parsley, taste and adjust seasoning, then serve warm or at room temperature.
14. Quick Pickled Radishes
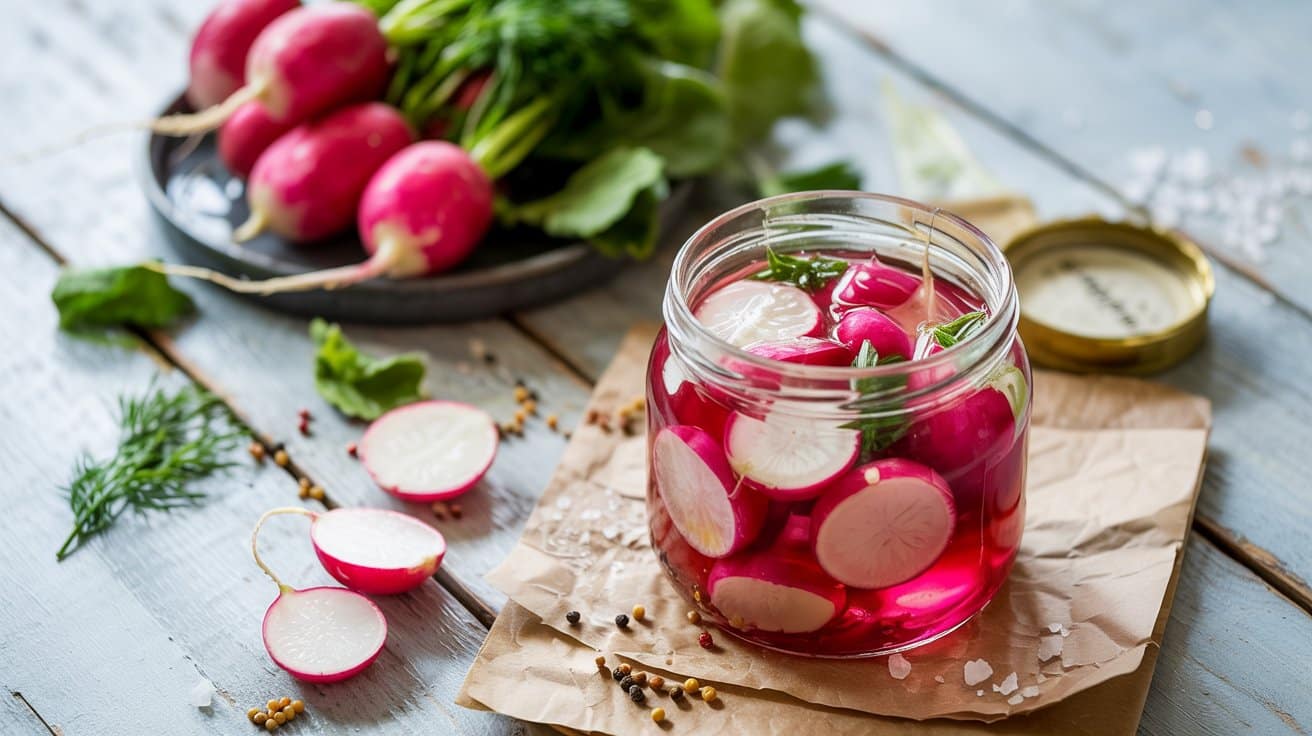
These quick pickles turn peppery radishes into bright, tangy slices that add crunch to tacos, salads, and sandwiches. The brine is simple and fast to make, and the radishes pickle in minutes while staying crisp.
They're best served chilled within a few hours for the brightest flavor.
Why This Recipe Works
This method gives bold tang without long waiting and keeps the radishes crunchy. It uses pantry staples and a no-fuss process that fits busy schedules.
- Bright quick brine - Equal parts vinegar and water with a little sugar and salt creates immediate tang and balance for speedy pickling.
- Crisp raw texture - Thin slices absorb flavor fast while keeping a satisfying crunch.
- Fast refrigerator pickles - The hot brine softens edges just enough so the radishes are ready in 30 minutes to an hour.
- Everyday condiment - The pickles store well in the fridge and lift simple meals like sandwiches, bowls, and grilled proteins.
Ingredient Swap Ideas
Swaps let you adjust acidity, sweetness, or salt to match your pantry or diet. Each alternative keeps the quick-pickle method intact.
- White vinegar - Use apple cider vinegar for a milder, fruitier tang that softens the sharpness of radishes.
- Granulated sugar - Swap with honey or maple syrup for a less processed sweetener that still balances acidity.
- Radishes - Substitute thinly sliced daikon or cucumbers for a similar crunch and quick pickling time.
- Kosher salt - Use fine sea salt or ¾ teaspoon table salt instead, adjusting for salt grain size so brine stays balanced.
Ingredients
- 1 bunch radishes (about 8 ounces) - trimmed and thinly sliced.
- ½ cup white vinegar - for the brine.
- ½ cup water - to dilute the vinegar.
- 1 tablespoon granulated sugar - to balance acidity.
- 1 teaspoon kosher salt - for seasoning.
Instructions
- Trim radish ends and slice them about ⅛ inch thick so they pickle quickly and stay crisp.
- Pack the sliced radishes into a clean 16-ounce jar or a similar container, pressing them down gently.
- In a small saucepan, combine vinegar, water, sugar, and salt and heat over medium, stirring until the sugar and salt dissolve and the liquid just comes to a simmer, about 1-2 minutes.
- Pour the hot brine over the radishes, covering them completely, then let the jar cool to room temperature for 15-20 minutes.
- Seal the jar and refrigerate for at least 30 minutes before using; refrigerate up to 2 weeks for best quality.
15. Zesty Cabbage Slaw
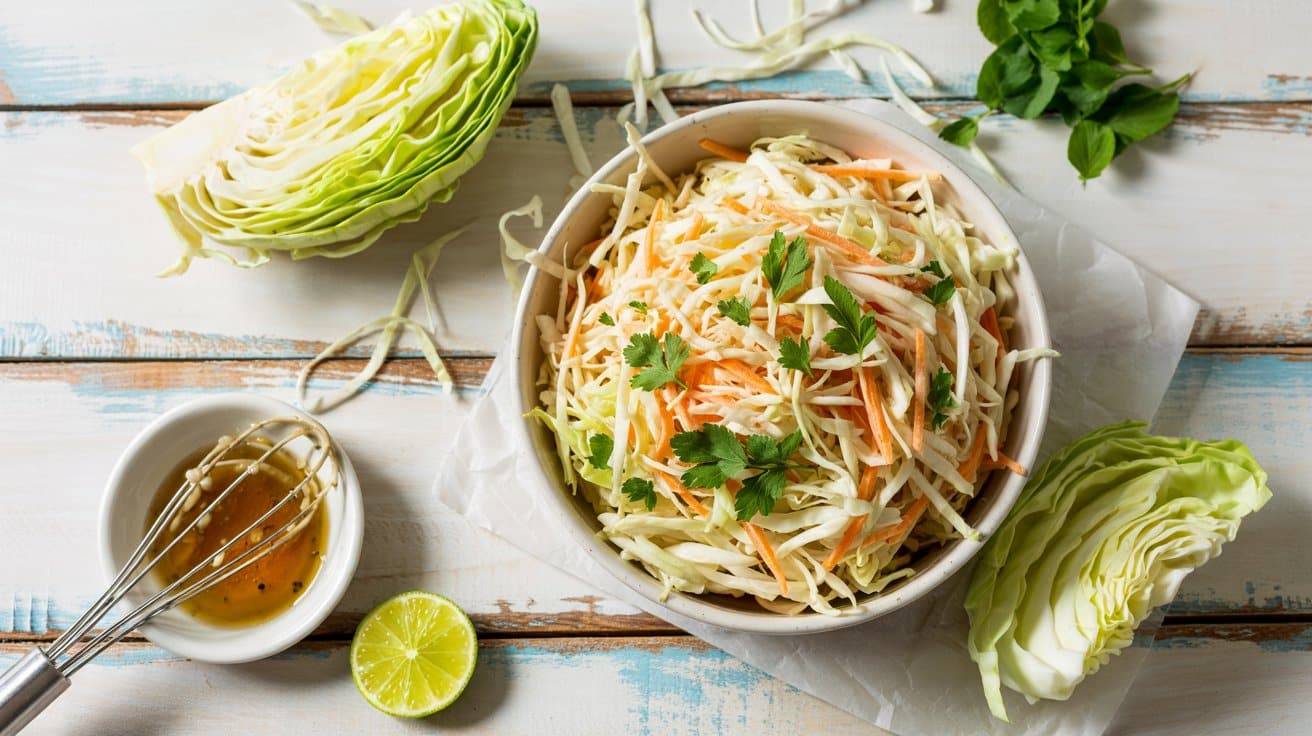
This bright slaw combines crisp cabbage and carrots with a tangy lime-yogurt dressing for a refreshing side. It's quick to make and pairs well with grilled proteins, tacos, or as a crunchy salad on a busy weeknight.
The lime and a touch of honey give a lively, balanced zing that wakes up simple ingredients.
Why This Recipe Works
This slaw balances crisp textures with a zesty, creamy dressing for wide appeal. It comes together fast and improves after a short chill.
- Bright lime-forward dressing - Fresh lime juice and yogurt create lively acidity that keeps the salad tasting fresh.
- Crunchy mixed cabbage textures - A mix of green and red cabbage gives varied bite and visual appeal.
- Sweet-and-tang contrast - Honey and apple cider vinegar smooth the acidity for pleasant, layered flavor.
- Quick make-ahead boost - The slaw softens and develops flavor after 15-30 minutes in the refrigerator.
Ingredient Swap Ideas
Small swaps help you match diet preferences or pantry contents while keeping the recipe's character. Use these to make the slaw lighter, richer, or vegan as needed.
- Plain Greek yogurt - Substitute mayonnaise for a richer, creamier slaw that still holds together well.
- Lime juice - Swap with lemon juice for a similar bright acidity if limes aren't available.
- Honey - Use maple syrup or agave for a vegan-friendly sweetener with comparable sweetness.
- Cilantro - Replace with flat-leaf parsley or sliced green onions for a milder herbal note.
Ingredients
- 6 cups green cabbage - thinly shredded.
- 1 cup red cabbage - thinly shredded.
- 1 cup carrots - grated.
- ¼ cup red onion - thinly sliced.
- ¼ cup cilantro - chopped.
- ⅓ cup plain Greek yogurt - for the dressing.
- 3 tablespoons lime juice - freshly squeezed.
- 1 tablespoon apple cider vinegar - for extra tang.
- 2 tablespoons honey - or maple syrup.
- 1 teaspoon Dijon mustard - to emulsify the dressing.
- 3 tablespoons olive oil - to loosen the dressing.
- ½ teaspoon salt - adjust to taste.
- ¼ teaspoon black pepper - freshly ground.
Instructions
- Shred or slice the cabbages, grate the carrots, thinly slice the red onion, and chop the cilantro.
- Whisk the Greek yogurt, lime juice, apple cider vinegar, honey, Dijon mustard, olive oil, salt, and pepper until smooth.
- Place the vegetables in a large bowl and pour the dressing over them.
- Toss everything until the vegetables are evenly coated and the dressing is distributed.
- Let the slaw rest in the refrigerator for 15-30 minutes to soften slightly and let flavors meld, then taste and adjust seasoning before serving.
16. Pan-Seared Eggplant Slices
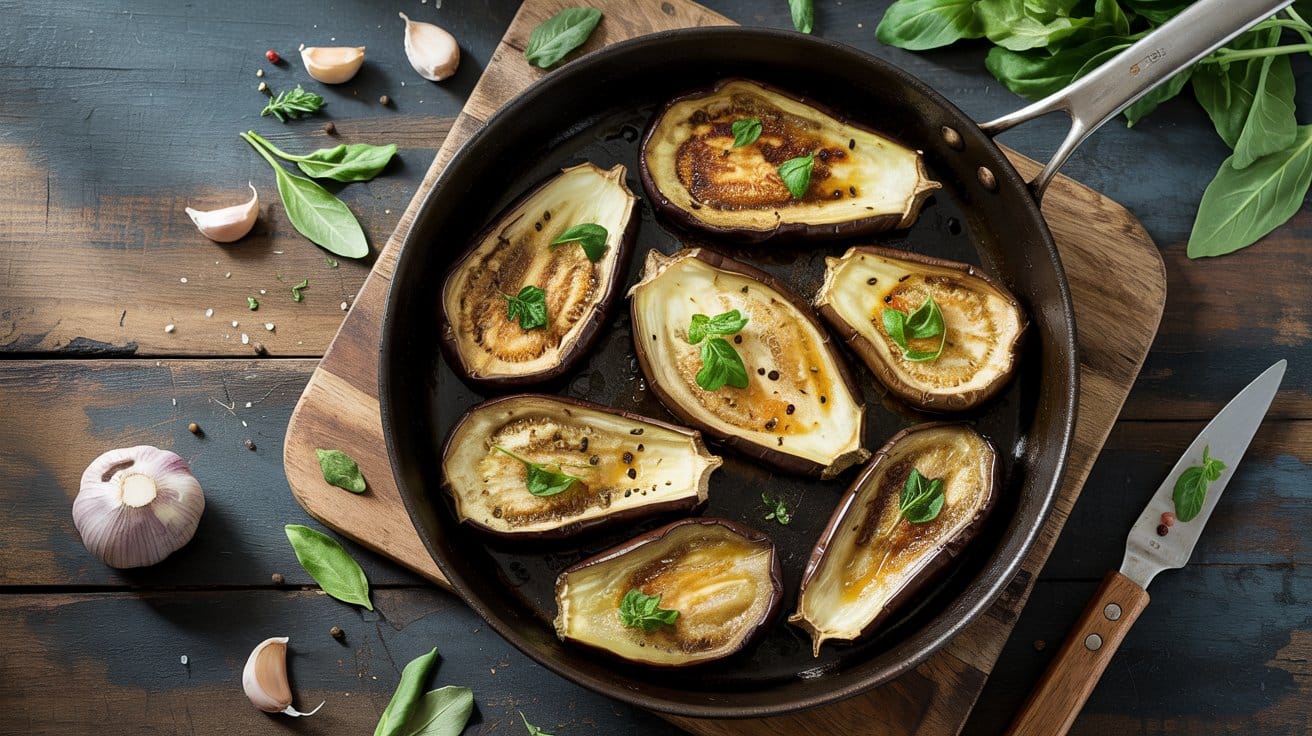
This simple method turns ordinary eggplant into browned, tender rounds you can serve as a side, a sandwich layer, or a warm salad topping. You get rich, savory notes from quick searing with just oil and salt, and the dish comes together in under 20 minutes.
Why This Recipe Works
You get deeply browned edges with a creamy interior from high-heat searing. The short cook time keeps slices tender without becoming mushy.
- High-heat caramelization - Searing creates a golden crust that adds texture against the soft center.
- Minimal-ingredient focus - Olive oil and salt highlight the eggplant's natural sweetness.
- Quick finish - Each slice cooks in minutes, so you can serve hot with little waiting.
- Versatile serving - The slices work as a side, sandwich layer, or base for toppings.
Ingredient Swap Ideas
Small swaps help match dietary preferences or ingredient availability without changing the method.
- Eggplant - Use zucchini or summer squash sliced the same thickness for similar searing and texture.
- Extra-virgin olive oil - Swap with avocado oil for a higher smoke point if you prefer a hotter pan.
- Kosher salt - Use flaky sea salt at the end for a brighter finish and crunch.
- Eggplant variety - Choose Japanese eggplant for thinner, faster-cooking slices or globe eggplant for meatier rounds.
Ingredients
- 1 medium eggplant - sliced into ½-inch rounds.
- 2 tablespoons extra-virgin olive oil - divided.
- 1 teaspoon kosher salt - or to taste.
Instructions
- Slice the eggplant into ½-inch rounds and pat both sides dry with paper towels.
- Brush both sides of the slices with 1 tablespoon of oil and season lightly with salt.
- Heat a large skillet over medium-high until hot, about 2 minutes.
- Add slices in a single layer and cook until deep golden, 3 to 4 minutes per side; adjust heat if they brown too quickly.
- Transfer to a plate, drizzle remaining oil if desired, season to taste, and serve warm.
17. Cherry Tomato Medley

This sautéed cherry tomato mix makes a bright, saucy topping you can use on pasta, toast, or grilled proteins. It cooks quickly and highlights sweet-tart tomato juices with garlic and fresh basil for a pop of summer flavor.
Why This Recipe Works
This dish turns small tomatoes into a glossy, spoonable sauce in minutes. It adds fresh bright notes to simple weeknight meals.
- Burst-skin texture - Quick high-heat cooking blisters skins and releases juices that form a light sauce.
- Savory aromatics base - Shallot and garlic fry briefly to give savory depth without overwhelming the tomatoes.
- Versatile finishing - A splash of balsamic and torn basil brightens and balances the sweetness of the tomatoes.
- Spoonable consistency - The tomatoes soften but keep some body so the mixture clings to pasta, bread, or proteins.
Ingredient Swap Ideas
Small swaps let you match pantry items or dietary needs while keeping the same method and flavor. Use these ideas to adapt the medley without changing technique.
- Cherry tomatoes - Use grape tomatoes or halved small plum tomatoes for similar blistering and juice release.
- Extra-virgin olive oil - Substitute avocado oil or light olive oil for a higher smoke point while keeping a neutral pan flavor.
- Fresh basil - Swap with parsley or oregano for a different fresh herb note that still goes with the tomatoes.
- Balsamic vinegar - Replace with lemon juice or red wine vinegar for bright acidity if you prefer a sharper finish.
Ingredients
- 1 pint cherry tomatoes - halved if large.
- 2 tablespoons extra-virgin olive oil - for sautéing.
- 3 cloves garlic - minced.
- 1 small shallot - finely chopped.
- ¼ teaspoon red pepper flakes - optional for heat.
- ½ teaspoon kosher salt - adjust to taste.
- ¼ teaspoon black pepper - freshly ground.
- 2 tablespoons fresh basil - roughly torn.
- 1 tablespoon balsamic vinegar - or lemon juice.
Instructions
- Heat the oil in a large skillet over medium heat until shimmering.
- Add the shallot and sauté 1-2 minutes until softened and translucent.
- Stir in the garlic and red pepper flakes and cook 30 seconds until fragrant.
- Add the tomatoes and raise heat to medium-high, sautéing 5-7 minutes until skins blister and some tomatoes burst.
- Remove from heat, stir in balsamic, salt, pepper, and basil, then taste and adjust seasoning before serving.
18. Quick Veggie Stir Fry
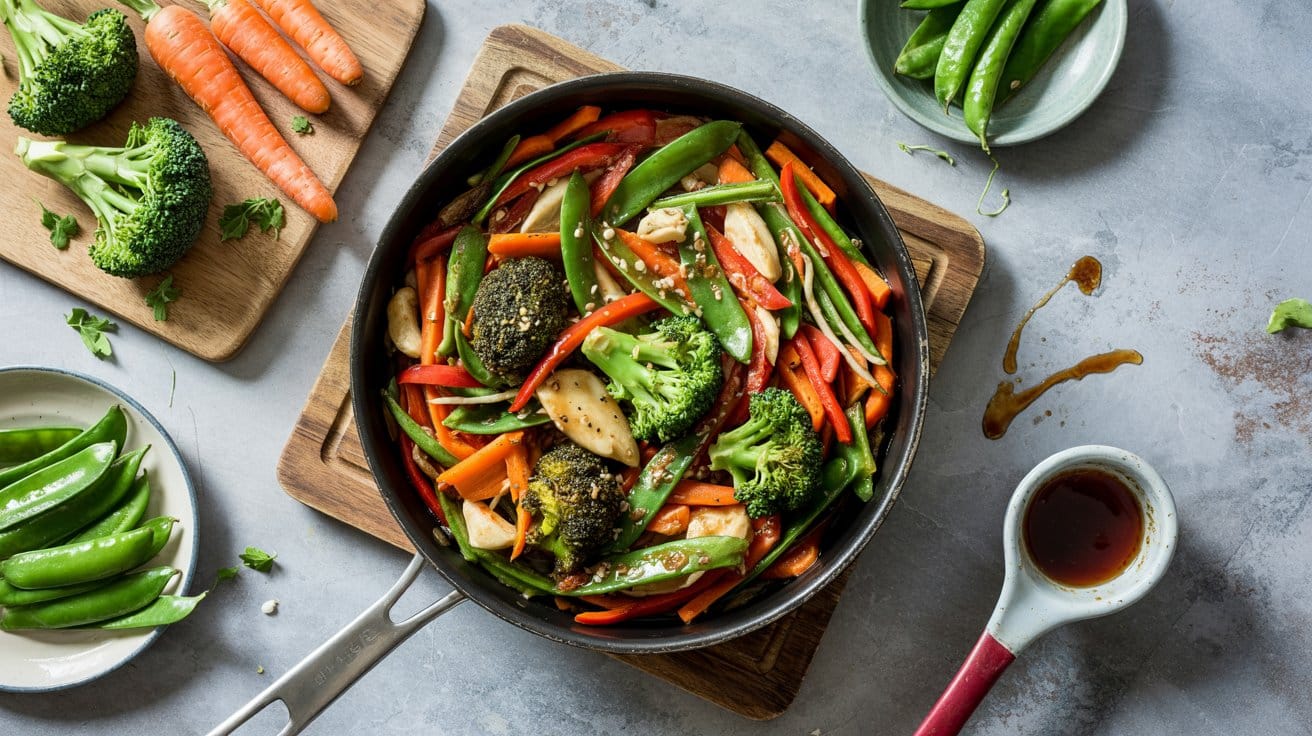
This bright vegetable stir-fry comes together in about 15 minutes and keeps the vegetables crisp-tender. The quick soy-honey glaze adds savory-sweet balance, making it an ideal weeknight main over rice or noodles.
Why This Recipe Works
It cooks fast and preserves fresh vegetable texture. The simple sauce clings to the veg for consistent flavor.
- High-heat sear for crisp-tender vegetables - Quick cooking over high heat keeps vegetables bright and slightly crunchy for contrast in every bite.
- Balanced soy-honey glaze - A mix of soy, rice vinegar, and honey creates a glossy coating that delivers savory, tangy, and sweet notes.
- Rapid sauce thickening - A small cornstarch slurry thickens in the pan so the sauce finishes shiny without extra steps.
- Flexible vegetable mix - Using quick-cooking vegetables means you can swap what's on hand without changing technique or timing.
Ingredient Swap Ideas
Swaps let you adapt the recipe for diet or pantry limits while keeping the same method and flavor.
- Soy sauce - Use tamari for gluten-free or low-sodium soy for milder salt, and it still provides savory umami.
- Honey - Swap with maple syrup for a vegan option that keeps the glaze glossy and sweet.
- Vegetable oil - Use peanut or canola oil for a higher smoking point and a neutral taste that supports high-heat searing.
- Mixed quick-cooking vegetables - Substitute broccolini, baby corn, or thinly sliced zucchini for similar cook times and texture.
Ingredients
- 2 tablespoon vegetable oil - divided.
- 2 cloves garlic - minced.
- 1 tablespoon fresh ginger - grated (about a 1-inch piece).
- 3 cups mixed quick-cooking vegetables - broccoli florets, bell pepper, snap peas, carrots, or mushrooms.
- 2 tablespoon soy sauce - reduced-sodium works well.
- 1 tablespoon rice vinegar - for brightness.
- 1 tablespoon honey - or maple syrup.
- 1 teaspoon cornstarch - dissolved in 2 tablespoon water for a slurry.
- 1 teaspoon toasted sesame oil - for finishing.
- 2 green onions - sliced on the diagonal.
- 4 cups cooked rice or noodles - for serving.
Instructions
- Whisk soy sauce, rice vinegar, honey, and the cornstarch slurry in a small bowl and set aside.
- Heat 1 tablespoon oil in a large skillet or wok over high heat until shimmering, then add garlic and ginger and cook 20-30 seconds until fragrant.
- Add the mixed vegetables and the remaining oil, stir-frying 4-6 minutes until vegetables are crisp-tender and lightly browned; add harder vegetables first if needed.
- Pour the sauce over the vegetables and stir constantly for 1-2 minutes until the sauce thickens and becomes glossy.
- Remove from heat, stir in toasted sesame oil and green onions, then serve immediately over cooked rice or noodles.
19. Steamed Mixed Vegetables
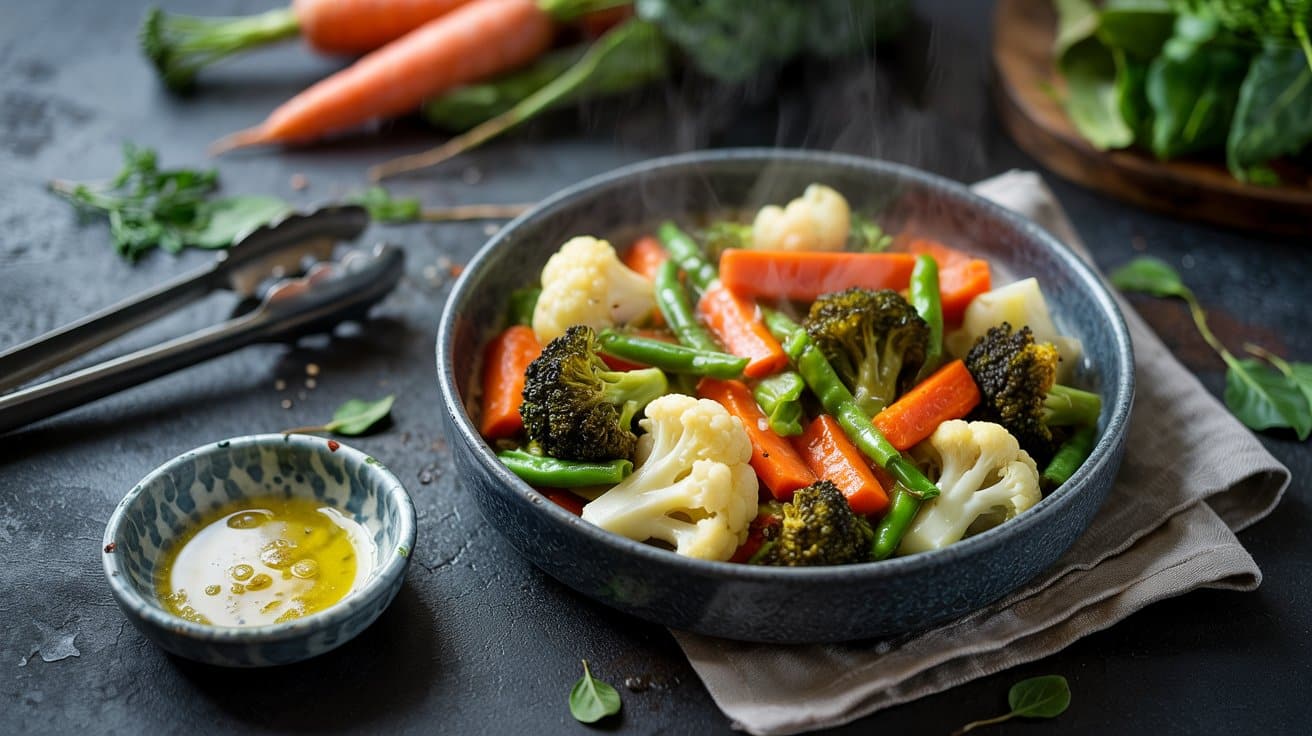
A quick, colorful mix of vegetables steamed until tender-crisp. It brings fresh, clean flavors that pair well with grilled proteins, rice bowls, or weeknight mains and is ready in under 15 minutes.
Why This Recipe Works
Steaming preserves color and nutrients while keeping texture lively. You get a versatile side that finishes with simple seasoning to highlight freshness.
- Bright, crisp texture - Steaming locks in bright color and yields a tender-crisp bite that appeals to all ages.
- Short, predictable cook time - Most pieces finish in 4-7 minutes so you can time this with the rest of your meal.
- Uniform cutting for even doneness - Similar-sized pieces steam at the same rate so nothing becomes mushy or undercooked.
- Simple finishing options - A squeeze of lemon or a pat of butter brightens the vegetables without masking their natural taste.
Ingredient Swap Ideas
Swaps let you adapt to what's on hand or meet dietary needs while keeping the steaming method the same.
- Broccoli florets - Use asparagus tips instead for a similar bright green color and quick steam time.
- Cauliflower florets - Swap with halved Brussels sprouts for similar density and a slightly nuttier note when steamed.
- Baby carrots - Replace with sliced parsnips for a firmer, earthy sweetness that softens to the same texture.
- Green beans - Use snap peas instead for a sweeter crunch and equally fast steaming.
Ingredients
- 2 cups broccoli florets - trimmed.
- 2 cups cauliflower florets - trimmed.
- 1 cup baby carrots - halved if large.
- 1 cup green beans - trimmed.
- 1 small red bell pepper - sliced.
- 1 cup water - for steaming.
- 1 tablespoon olive oil - for finishing.
- ½ teaspoon kosher salt - or to taste.
- ¼ teaspoon black pepper - freshly ground.
- 1 tablespoon lemon juice - fresh.
Instructions
- Add 1 cup water to a medium saucepan and bring to a simmer over medium-high heat with a steamer basket in place.
- Combine broccoli, cauliflower, carrots, and green beans in the steamer basket and cover the pan.
- Steam for 5-7 minutes, checking with a fork for tender-crisp doneness; add the sliced red bell pepper for the last 1 minute.
- Remove the basket and transfer vegetables to a serving bowl.
- Drizzle with olive oil and lemon juice, season with salt and pepper, and toss gently before serving.
20. Oven-Baked Parmesan Zucchini
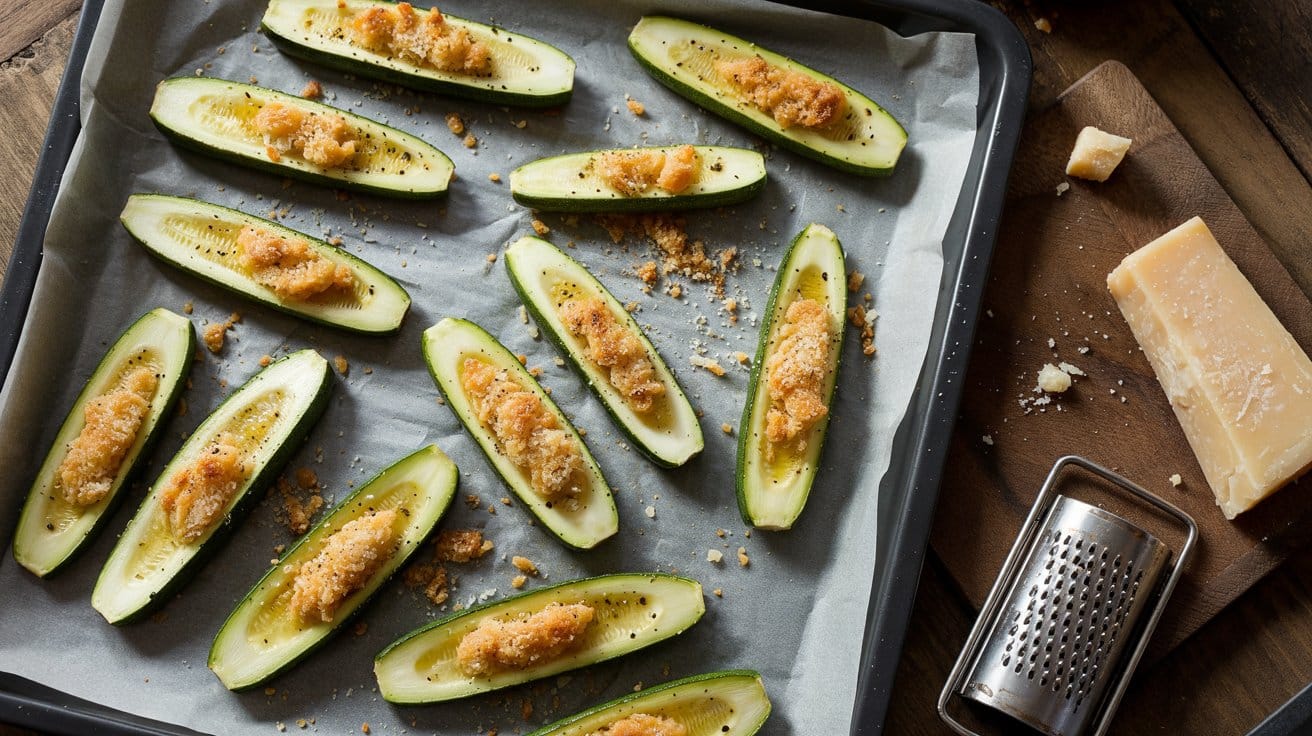
This simple baked zucchini gives you a crisp, cheesy exterior with tender squash inside. You can prepare it as a snack, side dish, or light weeknight main.
It's ready in about 30 minutes and pairs well with grilled proteins or a green salad.
Why This Recipe Works
This method creates a golden, crunchy coating without deep frying. The parmesan adds savory richness that browns nicely in the oven.
- Crispy panko-parmesan crust - The breadcrumb and cheese mixture browns in the oven for a satisfying crunch.
- Quick high-heat roast - A 425°F oven crisps edges while keeping centers tender.
- Light oil usage - A small amount of oil or spray gives color without excess grease.
- Simple pantry seasoning - Garlic powder, salt, and pepper boost flavor without extra prep.
Ingredient Swap Ideas
Swaps let you adjust texture, salt, or make the dish dairy-free without changing the method.
- Parmesan - Swap with Pecorino Romano for a saltier, sharper finish.
- Panko breadcrumbs - Swap with regular breadcrumbs or crushed cornflakes for a different crunch.
- All-purpose flour - Swap with gluten-free flour blend to keep the coating intact for gluten-free diets.
- Eggs - Swap with a mixture of ¼ cup milk and 2 tablespoons ground flaxseed (rest 5 minutes) to bind for a vegan-friendly option.
Ingredients
- 4 medium zucchini - trimmed and sliced into ¼-inch rounds.
- ½ cup all-purpose flour - for dredging.
- 2 large eggs - beaten.
- 1 cup panko breadcrumbs - plain.
- ½ cup grated Parmesan cheese - finely grated.
- 1 teaspoon garlic powder - or granulated garlic.
- ½ teaspoon paprika - optional for color.
- ½ teaspoon salt - adjust to taste.
- ¼ teaspoon black pepper - freshly ground if possible.
- 2 tablespoons olive oil - or use oil spray for lighter coating.
Instructions
- Preheat the oven to 425°F and line a baking sheet with parchment or a lightly oiled rack for air flow.
- Set up three shallow bowls: flour in the first, beaten eggs in the second, and a mixture of panko, Parmesan, garlic powder, paprika, salt, and pepper in the third.
- Dredge each zucchini slice in flour, dip into the eggs, then press into the breadcrumb mixture to coat both sides.
- Arrange coated slices on the prepared sheet in a single layer and lightly drizzle with olive oil or spray.
- Bake 15-18 minutes, flipping once at the halfway mark, until golden and crisp at the edges. Serve warm.
21. Savory Carrot Ribbons
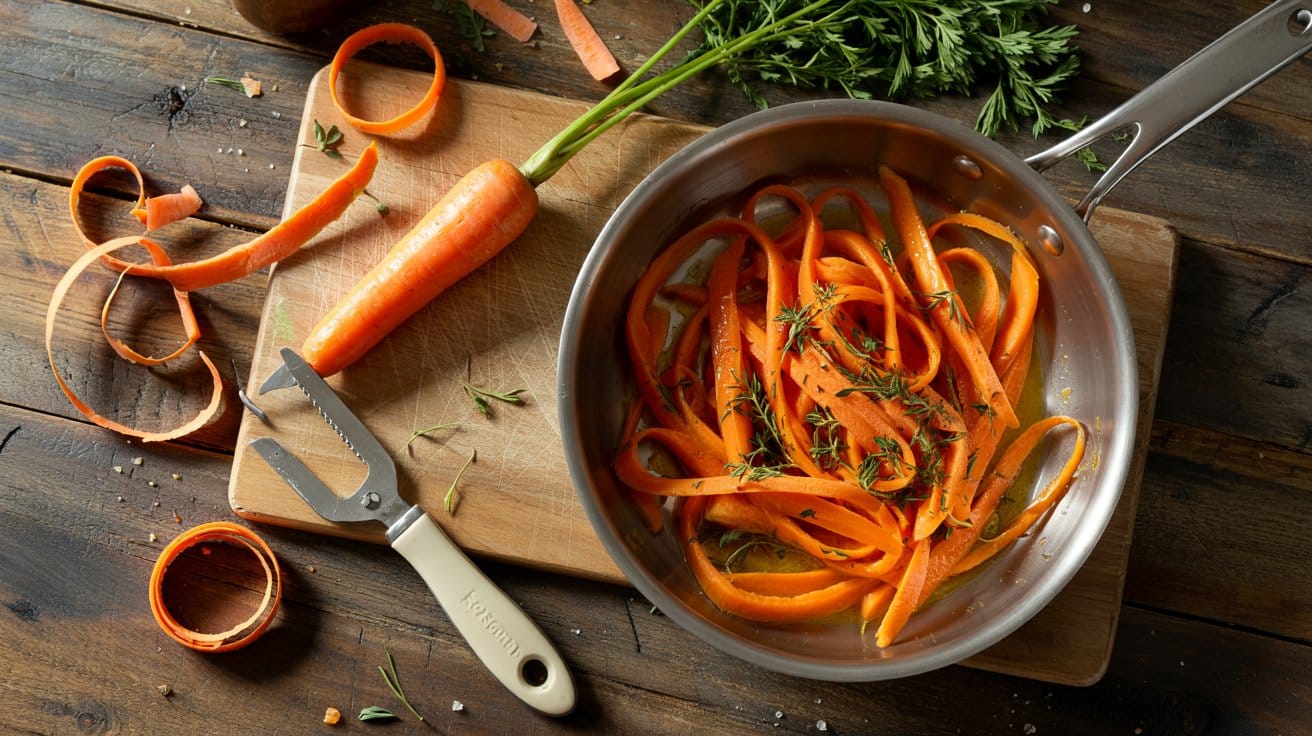
This simple side turns ordinary carrots into thin, glossy ribbons that hold a savory, slightly sweet glaze. You get quick caramelized edges, bright lemon lift, and a soft-but-structured texture that pairs with proteins or grains.
It's ideal for weeknight dinners, holiday spreads, or packed lunches.
Why This Recipe Works
The dish cooks fast and keeps bright color while developing savory depth.
- Silky ribbon texture - Thin peels soften quickly yet keep a pleasant bite, so the carrots feel refined rather than mushy.
- High-heat browning - A hot pan creates caramelized edges that add savory complexity to the natural sweetness of the carrots.
- Savory glaze finish - A touch of soy and lemon makes the ribbons glossy and layered in flavor without heavy sauce.
- Quick stovetop method - The entire recipe takes about 10 minutes at the stovetop, so you can finish it while the main is resting.
Ingredient Swap Ideas
Small swaps let you adapt this side for dietary needs or pantry limits while keeping texture and flavor intact.
- Soy sauce - Use tamari or coconut aminos for a gluten-free option that still provides umami depth.
- Unsalted butter - Replace with ghee for a lactose-reduced option or skip and add an extra tablespoon of olive oil for a vegan version.
- Lemon juice - Swap with rice vinegar for a milder bright note that still cuts through the richness.
- Fresh parsley - Substitute with dill or chives to keep a fresh herb finish with a different aromatic profile.
Ingredients
- 1 lb carrots - peeled into long ribbons with a vegetable peeler.
- 2 tablespoon olive oil - for sautéing.
- 1 tablespoon unsalted butter - optional for richness.
- 1 small shallot - thinly sliced.
- 1 garlic clove - minced.
- 1 teaspoon soy sauce - low-sodium if preferred.
- 1 tablespoon lemon juice - freshly squeezed.
- ¼ teaspoon flaky sea salt - adjust to taste.
- ⅛ teaspoon black pepper - freshly ground.
- 2 tablespoon fresh parsley - chopped.
Instructions
- Use a vegetable peeler to shave carrots into long ribbons and set them aside; stop peeling when you reach the core to avoid woody pieces.
- Heat olive oil and butter in a large skillet over medium-high heat until oil shimmers, then add shallot and sauté 1-2 minutes until softened.
- Add garlic and the carrot ribbons, toss to coat, and cook 3-5 minutes, stirring often, until ribbons are tender and edges show light browning.
- Stir in soy sauce and lemon juice and cook 30-60 seconds until the liquid reduces to a glossy glaze that coats the ribbons.
- Season with salt and pepper, remove from heat, toss with chopped parsley, and serve warm alongside roasted meats, grilled fish, or tossed with warm grains.
22. Broccoli Slaw with Apples
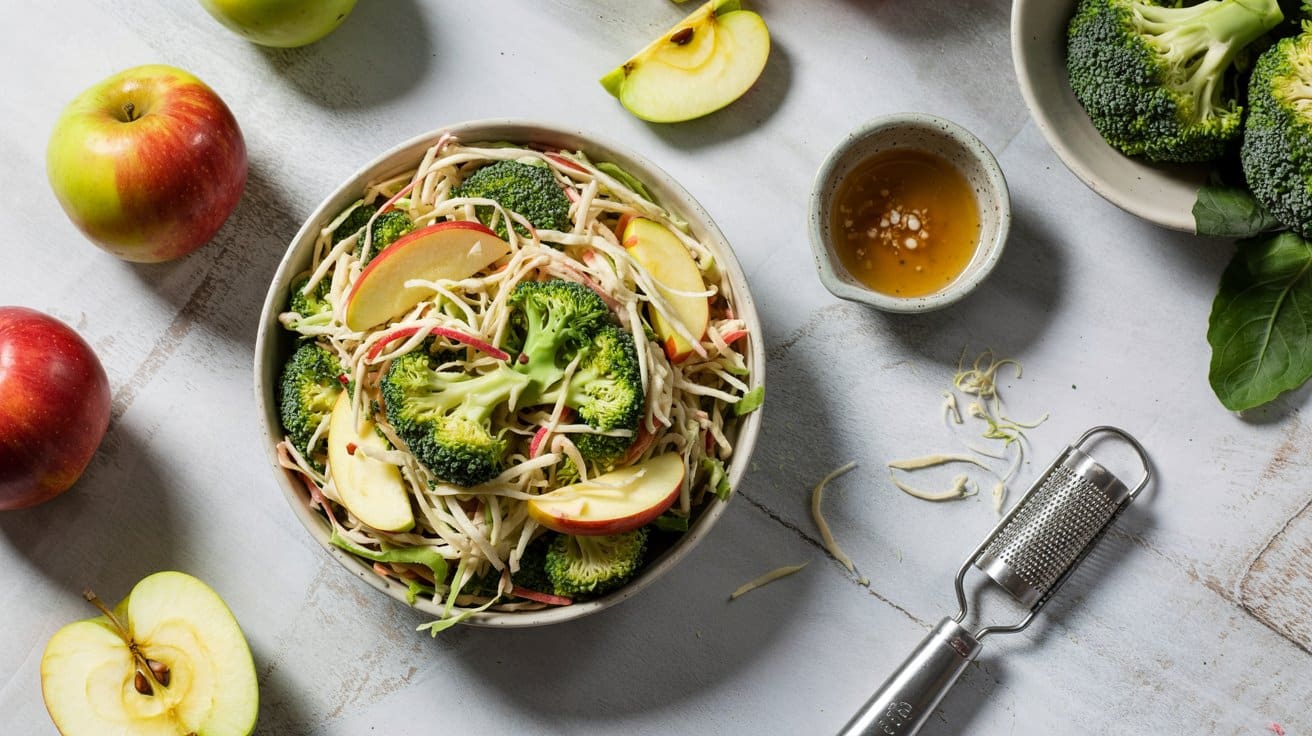
This crunchy slaw pairs crisp broccoli stems and sweet apples for a lively side you can pull together quickly.
You'll get a mix of tart, sweet, and creamy textures that make it great for weeknight dinners, picnics, or potlucks.
It holds up well chilled, so you can make it ahead and bring it out when you need a bright side.
Why This Recipe Works
This salad balances crisp vegetables with juicy fruit and a tangy dressing for contrast.
It keeps its crunch after chilling, so the texture stays lively through serving.
- Crunchy broccoli stems and apples - The firm slaw mix and sliced apples provide a crisp bite that prevents the salad from getting soggy.
- Bright apple-cider dressing - A vinegar-forward dressing adds tang that brightens the natural sweetness of the apples.
- Toasted almond topping - Nuts add savory depth and an extra layer of crunch that goes with the slaw.
- Make-ahead friendly - The flavors meld in the fridge, so you can prepare it several hours before serving.
Ingredient Swap Ideas
Swaps let you adjust for allergies, pantry limits, or personal taste without changing the method.
Choose alternatives that keep the slaw's crunchy texture and tangy-sweet profile.
- Broccoli slaw - Use 4 cups shredded cabbage and 1 cup shredded carrots if slaw mix is unavailable, and it will keep the same texture.
- Apples - Replace with 2 pears for a softer, sweeter fruit note that still holds shape.
- Mayonnaise - Swap for ⅓ cup plain Greek yogurt plus 1 tablespoon olive oil for a tangier, lighter dressing.
- Sliced almonds - Use ⅓ cup sunflower seeds for a nut-free crunch that still provides texture.
Ingredients
- 12 ounces broccoli slaw - pre-shredded mix of broccoli stems, cabbage, and carrots.
- 2 medium apples - cored and thinly sliced.
- ⅓ cup mayonnaise - for the dressing.
- 2 tablespoons apple cider vinegar - for brightness.
- 1 tablespoon honey - to balance acidity.
- 1 teaspoon Dijon mustard - for depth.
- 2 green onions - thinly sliced.
- ⅓ cup sliced almonds - toasted.
- Salt and black pepper - to taste.
Instructions
- Whisk mayonnaise, apple cider vinegar, honey, Dijon, ¼ teaspoon salt, and a few grinds of black pepper in a bowl until smooth.
- In a large bowl, combine broccoli slaw, sliced apples, and green onions.
- Pour the dressing over the slaw and toss to coat evenly.
- Taste and adjust seasoning with more salt or pepper if needed.
- Chill at least 20 minutes, then sprinkle with toasted almonds and serve.
23. Spinach and Feta Stuffed Peppers
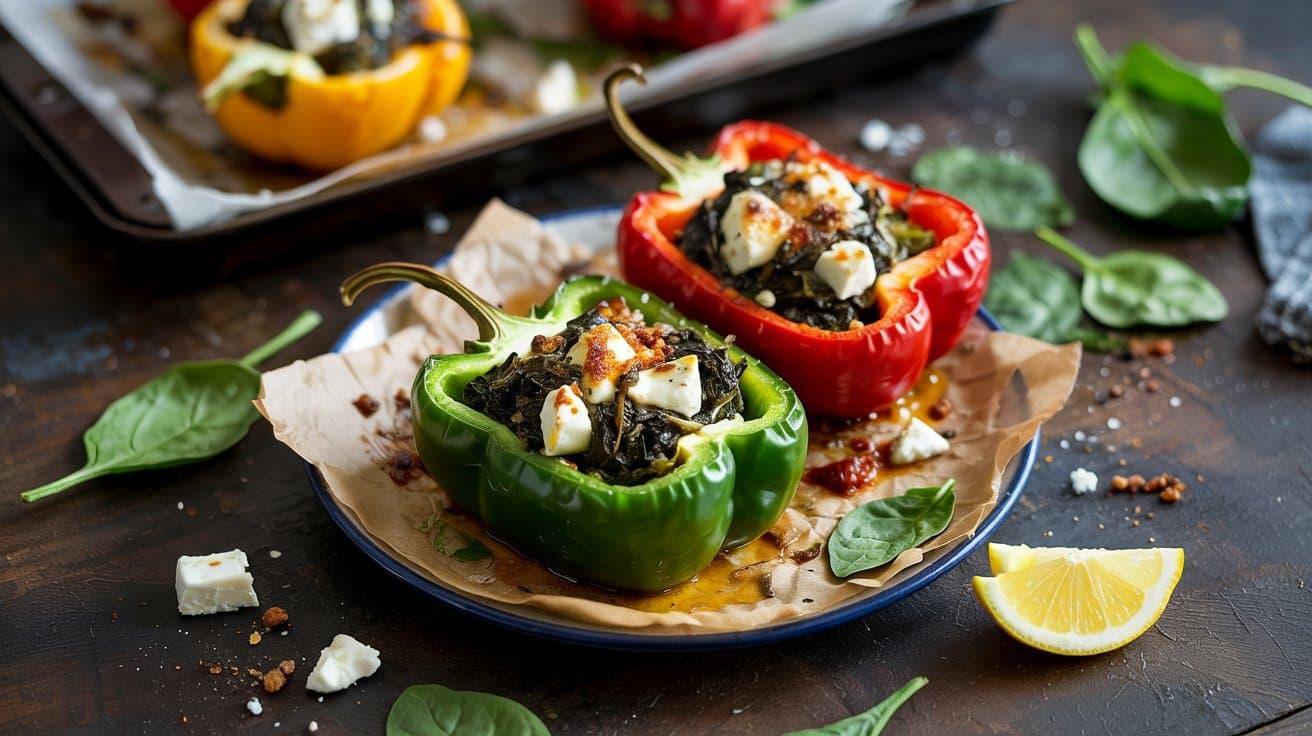
This bright stuffed-pepper recipe combines tangy feta and garlicky spinach for a flavorful side or light main. It comes together quickly on the stovetop and finishes in the oven, so you can serve warm peppers with a simple salad or grain.
The filling is creamy with a slight lemon lift, and the peppers roast until tender.
Why This Recipe Works
These peppers give a fresh, savory filling that cooks fast and holds together when baked. The method keeps the peppers tender while the filling stays moist.
- Tangy feta and lemon lift - The salty, crumbly feta plus a bit of lemon zest keeps the filling bright and balanced.
- Quick stovetop filling - You wilt the spinach and soften aromatics in minutes to save overall time.
- Bread-egg binder for structure - Breadcrumbs and a beaten egg hold the filling without making it heavy.
- Oven-finished tenderness - Baking softens the peppers and sets the top for easy serving.
Ingredient Swap Ideas
Swaps let you tune texture, dairy preferences, or what's in your pantry. Use these to keep the recipe similar in method and outcome.
- Feta - Swap with crumbled goat cheese for a similarly tangy, creamy result that combines well with spinach.
- Breadcrumbs - Use cooked quinoa or cooked rice to make the filling gluten-free while keeping structure.
- Egg - Use a tablespoon of plain yogurt mixed with a teaspoon of cornstarch as a binder for an egg-free option.
- Fresh spinach - Substitute with 10 ounces frozen spinach, thawed and well-drained, to save prep time without changing flavor.
Ingredients
- 4 large bell peppers - halved lengthwise and seeded.
- 2 tablespoon olive oil - divided.
- 1 small yellow onion - finely chopped.
- 2 cloves garlic - minced.
- 8 oz fresh spinach - roughly chopped.
- 1 cup crumbled feta cheese - packed.
- ½ cup plain breadcrumbs - or panko.
- 1 large egg - lightly beaten.
- 1 teaspoon lemon zest - grated.
- 1 teaspoon dried oregano - or 1 tablespoon chopped fresh.
- ½ teaspoon salt - adjust to taste.
- ¼ teaspoon black pepper - freshly ground.
Instructions
- Preheat the oven to 375°F and brush a baking dish with a little olive oil.
- Heat 1 tablespoon olive oil in a skillet over medium heat, then sauté the onion until softened, about 4 minutes; add garlic and cook 30 seconds.
- Add the spinach and cook until wilted, 2 to 3 minutes; remove from heat and stir in feta, breadcrumbs, egg, lemon zest, oregano, salt, and pepper until combined.
- Stuff each pepper half with the filling and arrange them in the prepared dish; drizzle with the remaining tablespoon of olive oil.
- Cover the dish with foil and bake 25 minutes, then uncover and bake 5 to 10 more minutes until peppers are tender and the filling is set; let rest 5 minutes before serving.
Frequently Asked Questions
Many Veggie Sides recipes work well for meal prep because they hold up in the refrigerator for several days. Choose options that reheat without losing texture or flavor.
Many work well made ahead. Prepare the components in advance and store them separately.
Combine just before serving to maintain the best texture and freshness.
Most cooked dishes keep well in the refrigerator for 3 to 4 days in airtight containers. Separate components that soften when stored together - such as crispy toppings or fresh herbs - for best results.
Are there quick versions that take under 30 minutes?
Yes.
Many variations in this category can be adapted to under 30 minutes by using pre-cut vegetables, rotisserie protein, or canned ingredients that skip long cooking steps.
For warmer accompaniments, see warm sides for any protein. For chilled options, try cold sides for light summer meals.

Andrew Gray is a passionate food writer and recipe creator who built Gusto Meadow to celebrate delicious, approachable cooking. With years of experience in restaurants and catering, he brings a grounded, real-world understanding of flavors, technique, and what truly works in a home kitchen.
At Gusto Meadow, Andrew focuses on fresh, seasonal ingredients and simple methods that anyone can follow. His goal is to make cooking feel fun, doable, and rewarding — whether you’re preparing a quick weeknight dinner or exploring something new.