Weeknight family meals should be simple, satisfying, and ready on a tight schedule. We want dishes that get everyone to the table without a long to-do list.
Keep it cozy, keep it doable, and keep everyone coming back for seconds.
This roundup mixes quick one-pan dinners, easy soups, bright salads, and a few crowd-pleasing casseroles. We include recipes kids can help with and fast sauces that turn plain ingredients into something fun.
Each option gives us swap-and-scale flexibility for different appetites.
These recipes make planning meals less stressful and cleanup quicker. We focus on straightforward prep, smart leftovers, and sides that pull the meal together.
They help us feed our families without a last-minute scramble.
1. Chocolate Mug Cake
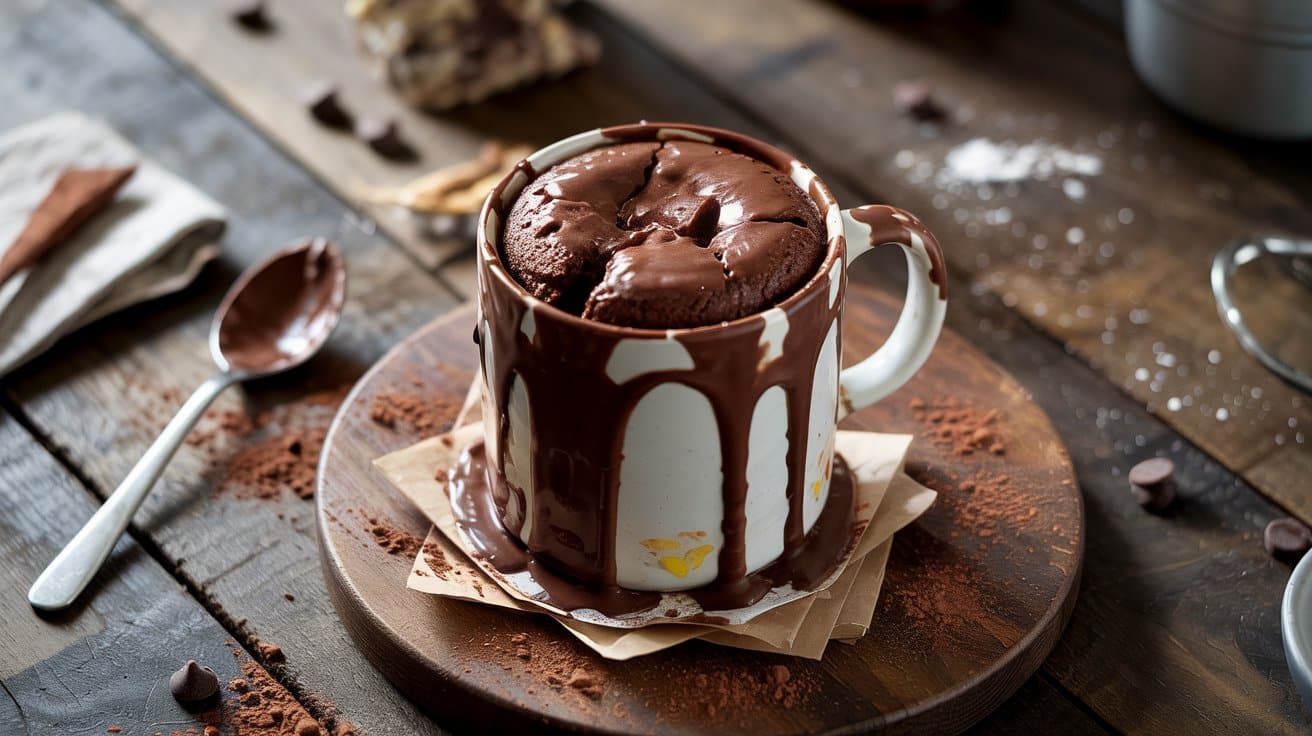
This single-serving mug cake gives you warm, chocolatey cake in minutes using pantry staples. It's rich but not heavy, and best served warm with a spoonful of yogurt or a scoop of ice cream for a quick after-dinner treat.
For a nutty take on chocolate treats, see nut-and-chocolate desserts for indulgence.
Why This Recipe Works
You get a baked cake texture fast without heating an oven. The ingredients are simple and mix right in the mug.
- Microwave single-serve baking - You make one portion in the mug, so there's no extra dishes or leftover cake to store.
- Cocoa-forward batter - Unsweetened cocoa gives clear chocolate flavor without needing melted chocolate.
- Egg-based lift - The egg adds structure and a tender crumb that holds up in the microwave.
- Melting chocolate pockets - A few chocolate chips create warm, gooey bites that contrast the cake's texture.
Ingredient Swap Ideas
Small swaps help adapt this recipe to dietary needs or whatever you have on hand.
For full-meal inspiration beyond swaps, see ground beef dinner ideas beyond tacos.
- Milk - Use almond, oat, or soy milk in equal measure for a dairy-free version that keeps the batter thin enough to cook through.
- Vegetable oil - Swap with melted butter for a richer, more buttery taste.
- Egg - Replace with 2 tablespoons applesauce or a flax egg (1 tablespoon ground flax + 3 tablespoons water) for a vegan option; texture will be slightly denser.
- All-purpose flour - Use a 1:1 gluten-free flour blend measured the same way for a gluten-free cake.
Ingredients
- 4 tablespoons all-purpose flour - spooned and leveled.
- 4 tablespoons granulated sugar - adjust slightly if you prefer less sweet.
- 2 tablespoons unsweetened cocoa powder - sift if clumpy.
- ¼ teaspoon baking powder - for rise.
- Pinch salt - about 1/16 teaspoon.
- 3 tablespoons milk - room temperature.
- 2 tablespoons vegetable oil - or melted butter.
- 1 large egg - beaten.
- ¼ teaspoon vanilla extract - optional.
- 1 tablespoon chocolate chips - optional; for a gooey center.
Instructions
- In a microwave-safe mug, whisk the flour, sugar, cocoa, baking powder, and salt until combined.
- Add the milk, oil, beaten egg, and vanilla, then stir until the batter is smooth and no dry streaks remain.
- Fold in the chocolate chips if using and smooth the top.
- Microwave on high for 60-90 seconds, checking at 60 seconds; the cake is done when the top is set and it springs back slightly.
- Let the mug cake cool for 1 minute, then top with yogurt, ice cream, or a drizzle of chocolate and serve.
2. Mini Cheesecake Bites
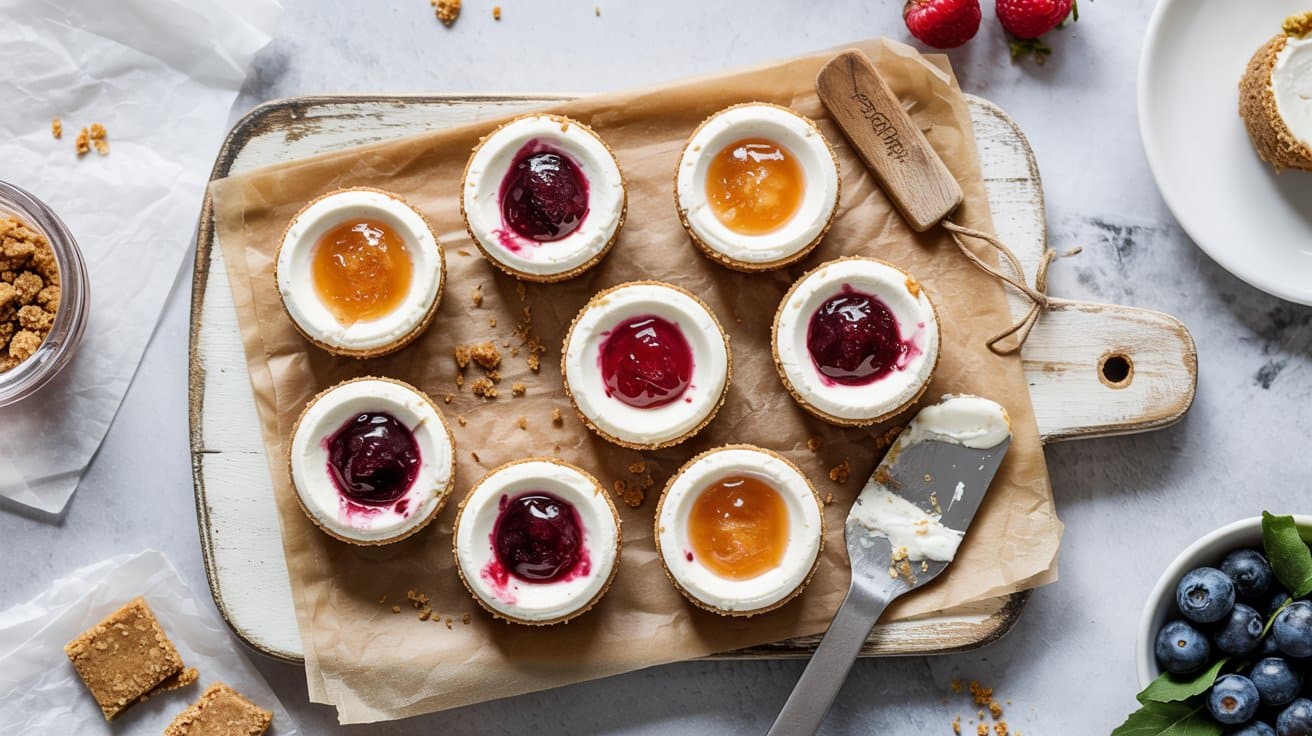
We make these tiny cheesecakes for their rich, creamy filling and crisp graham-cracker base.
They taste bright with vanilla and are ideal for parties, after-dinner sweets, or portion-controlled treats.
Also see vegan bao and steamed-bun recipes for soft bites for more handheld desserts and snacks.
Why This Recipe Works
These bite-sized cheesecakes balance a tender filling with a crunchy crust in a quick format.
They chill fast so you can serve them the same day.
- Creamy baked filling - The eggs and sour cream yield a smooth, slightly tangy texture that sets firm without cracking.
- Graham-cracker crunch - Small pressed crusts brown quickly and add a contrast to the silky center.
- Mini muffin tempo - Baking in a mini tin shortens time and creates uniform portions for easy serving.
- Simple pantry ingredients - The recipe uses basic items you likely already have for reliable results.
Ingredient Swap Ideas
Small swaps let you adjust for dietary needs or available pantry items while keeping the same method.
Each suggestion preserves texture or flavor so the bites stay familiar.
- Graham cracker crumbs - Use crushed vanilla wafers or digestive biscuits for a similar sweet, crunchy base.
- Unsalted butter - Replace with melted coconut oil for a dairy-free crust that firms as it cools.
- Sour cream - Swap in full-fat Greek yogurt for comparable tang and a slightly lighter finish.
- Granulated sugar - Use coconut sugar or a 1:1 baking sweetener to reduce refined sugar with minimal texture change.
Ingredients
- 1 cup graham cracker crumbs - finely crushed.
- 3 tablespoons granulated sugar - for the crust.
- 4 tablespoons unsalted butter - melted.
- 16 ounces cream cheese - room temperature.
- ⅔ cup granulated sugar - for the filling.
- 2 large eggs - room temperature.
- 1 teaspoon vanilla extract -.
- ½ cup sour cream - room temperature.
- Pinch salt -.
Instructions
- Preheat the oven to 325°F.
- Mix the graham cracker crumbs, 3 tablespoons sugar, and melted butter in a small bowl until moistened.
- Line a 24-cup mini muffin tin and press about 1 teaspoon of the crust into the bottom of each cup.
- Beat the cream cheese and ⅔ cup sugar in a medium bowl until smooth, then add the eggs one at a time and stir in vanilla, sour cream, and a pinch of salt until combined.
- Divide the filling among the cups and bake 12-15 minutes until the centers are just set with a slight jiggle.
- Cool on a wire rack 20 minutes, then chill in the refrigerator at least 2 hours before serving.
3. Small-Batch Brownies
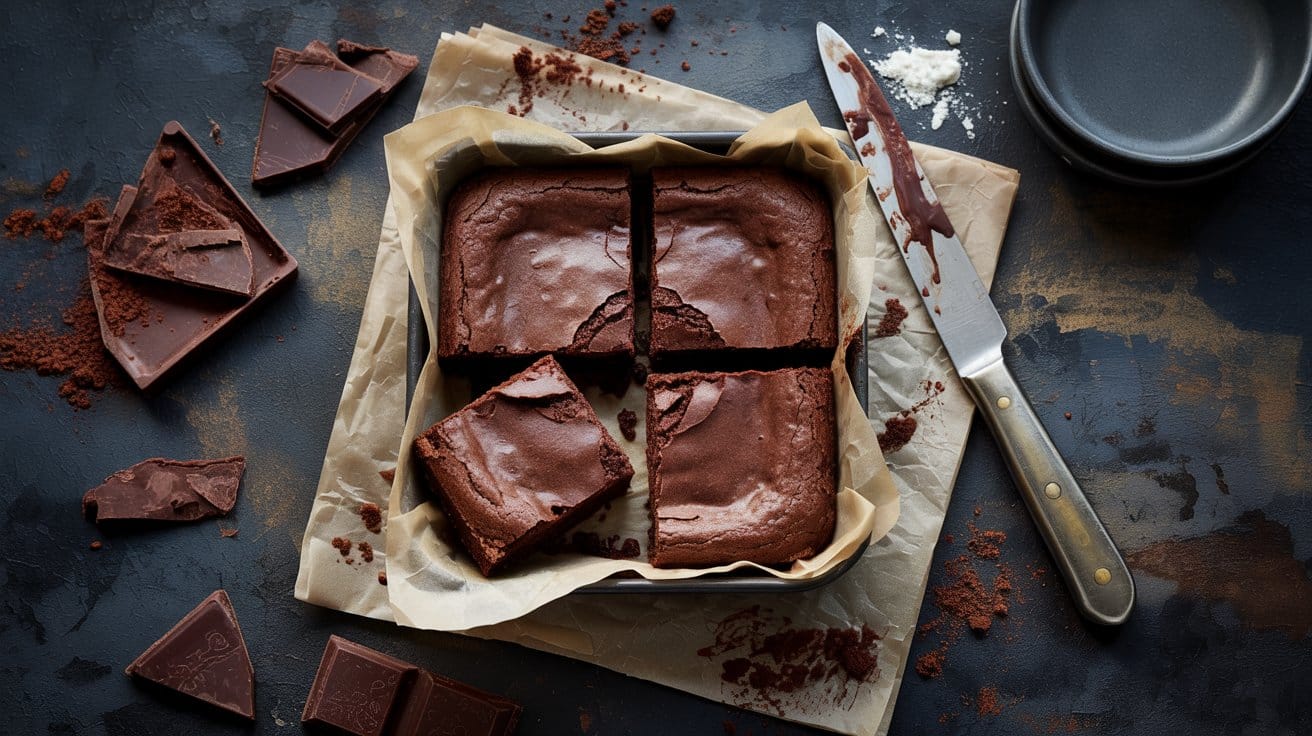
These fudgy, chocolate-forward brownies give you a rich treat without a lot of leftovers. They bake in a small pan and develop a shiny, crackly top with a gooey center.
Serve warm with ice cream for an indulgent snack or cool and slice for a simple dessert.
Why This Recipe Works
These brownies are dense and intensely chocolatey while staying quick to make. The small pan shortens bake time so you keep a gooey center.
- High-fat fudgy batter - Uses melted butter and chocolate to keep the crumb dense and moist.
- Shiny crackly top - Sugar and melted chocolate form a thin glossy crust as the brownies bake.
- Small pan, short bake - Concentrated heat gives a set edge and soft center in under 25 minutes.
- Minimal bowls - You melt and mix in one bowl for simple prep and easy cleanup.
Ingredient Swap Ideas
Swaps let you adjust flavor, texture, or pantry needs without changing the method. Use these if you need a substitute or a different chocolate profile.
- Unsalted butter - Replace with equal coconut oil for a dairy-free, similarly fudgy result.
- Semisweet chocolate - Swap for bittersweet for deeper chocolate intensity or milk chocolate for a sweeter, softer bar.
- Granulated sugar - Use light brown sugar to add chew and a hint of caramel flavor.
- All-purpose flour - Substitute a 1:1 gluten-free flour blend to keep structure, though crumb may be slightly different.
Ingredients
- 4 tablespoons unsalted butter - melted.
- 2 ounces semisweet chocolate - chopped.
- ⅓ cup granulated sugar -.
- 1 large egg - room temperature.
- ¼ cup plus 2 tablespoons all-purpose flour - for structure.
- 2 tablespoons unsweetened cocoa powder - sifted if lumpy.
- ⅛ teaspoon kosher salt -.
- ½ teaspoon vanilla extract -.
Instructions
- Preheat your oven to 350°F and line an 8x4-inch loaf pan or a 6-inch square pan with parchment, leaving an overhang for easy lifting.
- Melt the butter and chopped chocolate together in a heatproof bowl over simmering water or in 15-second microwave bursts, stirring until smooth.
- Whisk in the sugar and vanilla, then add the egg and whisk until the mixture is glossy and slightly thickened.
- Fold in the flour, cocoa powder, and salt until just combined, being careful not to overmix.
- Spread the batter into the prepared pan, smooth the top, and bake 18-22 minutes until the edges are set and the center still looks slightly soft.
- Cool in the pan on a wire rack for at least 15 minutes, then lift out on the parchment and slice once mostly cooled.
4. One-Person Tiramisu
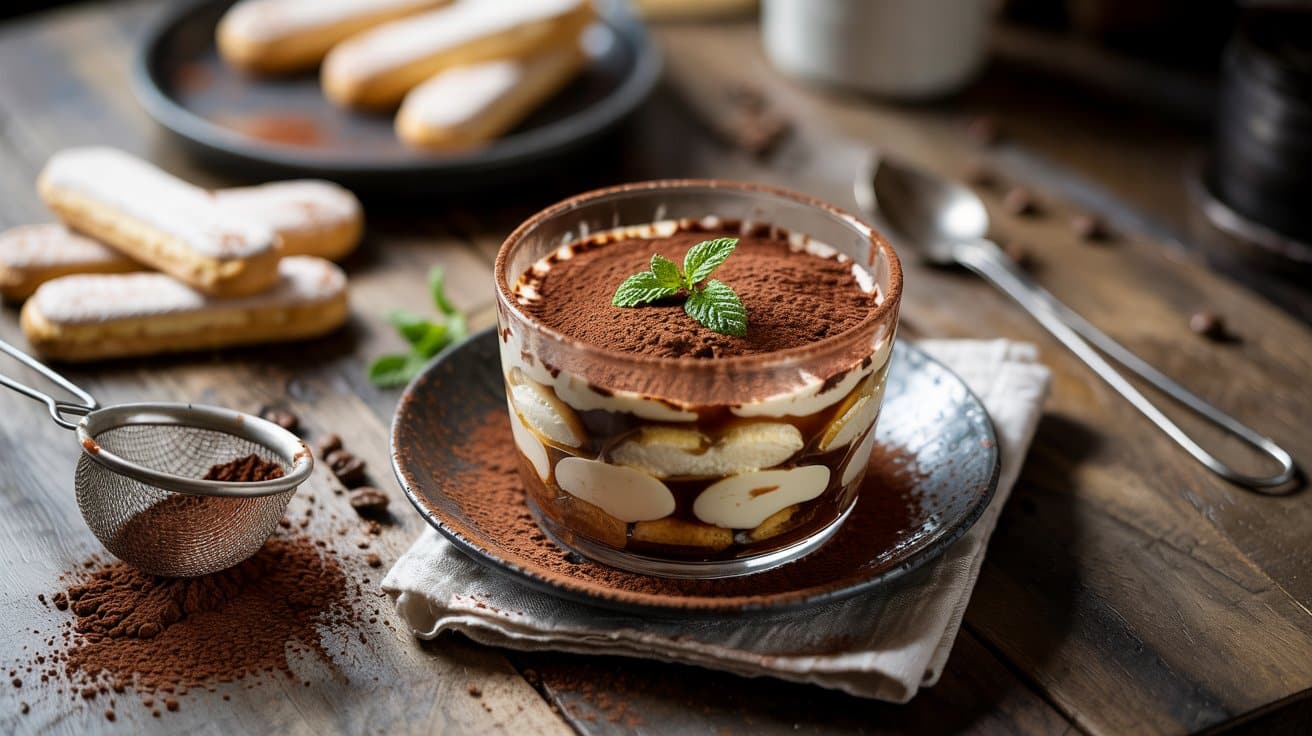
This single-serving tiramisu delivers the classic coffee-and-cream pairing in a compact, quick-to-build dessert. It uses whipped cream and mascarpone for a silky, stable filling and a few ladyfingers for structure.
Serve chilled after a meal or keep it ready for a solo treat with an afternoon coffee.
Why This Recipe Works
You get authentic tiramisu flavor without extra portions. The steps are short and use common pantry ingredients.
- Mascarpone-forward filling - The rich cheese folded into whipped cream creates a smooth, stable cream that holds its shape in a single ramekin.
- Speedy coffee soak - Briefly dipping each ladyfinger soaks in bold coffee flavor while avoiding sogginess.
- Single-serve portion control - You can make one ramekin without leftovers and still enjoy classic layered texture.
- Cocoa finish - A final dusting of cocoa adds bitter contrast and shows the coffee notes.
Ingredient Swap Ideas
Small swaps help adapt this recipe for diet needs or what you have on hand. Each substitute keeps the assembly and flavor intact.
- Mascarpone - Use full-fat cream cheese softened with 1 teaspoon heavy cream to mimic mascarpone's richness.
- Heavy cream - Use chilled coconut cream whipped until fluffy for a dairy-free option that still whips up well.
- Ladyfingers - Use thin slices of sponge cake or pound cake for an easier soak-and-layer option.
- Espresso - Use strong brewed coffee or dissolved instant espresso for the same deep coffee flavor.
Ingredients
- 3-4 ladyfingers - broken to fit a 6- to 8-ounce ramekin.
- 3 ounces mascarpone cheese - room temperature.
- ¼ cup heavy cream - chilled.
- 2 tablespoons powdered sugar - sifted.
- ⅓ cup strong espresso - cooled.
- 1 tablespoon coffee liqueur - optional; for soaking.
- 1 teaspoon vanilla extract - for flavor.
- 1 tablespoon unsweetened cocoa powder - for dusting.
Instructions
- Brew espresso and let it cool to room temperature, then stir in the coffee liqueur if using.
- Whip the chilled heavy cream with powdered sugar until soft peaks form, about 1-2 minutes.
- Fold the mascarpone and vanilla into the whipped cream until smooth and lump-free.
- Quickly dip each ladyfinger into the coffee (about 1 second per side) and arrange a layer in the ramekin.
- Spoon half the mascarpone mixture over the ladyfingers, repeat with one more soaked layer and the remaining cream.
- Chill at least 30 minutes to firm, then dust the top with cocoa powder right before serving.
5. Microwave Peanut Butter Cookie
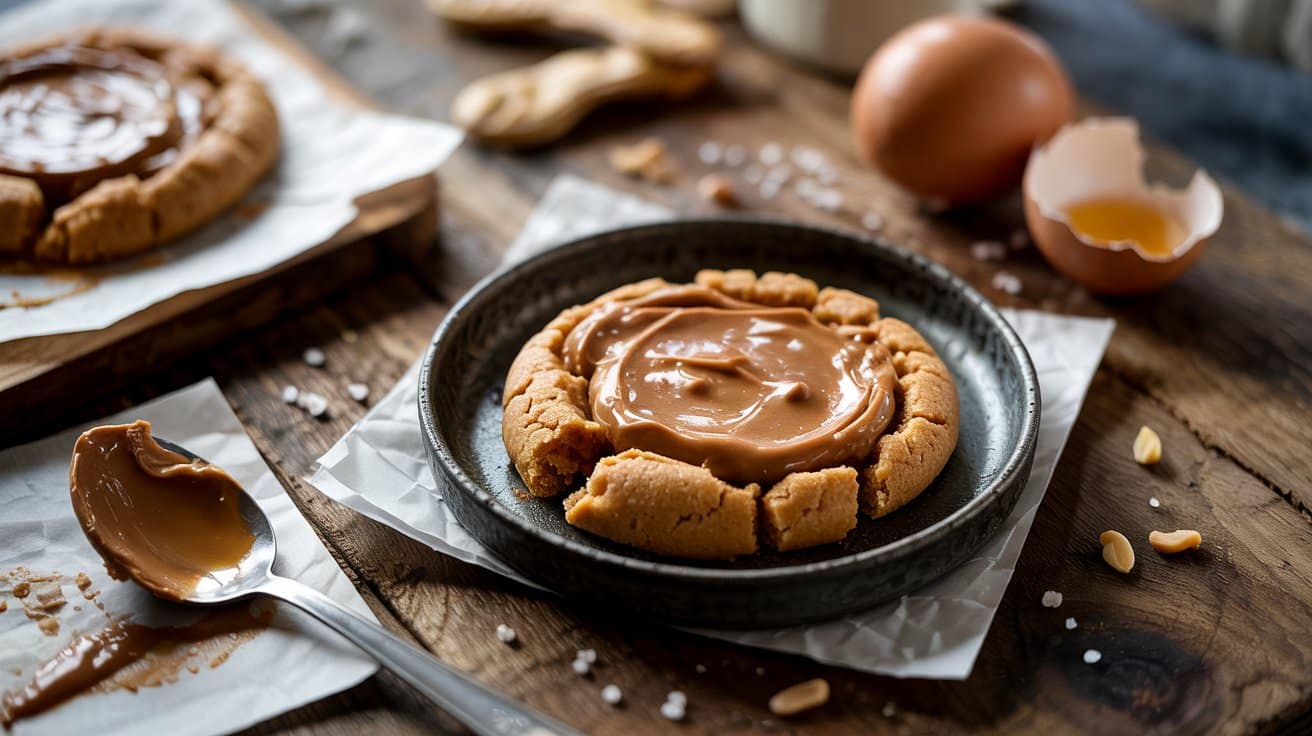
This quick microwave peanut-butter cookie comes together in minutes and satisfies a sweet craving without much fuss. It has a tender, slightly chewy center with toasted nutty notes.
Serve it warm with a cup of coffee or a cold glass of milk.
If a different spread is desired, consult where to find coconut butter in stores for buying tips.
Why This Recipe Works
You get a single cookie ready almost instantly. The texture stays soft in the center while the edges set.
- Single-serve timing - You can make one cookie in about 60 seconds for an instant sweet snack.
- Pure peanut profile - Using straight peanut butter keeps the nutty flavor bright and prominent.
- No oven needed - The microwave cooks the cookie quickly and avoids preheating an oven.
- Adjustable doneness - Shorter microwave time keeps the center soft; a few extra seconds firms it up.
Ingredient Swap Ideas
Swaps help you match allergies, pantry items, or taste preferences while keeping the same microwave method. Each substitute preserves the cookie's texture and quick-cook nature.
- Peanut butter - Use almond or sunflower seed butter for a nut-free or different nutty note; they have similar fat content so the cookie holds together.
- Granulated sugar - Replace with brown sugar or coconut sugar for deeper caramel notes; pack or loosen the sugar slightly to adjust moisture.
- Milk - Swap with almond or oat milk to make it dairy-free; a small splash keeps the dough pliable.
- Vanilla extract - Use a pinch of ground cinnamon or a drop of almond extract for a flavor twist that goes with the peanut base.
Ingredients
- 3 tablespoons creamy peanut butter - room temperature.
- 1 tablespoon granulated sugar - adjust to taste.
- ⅛ teaspoon baking powder - for lift.
- 1 teaspoon milk - any kind.
- ¼ teaspoon vanilla extract - optional but recommended.
- Pinch salt - enhances flavor.
Instructions
- Combine peanut butter, sugar, baking powder, milk, vanilla, and salt in a small bowl and stir until smooth.
- Spoon the dough onto a microwave-safe plate and press it into a roughly 2¼-inch disk about ½ inch thick.
- Microwave on high for 40-60 seconds, checking at 40 seconds; the cookie should look set but slightly soft in the center.
- Let the cookie rest 1-2 minutes to finish cooking and firm up.
- Serve warm for a soft center, or cool completely if you prefer a firmer texture.
6. Mini Banana Bread Loaf
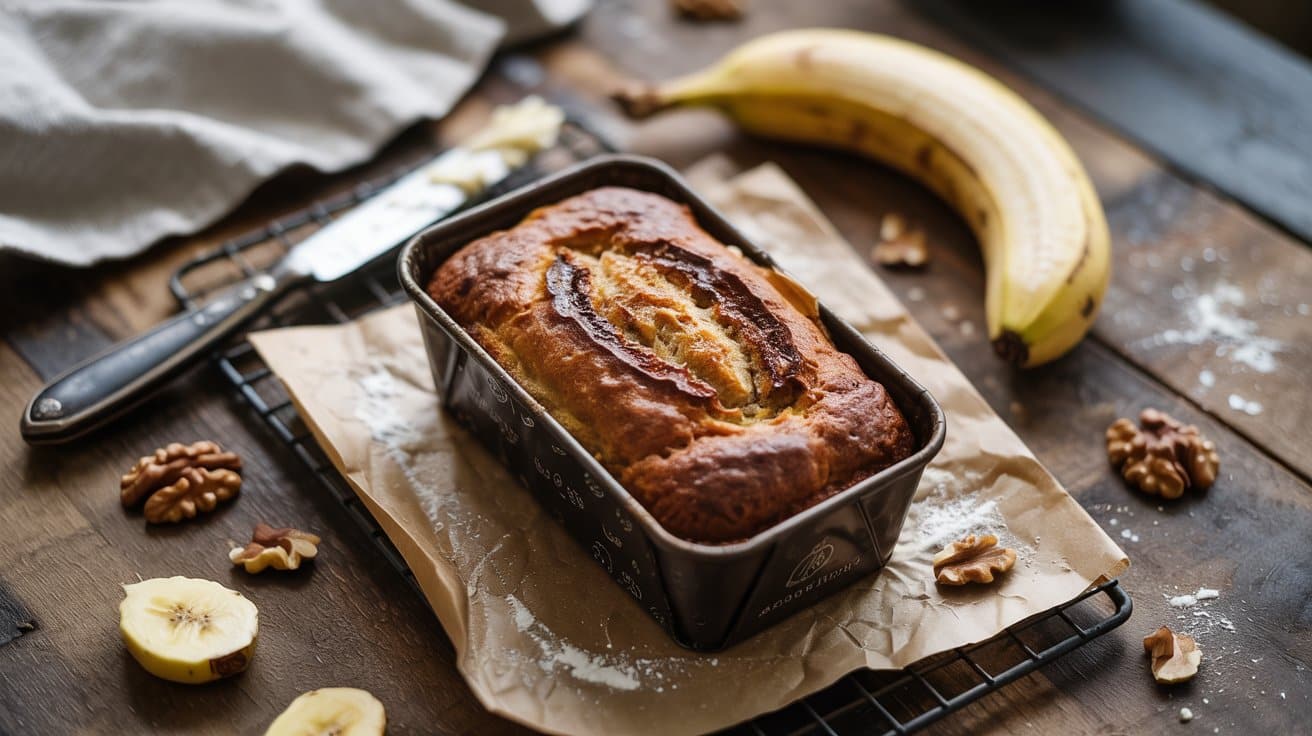
We turn one overripe banana into a small, tender loaf that works well for a cozy solo breakfast or a quick snack. The crumb is moist with banana sweetness and a warm hint of cinnamon, and it bakes in under an hour.
Why This Recipe Works
This recipe makes a single small loaf so you avoid waste and get fresh bread fast. The batter uses simple pantry staples and a bit of yogurt for extra moisture.
- Single mini loaf size - Makes just enough for one or two servings so leftover storage is minimal and you get fresh slices quickly.
- Banana-forward crumb - Using one ripe banana keeps the flavor focused and the texture moist without heavy syrup or lots of fat.
- Quick bake time - A compact pan means a shorter bake and a golden top in about 30-40 minutes.
- Simple mixing method - Wet and dry ingredients are combined separately then folded together to keep the loaf tender.
Ingredient Swap Ideas
Small swaps help you match dietary needs or use what's on hand without changing the method.
- Butter - Use an equal amount of neutral oil (canola or vegetable) for a dairy-free option that keeps the crumb tender.
- All-purpose flour - Swap half the flour for whole wheat pastry flour for nuttier flavor while keeping texture light.
- Plain yogurt - Replace with sour cream or buttermilk to keep moisture and add a slight tang.
- Granulated sugar - Use an equal amount of brown sugar for deeper caramel notes and a moister crumb.
Ingredients
- 1 cup all-purpose flour - spooned and leveled.
- ½ teaspoon baking soda - for lift.
- ¼ teaspoon salt - balances sweetness.
- ½ teaspoon ground cinnamon - optional for warm spice.
- ⅓ cup granulated sugar - for sweetness.
- 2 tablespoons brown sugar - packed for moisture.
- 1 large ripe banana - mashed (about ½ cup).
- 1 large egg - beaten.
- ¼ cup unsalted butter - melted and cooled.
- ½ teaspoon vanilla extract - for flavor.
- 2 tablespoons plain yogurt - for added moisture.
- Cooking spray or butter - for greasing the pan.
Instructions
- Preheat the oven to 350°F and grease a 5x3-inch mini loaf pan or line it with parchment; this prevents sticking.
- Whisk the flour, baking soda, salt, and cinnamon in a bowl until evenly combined.
- In a separate bowl mash the banana, then stir in both sugars, melted butter, egg, vanilla, and yogurt until smooth.
- Fold the dry ingredients into the wet mixture just until combined; stop when no large streaks of flour remain.
- Pour the batter into the prepared pan and smooth the top; bake 30-40 minutes until a toothpick inserted in the center comes out clean and the top is golden.
- Cool the loaf in the pan for 10 minutes, then transfer to a rack to cool before slicing. Enjoy warm or at room temperature.
7. Cupcake in a Cone

These handheld treats bake cake directly inside ice cream cones for a playful, tidy dessert. The cake stays soft while the cone adds a crisp edge, and a simple buttercream finish keeps them familiar and sweet.
They work well for parties, school snacks, or an easy weekend bake.
Why This Recipe Works
This method turns cupcakes into portable, low-mess servings. The cones hold shape while the cake bakes and cools.
- Built-in serving cup - The cone acts as both baking vessel and plate so guests can eat without forks or plates.
- Even browning on top - Heat reaches the batter evenly inside the narrow cone for well-cooked centers.
- Crunchy contrast - The crisp cone edge adds texture against the soft cake interior.
- Easy portion control - Each cone is a single serving, which simplifies plating and packing for events.
Ingredient Swap Ideas
Swaps let you match dietary needs or speed up prep without changing the method.
- All-purpose flour - Use 1:1 gluten-free flour blend to make these gluten-free while keeping the same measurements.
- Unsalted butter (batter) - Substitute neutral oil (canola or vegetable) for a slightly moister crumb and easier creaming.
- Sugar cones - Use sturdy waffle cones trimmed to fit if you prefer slightly larger servings and a different crunch.
- Buttercream frosting - Swap for cream cheese frosting for a tangier finish that pairs well with fruit-flavored cakes.
Ingredients
- 12 sugar ice cream cones - room temperature.
- 1 ¼ cups all-purpose flour - for the batter.
- ¾ cup granulated sugar - for the batter.
- 1 ¼ teaspoons baking powder - leavening for the cake.
- ¼ teaspoon fine salt - for balance.
- ½ cup (1 stick) unsalted butter - softened for the batter.
- 2 large eggs - beaten lightly.
- ½ cup milk - whole or 2% for best texture.
- 1 teaspoon vanilla extract - for flavor.
- ½ cup (1 stick) unsalted butter - softened for the frosting.
- 1 ½ to 2 cups powdered sugar - sifted for smooth frosting.
- 1 to 2 tablespoons milk - to thin frosting as needed.
Instructions
- Preheat the oven to 350°F and stand the cones upright in a muffin tin so they stay steady during baking.
- Whisk flour, baking powder, and salt in a bowl until combined.
- Beat the softened butter and granulated sugar until light, then add eggs one at a time, then vanilla; stir in the dry mix alternating with milk until smooth.
- Fill each cone about two-thirds full and bake 15-18 minutes until a toothpick inserted into the cake portion comes out clean and tops are set.
- Cool cones upright 10 minutes, transfer to a rack to cool completely, beat frosting ingredients to spreadable consistency, then pipe or spoon onto cooled cakes before serving.
8. Single-Serve Muffin
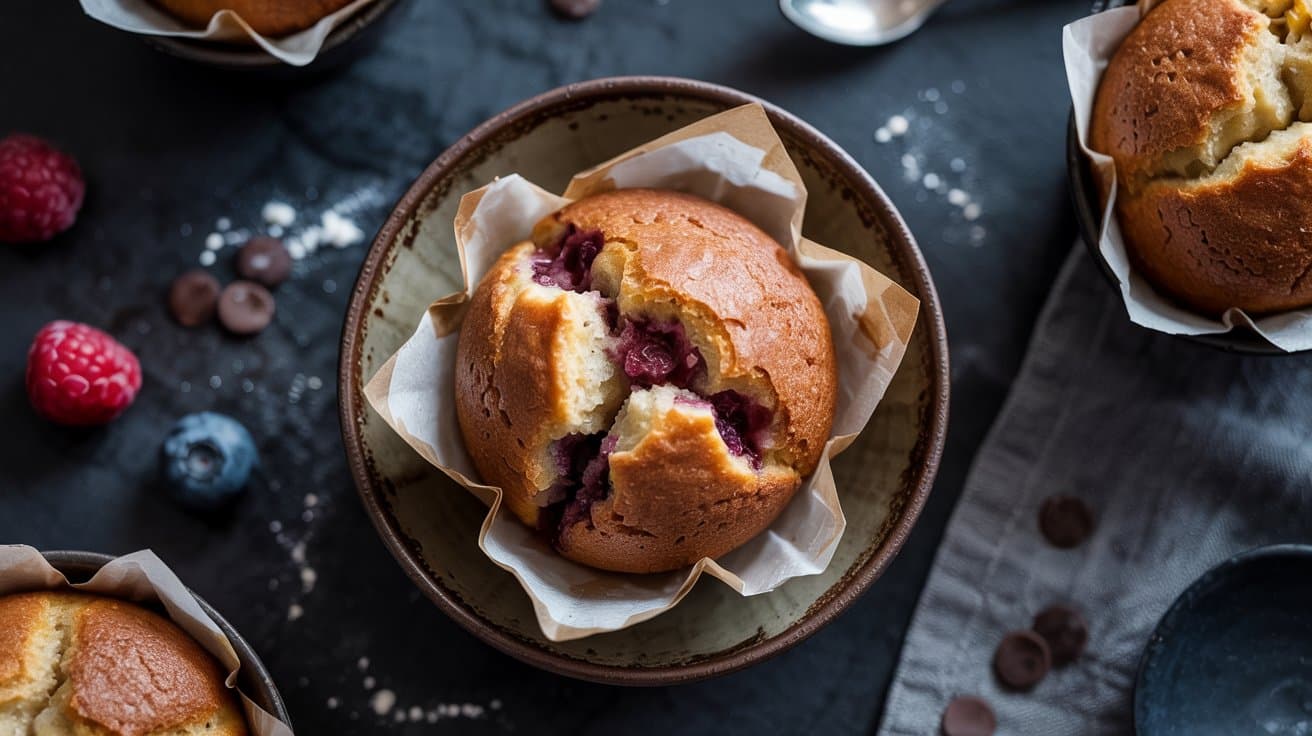
This single-serving muffin is a quick, wholesome breakfast or mid-afternoon snack that bakes in under 25 minutes. We rely on mashed banana and Greek yogurt for natural sweetness and moisture, giving a tender crumb with whole-grain texture.
It works well warmed and spread with a little nut butter or eaten plain on the go.
Why This Recipe Works
We get a tender, moist muffin with minimal prep and no special equipment. The batter comes together in one small bowl for fast cleanup.
- Moist banana base - Mashed banana keeps the muffin soft without adding refined sugar.
- Whole-grain texture - Rolled oats and whole wheat flour add chew and a nutty flavor.
- Single-bowl method - You mix wet and dry separately, then combine for a quick, low-fuss process.
- Balanced sweetness - A touch of maple syrup and ripe banana provides gentle sweetness without overpowering the other flavors.
Ingredient Swap Ideas
Swaps help adjust pantry items or dietary needs while keeping the simple method intact.
- Whole wheat flour - Use all-purpose flour to lighten the crumb while keeping the same measurements.
- Maple syrup - Substitute honey for a similar sweetness and moisture level.
- Greek yogurt - Replace with an equal amount of unsweetened applesauce to reduce dairy while preserving moisture.
- Mashed banana - Use ¼ cup unsweetened pumpkin puree for a different flavor that still keeps the batter moist.
Ingredients
- ⅓ cup whole wheat flour - lightly packed.
- 2 tablespoons rolled oats - old-fashioned or quick.
- ½ teaspoon baking powder - for rise.
- ¼ teaspoon ground cinnamon - for warm spice.
- ⅛ teaspoon salt - about a pinch.
- ¼ cup mashed ripe banana - about half a medium banana.
- 1 large egg - room temperature.
- 1 tablespoon plain Greek yogurt - for tenderness.
- 1 tablespoon maple syrup - for gentle sweetness.
- 1 tablespoon neutral oil - canola or vegetable; melted if solid.
- ¼ teaspoon vanilla extract - for flavor lift.
Instructions
- Preheat the oven to 350°F (175°C) and grease a standard-size muffin tin cavity or oil a 6-ounce ramekin.
- Whisk flour, oats, baking powder, cinnamon, and salt in a small bowl until combined.
- In a separate bowl, mash the banana then stir in the egg, Greek yogurt, maple syrup, oil, and vanilla until smooth.
- Fold the dry ingredients into the wet mixture just until combined; do not overmix.
- Spoon the batter into the prepared cavity and bake 18-22 minutes, or until a toothpick inserted near the center comes out clean. Let cool a few minutes before serving.
9. Small-Batch Apple Crisp
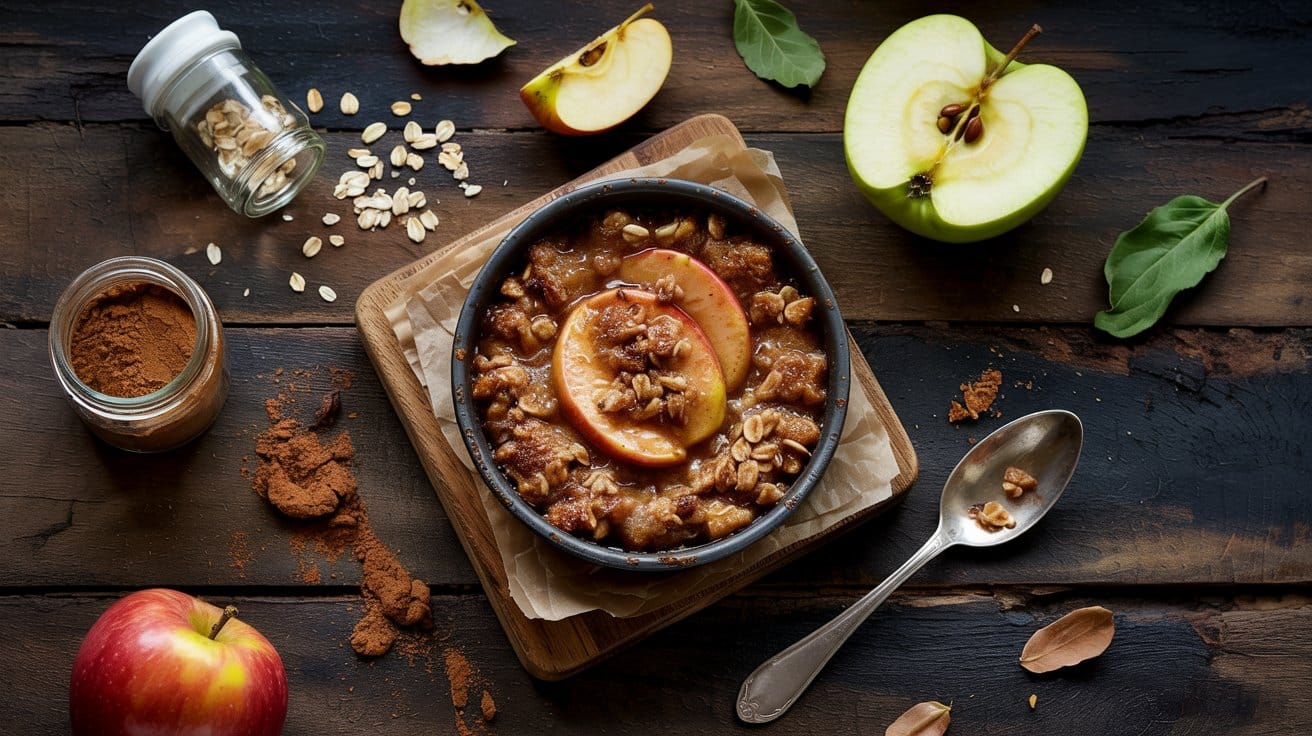
This small-batch apple crisp gives you warm, spiced fruit with a crunchy oat topping in a single baking dish. It's quick to assemble and best served warm with a scoop of ice cream or a dollop of whipped cream.
The balance of tart apples and brown-sugar topping makes it a cozy dessert for weeknights or small gatherings.
Why This Recipe Works
It highlights seasonal apples while keeping the portion small and manageable. The oat topping browns evenly for a satisfying crunch.
- Tart-sweet apple filling - Apples tossed with lemon and a touch of sugar bake tender and release a gently syrupy sauce.
- Buttery oat topping - Cold butter cut into oats and flour creates a crumbly, golden crust that contrasts the soft fruit.
- Small-batch size - A single 1-quart or 8x8-inch-style dish keeps portions reasonable and baking time short.
- Quick assembly - The filling and topping come together in minutes so you can bake soon after chopping apples.
Ingredient Swap Ideas
Simple swaps help you adjust sweetness, texture, or dietary needs without changing the method.
- Apples - Swap Granny Smith for a tarter bite or Honeycrisp for more natural sweetness; both hold their shape while baking.
- Brown sugar - Swap with coconut sugar for a deeper caramel note and a slightly different sweetness profile.
- Rolled oats - Swap with quick oats if needed; the topping will be less chewy but still crisp.
- Unsalted butter - Swap with cold coconut oil for a dairy-free topping that still creates a crumbly texture.
Ingredients
- 2 medium apples - peeled, cored, and sliced about ¼-inch thick.
- 2 tablespoons granulated sugar - for the filling.
- 1 tablespoon lemon juice - to brighten and prevent browning.
- ½ teaspoon ground cinnamon - warming spice for the filling.
- ⅛ teaspoon ground nutmeg - for subtle depth.
- ½ cup rolled oats - old-fashioned oats for the topping.
- ⅓ cup all-purpose flour - for structure in the topping.
- ¼ cup packed brown sugar - for caramel flavor in the topping.
- ¼ teaspoon salt - to balance sweetness.
- 3 tablespoons cold unsalted butter - cut into small pieces for the topping.
Instructions
- Preheat the oven to 350°F and grease a 1-quart ovenproof dish or an 8x8-inch pan.
- Toss the sliced apples with granulated sugar, lemon juice, cinnamon, and nutmeg until evenly coated, then spread them in the prepared dish.
- Combine rolled oats, flour, brown sugar, and salt in a bowl, then cut in the cold butter with a fork or pastry cutter until the mixture resembles coarse crumbs.
- Scatter the topping evenly over the apples and bake for 30-35 minutes, until the topping is golden and the filling is bubbling; let rest 10 minutes before serving.
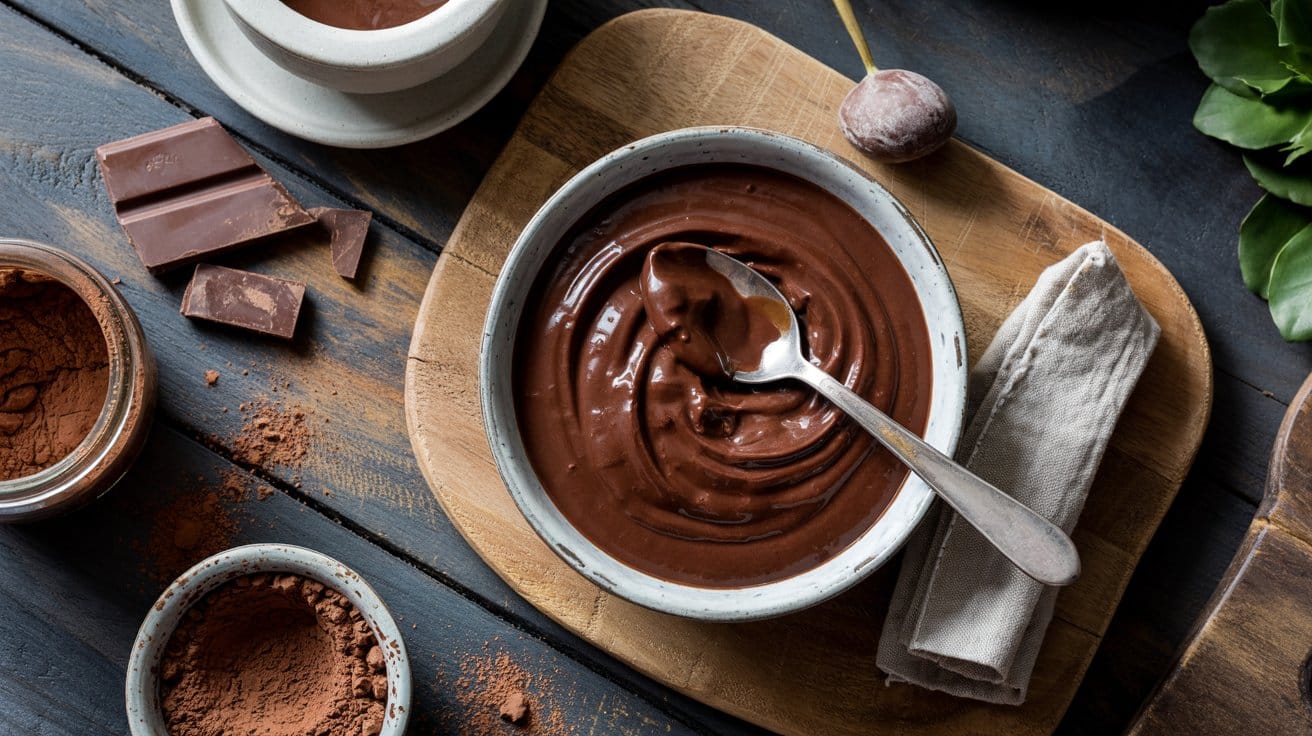
10. No-Bake Chocolate Oat Bars
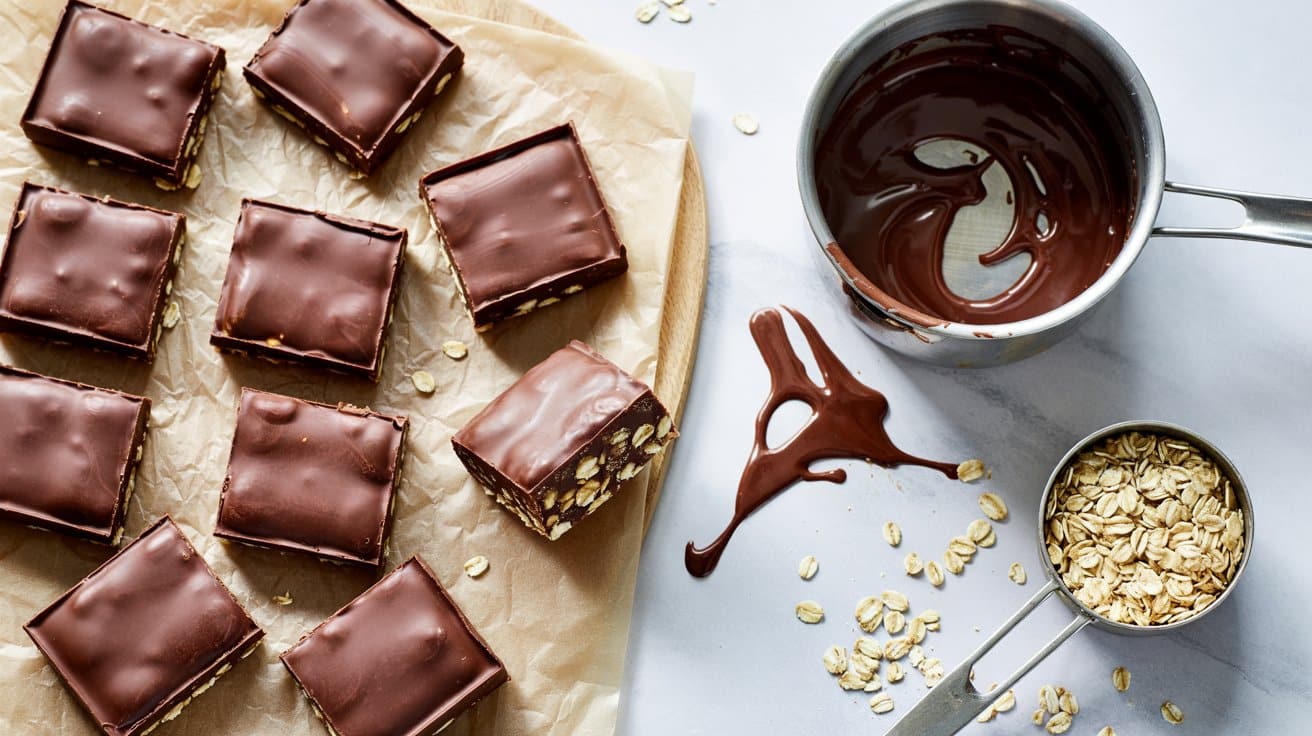
These bars combine rich chocolate and nut butter with hearty oats for a satisfying snack or dessert. They come together in minutes without any baking and chill firm in the fridge.
Serve chilled for a fudgy bite or at room temperature for a chewier texture.
For more bar-style sweets with tender textures, see soft, tender dessert bars everyone will love.
Why This Recipe Works
These bars balance fudgy chocolate with chewy oats for a reliable texture every time. The no-bake method saves time and keeps the pantry-friendly ingredients intact.
- Fudgy chocolate layer - A melted chocolate topping sets glossy and adds a rich contrast to the oat base.
- Oat-based binding - Old-fashioned oats give chew and structure so bars hold together when sliced.
- Nut-butter glue - Creamy nut butter mixes with sweetener to bind ingredients without extra liquid.
- Fridge-set finish - Chilling firms the bars quickly so they slice cleanly and store well.
Ingredient Swap Ideas
Swaps make the bars fit dietary needs or flavor preferences while keeping the method the same. Try these to adjust sweetness, fat source, or texture.
- Peanut butter - Use almond or cashew butter for a milder, nuttier flavor and the same binding quality.
- Honey - Swap with maple syrup to make the recipe vegan while maintaining stickiness and sweetness.
- Coconut oil - Use melted butter or a neutral vegetable oil to help the chocolate set and keep the texture smooth.
- Dark chocolate chips - Replace with chopped dark chocolate or semi-sweet chips to control sweetness and melting behavior.
Ingredients
- 2 cups old-fashioned rolled oats - for chew and structure.
- 1 cup creamy peanut butter - smooth for easy mixing.
- ½ cup honey - or maple syrup for sweetness and binding.
- ⅓ cup unsweetened cocoa powder - for chocolate flavor.
- 2 tablespoons coconut oil - melted to loosen the filling.
- 1 teaspoon vanilla extract - for depth of flavor.
- ¼ teaspoon fine salt - to balance sweetness.
- ½ cup dark chocolate chips - for topping and a glossy finish.
Instructions
- Line an 8x8-inch pan with parchment, leaving an overhang, and set aside.
- Whisk peanut butter, honey, melted coconut oil, vanilla, and salt in a bowl until smooth.
- Stir in cocoa powder until incorporated, then fold in oats until the mixture holds when pressed.
- Press the oat mixture firmly into the prepared pan, smoothing the top with a spatula.
- Melt chocolate chips in 20-30 second microwave bursts, stirring between bursts until glossy, then spread over the pressed base and chill for at least 1 hour until set before slicing.
11. Peach Crumble for One
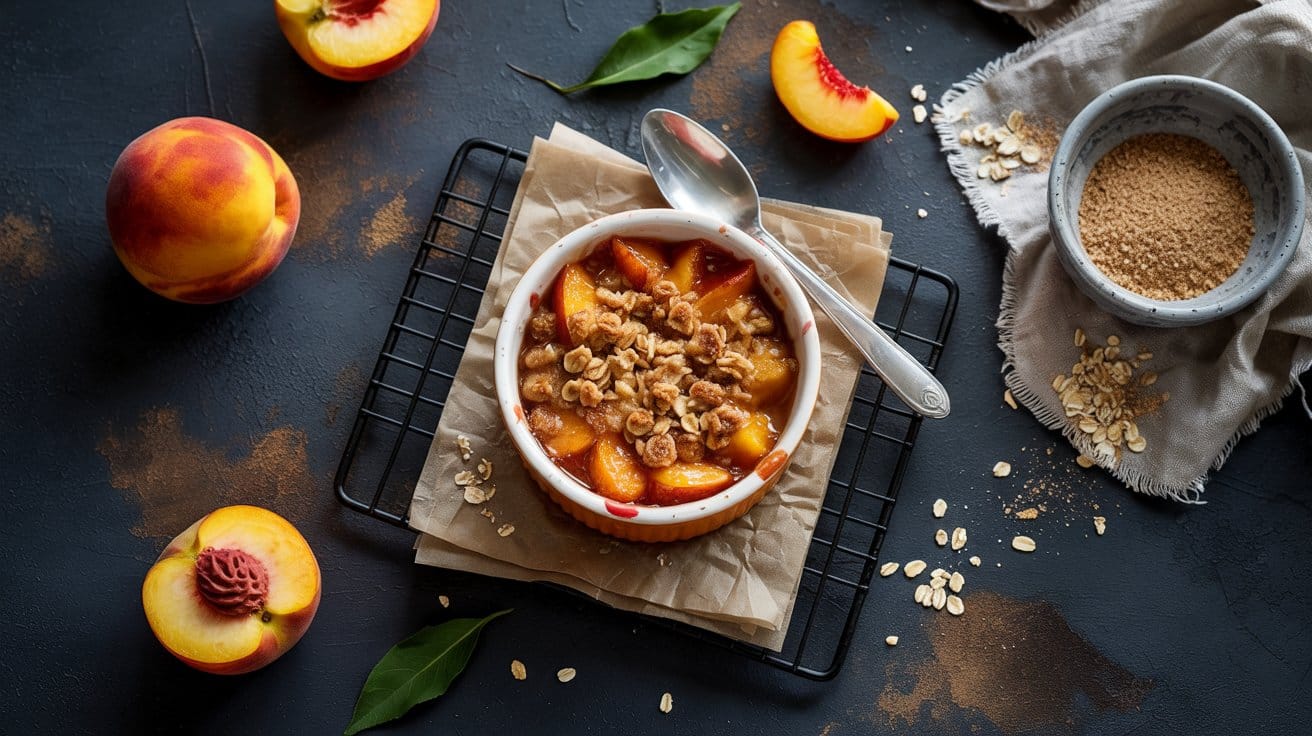
This single-serve peach crumble delivers warm, caramelized fruit with a crunchy oat topping in a portion sized for one. You can make it quickly from pantry staples and serve it warm for a simple dessert or a special breakfast treat.
For quick one-pan meal ideas that pair well with simple desserts, see quick one-pan Italian dinners.
Why This Recipe Works
This recipe focuses on bright fruit and a crisp topping in a small bake that finishes fast. It uses minimal tools and ingredients for reliable results.
- Single-serving oven bake - The small ramekin concentrates heat so the peach softens and the topping browns evenly.
- Thickened fruity filling - A touch of cornstarch keeps the juices saucy without making the dish runny.
- Buttery oat crumb - Cold butter rubbed into oats creates pea-sized crumbs that crisp while the fruit steams.
- Quick, pantry-based method - You can assemble and bake in under 30 minutes using common staples.
Ingredient Swap Ideas
Swaps help you adjust for seasonality, diet, or what you have on hand. Use these to keep texture and flavor consistent.
- Fresh peach - Use about ¾ cup thawed frozen sliced peaches, drained, for year-round access and similar texture.
- Light brown sugar - Swap with coconut sugar for a similar caramel note with slightly less moisture.
- All-purpose flour - Replace with the same amount of oat flour for a more tender, gluten-free-friendly topping if certified gluten-free oats are used.
- Cold unsalted butter - Use solid coconut oil in the same amount for a dairy-free crumble that still yields crisp bits.
Ingredients
- 1 medium peach - peeled and sliced (about 1 cup).
- 1 teaspoon granulated sugar - for the fruit coating.
- ½ teaspoon cornstarch - to thicken fruit juices.
- ½ teaspoon lemon juice - to brighten the peach.
- ⅛ teaspoon ground cinnamon - for warm spice.
- Pinch salt - to balance sweetness.
- 2 tablespoons old-fashioned rolled oats - for topping texture.
- 2 tablespoons all-purpose flour - for structure in the topping.
- 1 tablespoon packed light brown sugar - for caramel flavor in the topping.
- 2 tablespoons cold unsalted butter - cubed for rubbing into the topping.
Instructions
- Preheat your oven to 375°F and grease a 6-ounce ramekin with a little butter or nonstick spray.
- In a small bowl, toss the peach slices with granulated sugar, cornstarch, lemon juice, cinnamon, and a pinch of salt until coated, then transfer the fruit to the ramekin.
- Combine oats, flour, and brown sugar in a separate bowl and rub in the cold cubed butter with your fingertips until the mixture forms pea-sized crumbs.
- Scatter the crumb topping evenly over the peaches.
- Bake 20-25 minutes until the filling bubbles at the edges and the topping is golden, then cool 5 minutes before serving.
12. Single Serving Panna Cotta
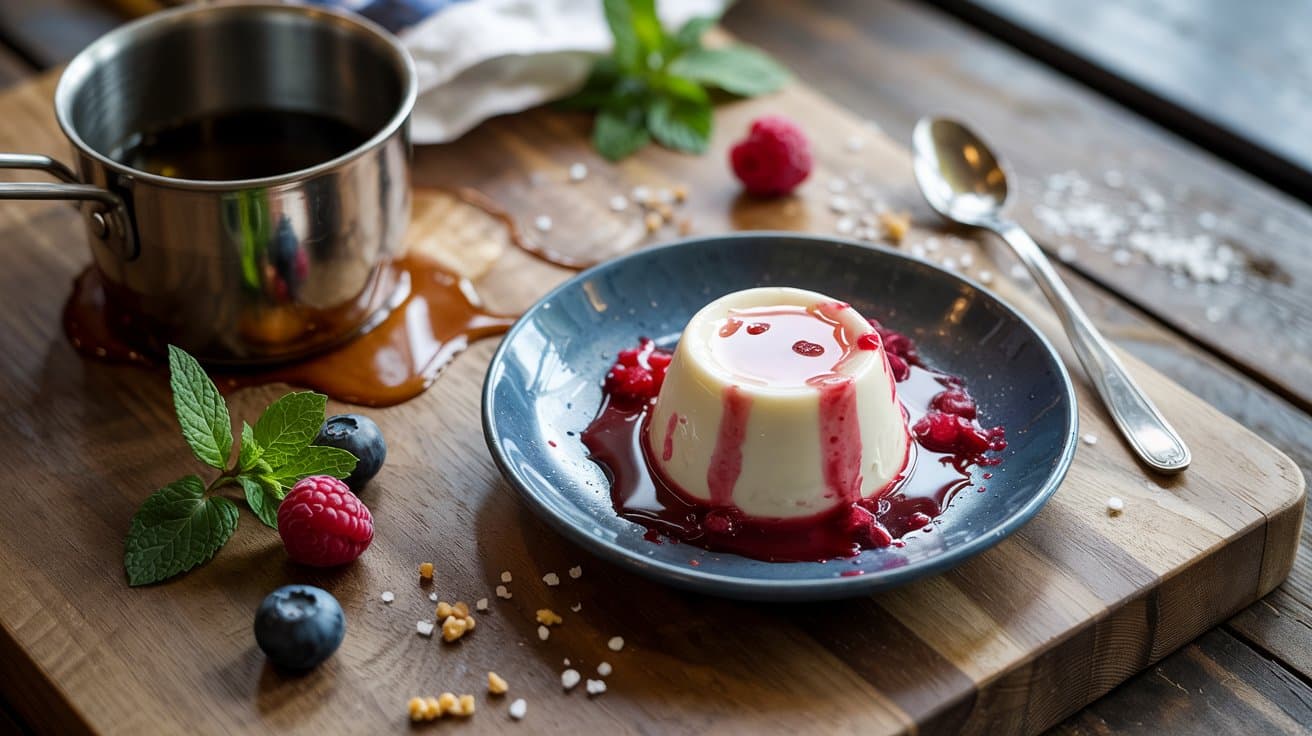
This small panna cotta delivers a silky, creamy dessert you can make for one without fuss. It highlights vanilla-scented cream with a smooth texture and sets in a single ramekin for an elegant finish.
Serve chilled with fresh berries or a spoonful of fruit compote for contrast.
Why This Recipe Works
This method gives a reliably smooth set and bright vanilla flavor. It scales cleanly for one portion and fits a busy evening routine.
- Silky single-portion set - The cream-to-milk ratio and gentle gelatin bloom produce a tender, spoonable texture.
- Straightforward stovetop method - You heat the dairy just enough to dissolve sugar and gelatin without curdling.
- Quick chilling timeline - It firms in the fridge within about 4 hours so you can make it the same day.
- Versatile finishing options - Neutral base pairs well with citrus curd, berry compote, or a caramel drizzle.
Ingredient Swap Ideas
Swaps help you adapt for diet or pantry limits while keeping the same set and flavor balance. Choose substitutions that match the recipe's gentle heating and gelatin-setting method.
- Heavy cream - Use half-and-half for a lighter texture, and expect a slightly softer set.
- Whole milk - Swap with unsweetened oat milk for a light dairy-free finish, but add slightly more gelatin for firmness.
- Powdered gelatin - Replace with ½ teaspoon agar-agar powder, whisked into the warm liquid and simmered 1 minute for a vegetarian set.
- Granulated sugar - Swap with honey or maple syrup in equal volume for a different sweetness note, and add it while warming so it dissolves evenly.
Ingredients
- 1 cup heavy cream - full fat for smooth texture.
- ¼ cup whole milk - evens the richness and lightens the set.
- 2 tablespoons granulated sugar - for balanced sweetness.
- 1 teaspoon powdered gelatin - unflavored.
- 2 tablespoons cold water - for blooming the gelatin.
- ½ teaspoon vanilla extract - or vanilla bean seeds.
- Pinch salt - to improve the cream flavor.
Instructions
- Sprinkle the gelatin over the cold water in a small bowl and let it bloom for 5 minutes.
- Warm the cream, milk, sugar, and pinch of salt in a small saucepan over medium heat until steam rises and the sugar dissolves, about 3-4 minutes; do not boil.
- Remove the pan from heat and stir in the bloomed gelatin until fully dissolved, then mix in the vanilla.
- Pour the mixture into a single 6-ounce ramekin, cool to room temperature for 10 minutes, then cover and refrigerate until set, about 4 hours.
- To unmold, run a hot towel around the ramekin or dip the base in warm water for 5-10 seconds, then invert onto a plate, or serve directly with berries or compote.
13. Chocolate Chip Cookie for One
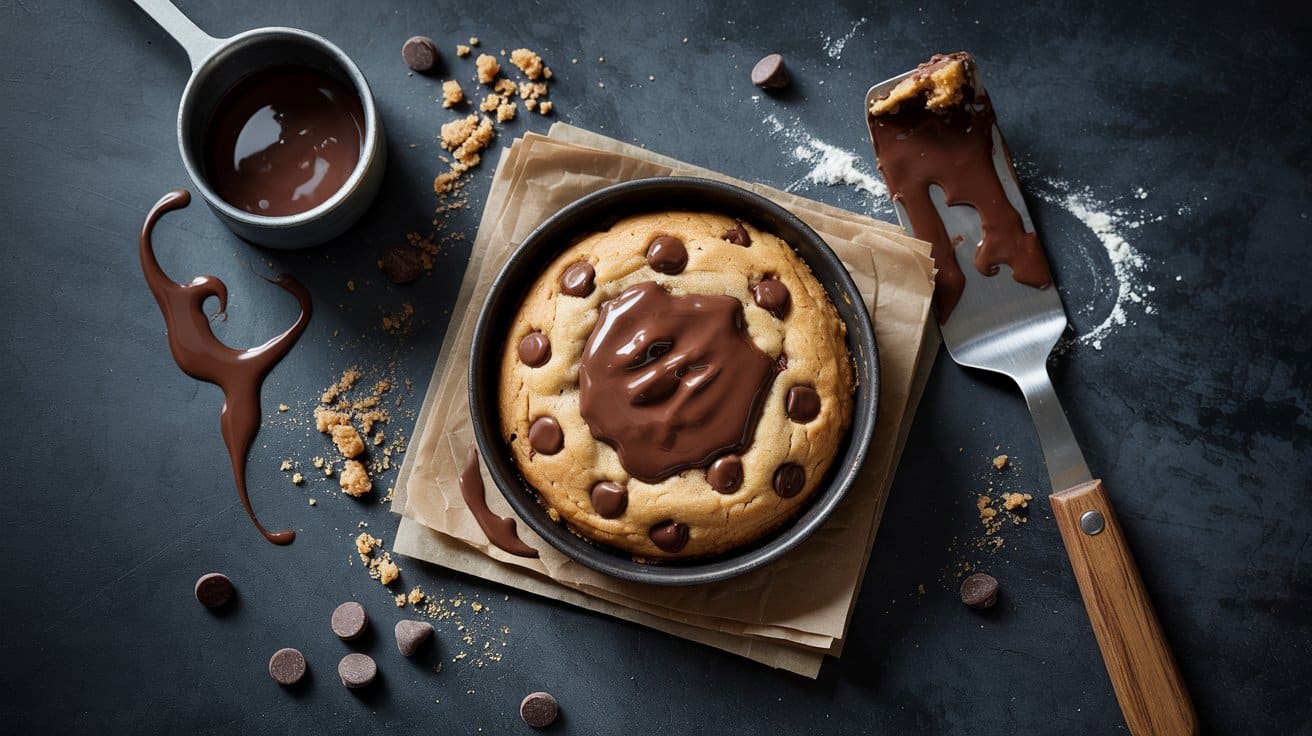
This single-serve cookie gives you warm, fresh-baked cookie satisfaction without baking a whole batch. It yields a soft, slightly gooey center and browned edges, making it great for a quick treat after dinner or a solo snack.
The method is simple and uses common pantry ingredients so you can bake one in about 15 minutes.
Why This Recipe Works
This recipe balances a small dough ratio for a soft center and quick bake time for fast results. You get the texture of a bakery-style cookie without extra fuss.
- Single-portion dough ratio - Ingredients are scaled so the dough bakes evenly in one small cookie and won't overcook while the center sets.
- Soft, gooey center - Using one egg yolk and modest flour keeps the interior tender and slightly molten after a short bake.
- Quick mixing method - You combine wet and dry components in two bowls for minimal equipment and fast prep.
- Bakes in one shape - Forming one 2.5-3 inch disc yields a nicely browned edge and a soft middle with a short baking time.
Ingredient Swap Ideas
Small swaps let you adjust flavor or dietary needs without changing the method. Use these to adapt the cookie while keeping the same texture.
- Unsalted butter - Use an equal amount of melted coconut oil for a dairy-free option; it keeps moisture and mouthfeel similar.
- Brown sugar - Replace with coconut sugar for a deeper, caramel-like note and a similar chewiness.
- Egg yolk - Use 1 tablespoon plain yogurt as a binder for an egg-free version; it keeps the dough moist.
- Semi-sweet chocolate chips - Swap for chopped dark or milk chocolate to adjust sweetness and melt quality.
Ingredients
- 3 tablespoons all-purpose flour - spooned and leveled.
- ⅛ teaspoon baking powder - for slight lift.
- Pinch salt - about 1/16 teaspoon.
- 1 tablespoon unsalted butter - melted and slightly cooled.
- 1 tablespoon brown sugar - packed.
- 1 tablespoon granulated sugar -.
- 1 large egg yolk - room temperature.
- ¼ teaspoon vanilla extract -.
- 2 tablespoons semi-sweet chocolate chips - or chopped chocolate.
Instructions
- Preheat the oven to 350°F and line a baking sheet with parchment paper.
- Whisk the flour, baking powder, and salt in a small bowl.
- In a separate bowl, mix melted butter with both sugars until combined, then stir in the egg yolk and vanilla.
- Add dry ingredients to the wet mixture and fold until just combined, then stir in the chocolate chips.
- Shape the dough into a 2.5-3 inch disk on the parchment and bake 10-12 minutes, until edges are set and the center is slightly soft.
- Let the cookie cool on the sheet 3-5 minutes before transferring to a plate to finish firming and serve warm.
14. Single-Serving Fruit Tart
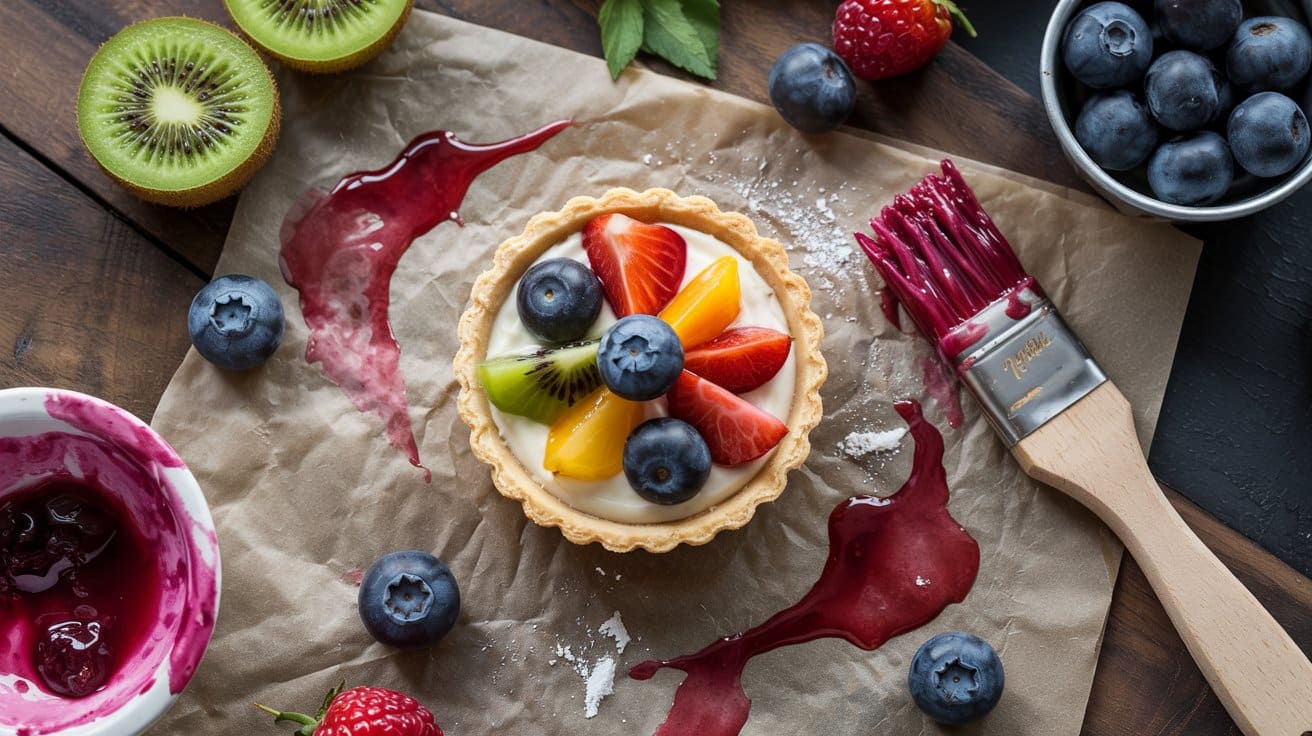
This small tart gives you a bright, fresh dessert that comes together quickly. The creamy filling and glossy fruit make each bite balanced and light.
Serve it after dinner or bring a single portion to a brunch for a pretty, personal treat.
For a quick read on ingredient categories, consult is an egg a fruit or vegetable explained.
Why This Recipe Works
This recipe is fast to assemble and highlights fresh fruit. The components are simple so you get clean, fresh flavors.
- Single-portion size - You avoid leftovers and can tailor the fruit to what's in season or your favorite combination.
- Light mascarpone filling - The filling is creamy but not overly sweet, so the fruit remains the star.
- Quick apricot glaze - A small warmed jam glaze gives shine and seals the fruit in place.
- No-rolling crust option - Using a pre-baked tart shell keeps the base crisp without extra prep or baking time.
Ingredient Swap Ideas
Swaps help you adapt for diet preferences or what's in your pantry. Choose substitutions that keep the same textures and sweetness level.
- Mascarpone - Use full-fat cream cheese blended with 1 tablespoon heavy cream for a similar texture and tang.
- Pre-baked 4-inch tart shell - Use a 4-inch graham cracker crust or a store-bought mini pie shell for the same crisp base.
- Apricot jam - Substitute apple jelly or neutral grape jelly and thin it the same way for a shiny glaze.
- Heavy cream - Use chilled coconut cream for a dairy-free version that still whips to soft peaks.
Ingredients
- 1 pre-baked 4-inch tart shell - ready to fill.
- 3 oz mascarpone cheese - softened.
- 2 tablespoon heavy cream - cold.
- 1 tablespoon powdered sugar - sifted.
- ½ teaspoon lemon zest - finely grated.
- ¼ teaspoon vanilla extract -.
- ½ cup mixed fresh fruit - sliced or halved; berries, kiwi, or stone fruit work well.
- 1 tablespoon apricot jam - strained if chunky.
- 1 teaspoon water - to thin jam.
Instructions
- Whip the mascarpone with powdered sugar, lemon zest, and vanilla until smooth using a spoon or small whisk.
- Whip the heavy cream to soft peaks and fold it into the mascarpone to lighten the filling.
- Spoon the filling into the tart shell and smooth the surface with the back of a spoon.
- Arrange the sliced fruit on top in a single layer.
- Warm the apricot jam with the water in a small microwave-safe bowl for 10-15 seconds or until runny, then brush it over the fruit to glaze.
- Chill the tart 10-15 minutes before serving to set the filling and glaze.
15. Mini S'mores Dip
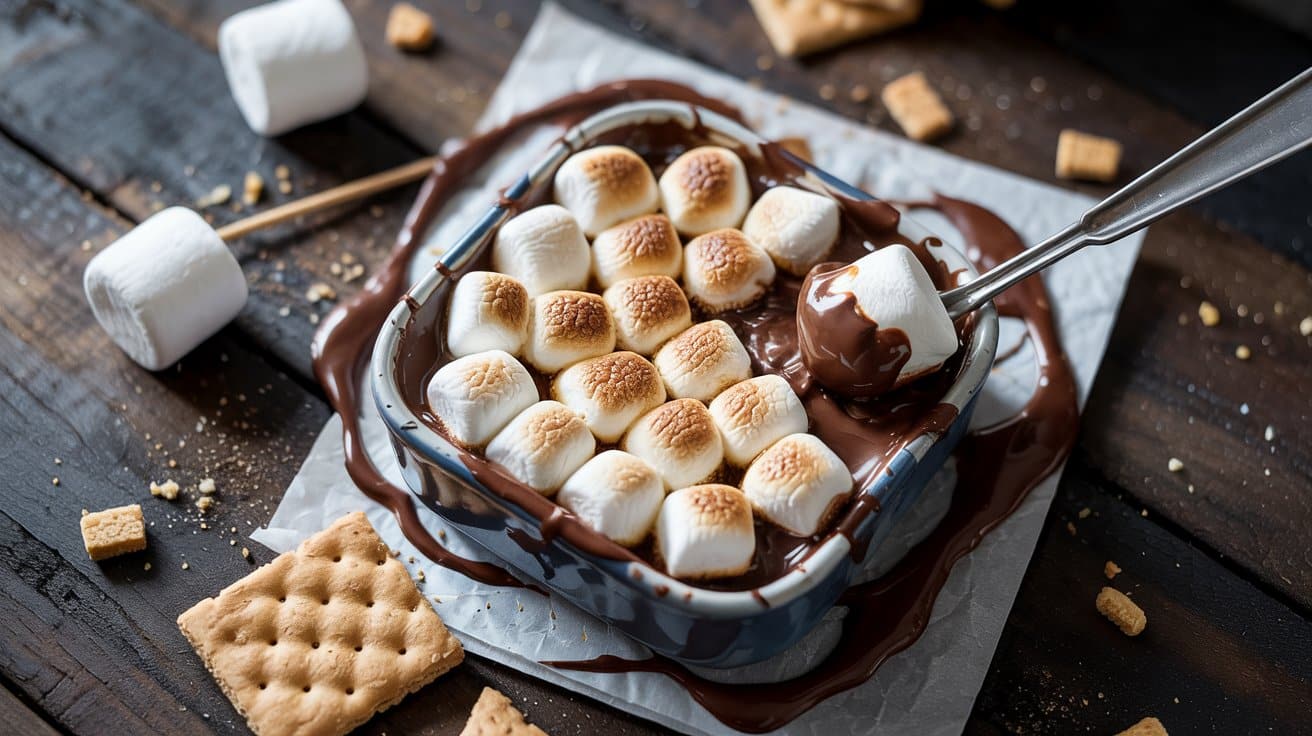
This mini version captures the toasted-marshmallow and melted-chocolate combo in small, shareable dishes. It's quick to pull together and tastes great warm straight from the oven, especially for casual gatherings or an after-dinner treat.
For fresh, crunchy dippable options that complement sweets, see vegan spring roll recipes for fresh crunch.
Why This Recipe Works
This recipe recreates classic s'mores flavor in controlled single servings. The broiler gives a fast toasted top while the chocolate beneath stays gooey.
- Individual ramekin portions - Each person gets a warm, personal dip that keeps marshmallows gooey without crowding a pan.
- Broiler-toasted marshmallows - High heat creates a browned, slightly crisp top that mimics campfire toasting in minutes.
- Melty chocolate base - Chocolate chips melt to a scoopable, glossy dip that clings to graham crackers.
- Fast hands-on time - Assembly and broiling take under 10 minutes, so you can serve warm quickly.
Ingredient Swap Ideas
Swaps help you adjust for diet, texture, or pantry limits while keeping the same method and flavor. Use these to change richness, dietary fit, or dipping options.
- Semi-sweet chocolate chips - Swap with chopped milk or dark chocolate for a smoother melt and stronger or creamier chocolate notes.
- Mini marshmallows - Swap with large marshmallows cut into pieces for the same toasted surface and gooey interior.
- Unsalted butter - Swap with coconut oil to make the recipe dairy-free and add a subtle tropical aroma.
- Graham crackers - Swap with sturdy pretzel sticks or digestive biscuits for different crunch and dipping ease.
Ingredients
- 1 ½ cups semi-sweet chocolate chips - for melting.
- 1 ½ cups mini marshmallows - for topping.
- 1 tablespoon unsalted butter - for greasing ramekins.
- 18 graham cracker squares - for dipping; about 3 per serving.
- Pinch kosher salt - to enhance chocolate flavor.
Instructions
- Preheat your oven broiler on high and move the rack to the upper third, about 6 inches from the heat source.
- Grease six 4-ounce ramekins with the butter and place them on a rimmed baking sheet.
- Divide the chocolate chips evenly among the ramekins and top each with an even layer of mini marshmallows.
- Broil until the marshmallows are golden and the chocolate beneath is melted, 1-3 minutes; watch constantly to avoid burning.
- Let the dips rest 1-2 minutes, then serve warm with graham crackers for dipping.
16. Mini Pumpkin Pie
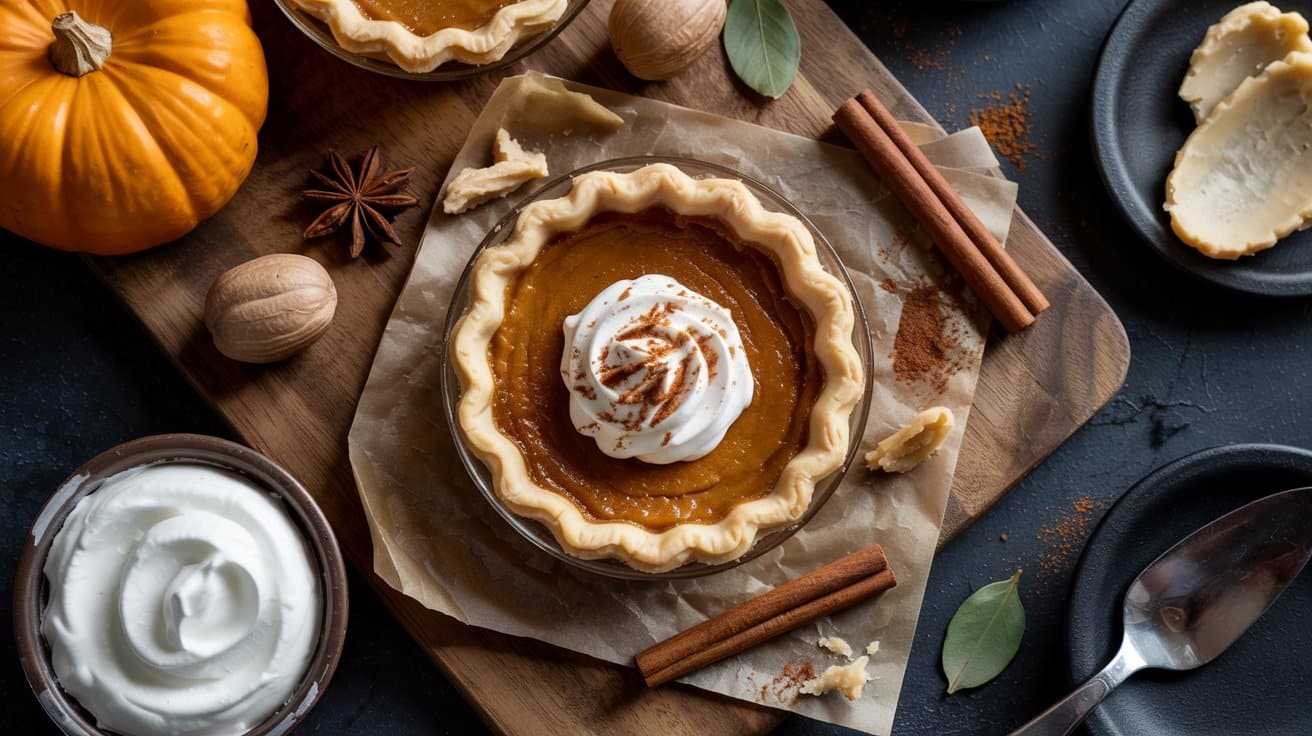
These single-serve pies give you all the warm spices and creamy pumpkin filling in a small, easy portion. They bake quickly and are ideal for fall gatherings or a simple dessert after a weeknight meal.
Why This Recipe Works
These minis deliver concentrated pumpkin flavor with a crisp, buttery edge. They finish faster than a full pie so you can serve them the same day.
- Small crusts bake evenly - Individual pans prevent soggy bottoms and give a flaky edge on every pie.
- Concentrated filling ratio - Less filling per tart means the center sets reliably without overbaking the crust.
- Quick chilling time - Small pies cool and firm up faster, so you can serve sooner.
- Portable single portions - Easy to plate or hand out at a gathering without cutting or slicing.
Ingredient Swap Ideas
Swaps help tailor sweetness, texture, or dietary needs without changing the method. Try these to suit your pantry or preferences.
light fruit desserts without added sugar pairs well with many small desserts for lighter options. melt-free desserts for hot days offers refreshing, no-melt ideas for warm-weather servings.
- Refrigerated pie crust - Use a graham cracker crust (about 1 ½ cups crumbs + 4 tablespoon melted butter) for a sweeter, crunchy base.
- Evaporated milk - Substitute half-and-half for a slightly richer filling and similar texture.
- Brown sugar - Replace with maple syrup (3 tbsp) for a pronounced autumn flavor and natural sweetness.
- Pumpkin puree - Use roasted, mashed pumpkin for fresher flavor; measure to the same volume to keep consistency.
Ingredients
- 1 package refrigerated pie crusts (2 crusts) - softened for rolling.
- 1 cup pumpkin puree - canned or homemade.
- ½ cup packed brown sugar - for sweetness and depth.
- 1 large egg - room temperature.
- ½ cup evaporated milk - for a smooth, creamy filling.
- 1 teaspoon pumpkin pie spice - or a mix of cinnamon, ginger, and nutmeg.
- ½ teaspoon vanilla extract - for balance.
- ⅛ teaspoon salt - to enhance flavor.
- Nonstick cooking spray - for greasing pans.
Instructions
- Preheat the oven to 375°F and lightly grease six 3-inch tart pans or a 12-cup muffin tin with nonstick spray.
- Roll the pie dough and cut six 3-inch rounds, then press each round into the prepared pans to form crusts.
- Whisk the pumpkin puree, brown sugar, egg, evaporated milk, pumpkin pie spice, vanilla, and salt until smooth.
- Spoon the filling into each crust, filling each to about three-quarters full.
- Bake for 20-25 minutes until the edges are set and the centers have a slight jiggle but are not liquid.
- Cool on a wire rack, then chill at least 30 minutes before serving to let the filling firm up.
Frequently Asked Questions
A good Small-Batch Desserts recipe balances flavor, texture, and ease of preparation. Look for clear instructions, manageable ingredient lists, and options you can adapt to what is already in your kitchen.
Yes. Many Small-Batch Desserts recipes are beginner-friendly and require only basic cooking skills.
Start with shorter ingredient lists and simple techniques before working up to more complex versions.
Olive oil, garlic, salt, basic spices, and an acid like lemon juice or vinegar cover most recipes. Stocking these reduces the need for special shopping trips for most variations.
Can these recipes be scaled up for meal prep?
Yes.
Most recipes in this style scale well for batch cooking.
Double or triple the base and store in portions. Sauces, grains, and roasted proteins are the easiest components to prep in advance.

Andrew Gray is a passionate food writer and recipe creator who built Gusto Meadow to celebrate delicious, approachable cooking. With years of experience in restaurants and catering, he brings a grounded, real-world understanding of flavors, technique, and what truly works in a home kitchen.
At Gusto Meadow, Andrew focuses on fresh, seasonal ingredients and simple methods that anyone can follow. His goal is to make cooking feel fun, doable, and rewarding — whether you’re preparing a quick weeknight dinner or exploring something new.