After a long day we often crave bold, comforting flavors that still feel a little fresh. These recipes bring bright spices, tangy sauces, and hearty textures that hit the spot.
We included quick soups, skillet dinners, sheet-pan meals, and salads that pack savory, sweet, or spicy notes. There are also easy one-pot pastas, saucy tacos, and a few clever twists that make simple ingredients crave-worthy.
These dishes deliver big flavor without long ingredient lists or fussy steps. We built them for busy weeknights, casual get-togethers, and evenings when we want something deeply satisfying with minimal cleanup.
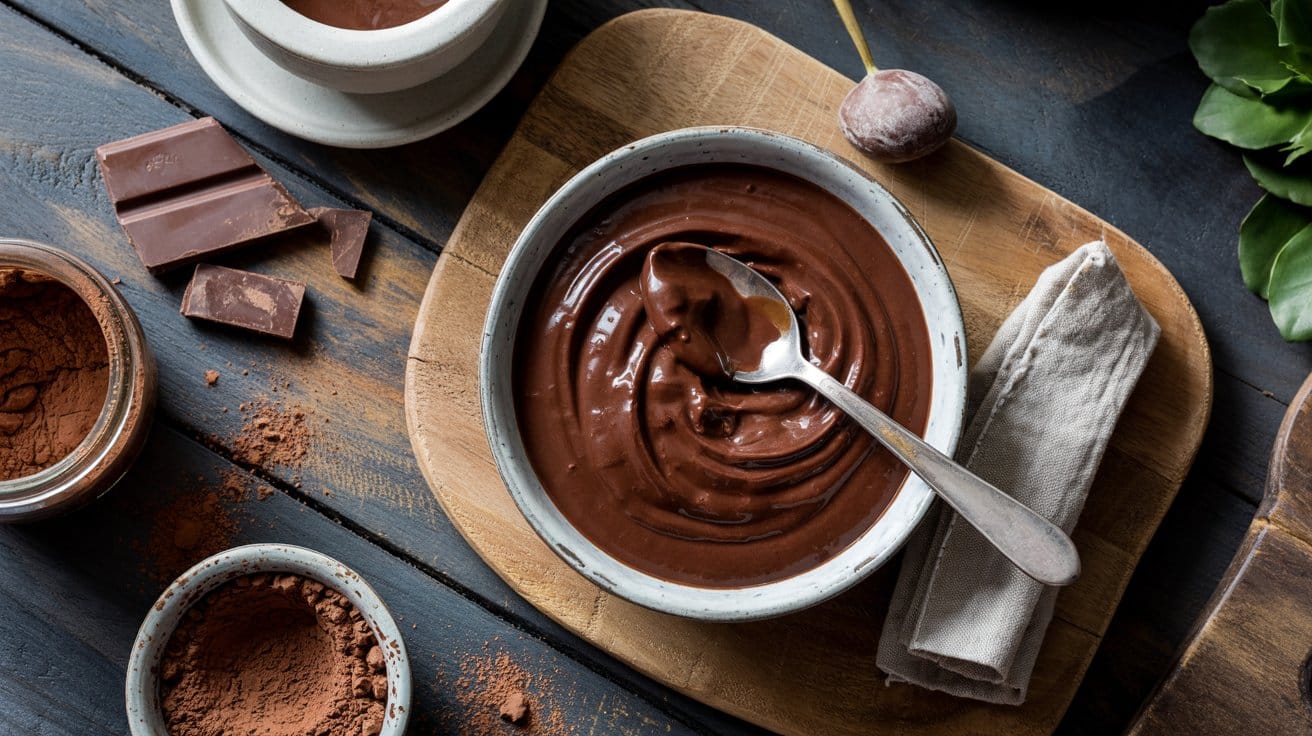
1. Stovetop Chocolate Pudding
This rich, creamy chocolate pudding comes together quickly on the stove using simple pantry staples. It has deep cocoa flavor and a silky texture that's lovely served warm or chilled after a weeknight meal or as a make-ahead dessert for guests.
Why This Recipe Works
It thickens on the stovetop in minutes for fast results. The texture is smooth and custard-like without needing eggs.
- Fast stovetop thickening - Cornstarch brings pudding to the right consistency quickly so you can serve it the same day.
- Deep cocoa profile - Cocoa powder plus a bit of butter gives pronounced chocolate flavor without excess sweetness.
- Silky, egg-free custard - The cornstarch-based method produces a smooth texture that holds when cooled.
- Flexible serving temperature - The pudding is pleasant warm for comfort or chilled for a firmer, spoonable dessert.
Ingredient Swap Ideas
Swaps help you adapt for diet, texture, or what's in your pantry - try options from low-carb breakfast ideas to kickstart your day for lighter mornings.
d they can simplify breakfasts, like 3-ingredient fruit smoothie recipes for simplicity on busy mornings.cluding ideas like tuna salad ideas for bread-free meals that use pantry staples.- Whole milk - Use 2% for a lighter result or unsweetened oat milk for a dairy-free but still creamy finish.
- Granulated sugar - Swap coconut sugar or light brown sugar for a deeper, caramel-like note.
- Cornstarch - Use arrowroot starch 1:1 for a glossier set; add it near the end and avoid prolonged boiling.
- Unsweetened cocoa powder - Replace with 2 ounces finely chopped dark chocolate for a richer, more intense chocolate pudding.
Ingredients
- 2 ½ cups whole milk - for the pudding.
- ⅓ cup granulated sugar - to sweeten.
- ¼ cup unsweetened cocoa powder - sifted if lumpy.
- 3 tablespoons cornstarch - for thickening.
- ⅛ teaspoon salt - to brighten the chocolate.
- 2 tablespoons unsalted butter - for richness and sheen.
- 1 teaspoon vanilla extract - stirred in off heat.
Instructions
- Whisk the sugar, cocoa powder, cornstarch, and salt together in a medium saucepan until even.
- Gradually whisk in the milk until the mixture is completely smooth.
- Cook over medium heat, stirring constantly, until the mixture thickens and starts to bubble; simmer while stirring for 1 minute (about 5-7 minutes total).
- Remove from heat and stir in the butter and vanilla until melted and smooth.
- Pour into serving dishes and press plastic wrap onto the surface to prevent a skin, then cool to room temperature and refrigerate at least 2 hours, or serve warm.
2. One-Pot Rice Pudding
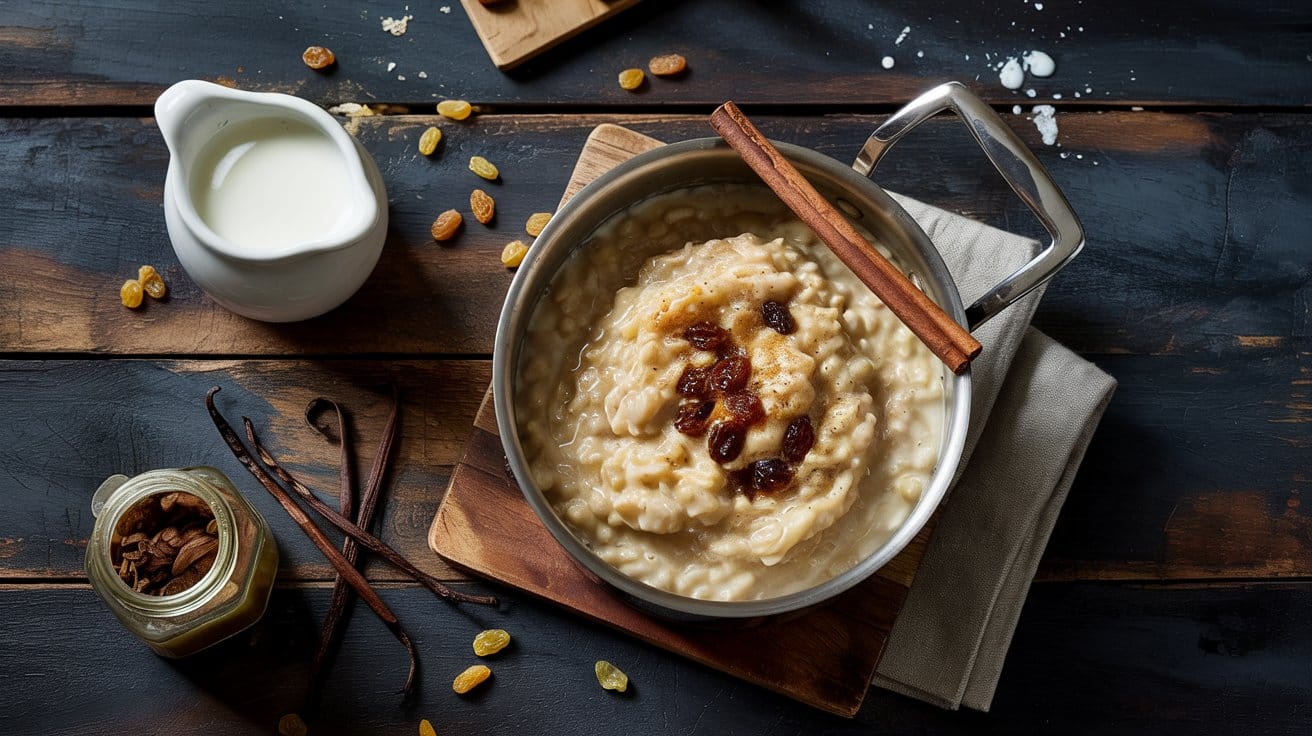
This creamy stove-top pudding uses pantry staples to make a silky, comforting dessert you can serve warm or chilled. It develops a rich texture from short-grain rice and gentle simmering, with a subtle cinnamon aroma.
Make it after dinner, for a cozy breakfast, or whenever you want an easy sweet finish - try alongside savory bowls like low-carb cauliflower rice dinner bowls to stretch a meal.
Why This Recipe Works
This method yields reliably creamy pudding with minimal stirring. Cooking everything in one pot keeps the texture consistent and cleanup small.
- Creamy starch release - Short-grain rice releases starch as it simmers, producing a thick, spoonable pudding that firms slightly as it cools.
- Even gentle cooking - Simmering on low prevents scorching and keeps the milk from separating for a smooth result.
- Subtle spice infusion - A cinnamon stick flavors the milk evenly without leaving gritty spice bits.
- Flexible serving temperature - The pudding is delicious warm straight from the pot or chilled after a few hours in the refrigerator.
Ingredient Swap Ideas
Swaps let you match the recipe to dietary needs or what you have on hand while keeping the basic method intact.
- Whole milk - Use 3 cups milk plus 1 cup light cream for extra richness, or 4 cups unsweetened almond milk for a lighter, dairy-free option; expect a looser texture with plant milk.
- Short-grain rice - Substitute medium-grain rice or arborio if needed; the pudding will still thicken but may be slightly less creamy.
- Granulated sugar - Swap for ⅓ cup maple syrup or honey; reduce simmer time slightly and taste for sweetness as liquid affects final concentration.
- Cinnamon stick - Use ½ teaspoon ground cinnamon stirred in near the end, or try 3-4 crushed green cardamom pods for a floral note.
Ingredients
- 1 cup short-grain rice (Arborio or sushi rice) - rinsed.
- 4 cups whole milk - for cooking.
- ½ cup granulated sugar - adjust to taste.
- 1 cinnamon stick - or ½ teaspoon ground cinnamon.
- Pinch of salt - to balance flavors.
- 1 teaspoon vanilla extract - added off heat.
- 1 tablespoon unsalted butter - stirred in at the end.
Instructions
- Combine the rinsed rice, milk, sugar, cinnamon stick, and pinch of salt in a medium saucepan and bring to a gentle simmer over medium heat, stirring once or twice as it warms.
- Reduce heat to low and simmer uncovered, stirring every 5 minutes to prevent sticking, until the rice is tender and the mixture is thick and creamy, about 25-35 minutes.
- Remove the pan from heat, take out the cinnamon stick, and stir in the butter and vanilla extract; taste and add a bit more sugar if needed.
- Let the pudding rest for 5 minutes to thicken slightly, then serve warm spooned into bowls.
- To serve chilled, transfer to a shallow dish, cover, and refrigerate at least 2 hours before serving; stir gently before plating.
3. Pineapple Upside Down Cake on the Stove
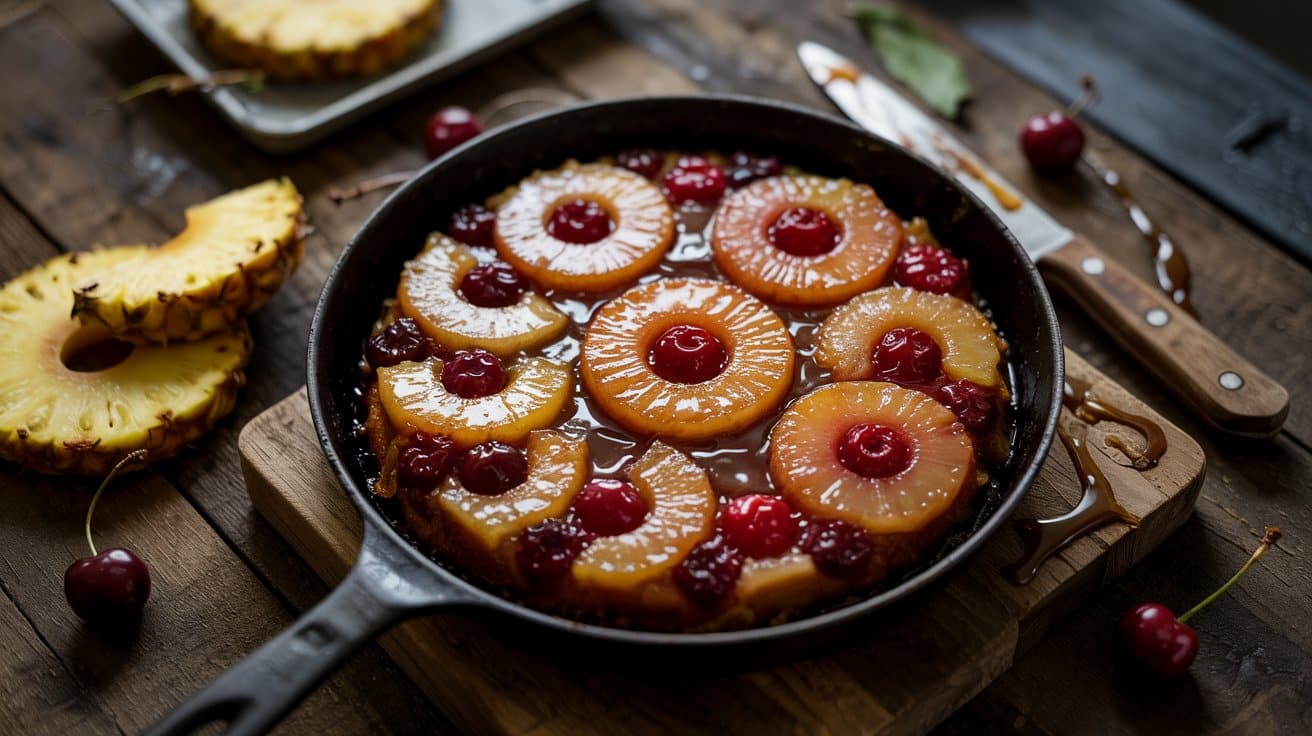
This stove-top take gives the classic a caramelized top and warm pineapple flavor without using an oven. It cooks in a single heavy skillet and is best served warm with a scoop of ice cream or a dollop of whipped cream.
The result is sticky-sweet, slightly tangy, and quick enough for a weeknight dessert.
Why This Recipe Works
This method creates a caramel glaze and tender cake using just a skillet and low heat. It shortens bake time while keeping the pineapple glossy and flavorful.
- Skillet caramel crust - Brown sugar and butter form a sticky glaze that caramelizes under the pineapple.
- Steam-finished sponge - Covering the skillet traps steam so the cake cooks through without burning.
- Golden pineapple rings - Slices soften and concentrate sweetness while the edges brown slightly.
- Quick stovetop bake - You get a warm upside-down cake in under 30 minutes from skillet to plate.
Ingredient Swap Ideas
Small swaps let you adjust sweetness, dietary needs, or pantry limits without changing the stovetop method. Choose alternatives that behave like the originals in batter and caramel.
- Brown sugar - Use coconut sugar for a deeper, slightly nutty caramel flavor and a less-refined option.
- Unsalted butter - Swap with coconut oil for a dairy-free glaze that still melts and browns.
- All-purpose flour - Use a 1-to-1 gluten-free baking blend to keep the same texture in the batter.
- Milk - Replace with oat or almond milk for a dairy-free batter that still hydrates and browns.
Ingredients
- ¼ cup unsalted butter - divided.
- ½ cup packed brown sugar - for topping.
- 1 can (20 oz) pineapple slices - drained; reserve ¼ cup juice.
- 8 maraschino cherries - optional for centers.
- 1 cup all-purpose flour -.
- 1 teaspoon baking powder -.
- ¼ teaspoon salt -.
- ½ cup granulated sugar -.
- 1 large egg - room temperature.
- ¼ cup milk - room temperature.
- ¼ cup reserved pineapple juice - from the can.
- ¼ cup vegetable oil - or neutral oil.
- 1 teaspoon vanilla extract -.
Instructions
- Melt 2 tablespoons butter in a 10-inch heavy skillet over medium heat, then add brown sugar and stir until bubbling, about 2 minutes.
- Arrange pineapple slices in the caramel and place cherries in the centers; lower heat to very low.
- Whisk flour, baking powder, salt, and granulated sugar in a bowl until combined.
- In another bowl, whisk the egg, milk, reserved pineapple juice, oil, and vanilla until smooth.
- Stir wet ingredients into dry just until combined, pour batter over the arranged pineapple, spread gently, then cover and cook on the lowest heat for 18-22 minutes until the top is set and a toothpick comes out clean.
- Remove from heat and let rest 5 minutes, then invert onto a plate and serve warm.
4. Stovetop Shortbread Cookies
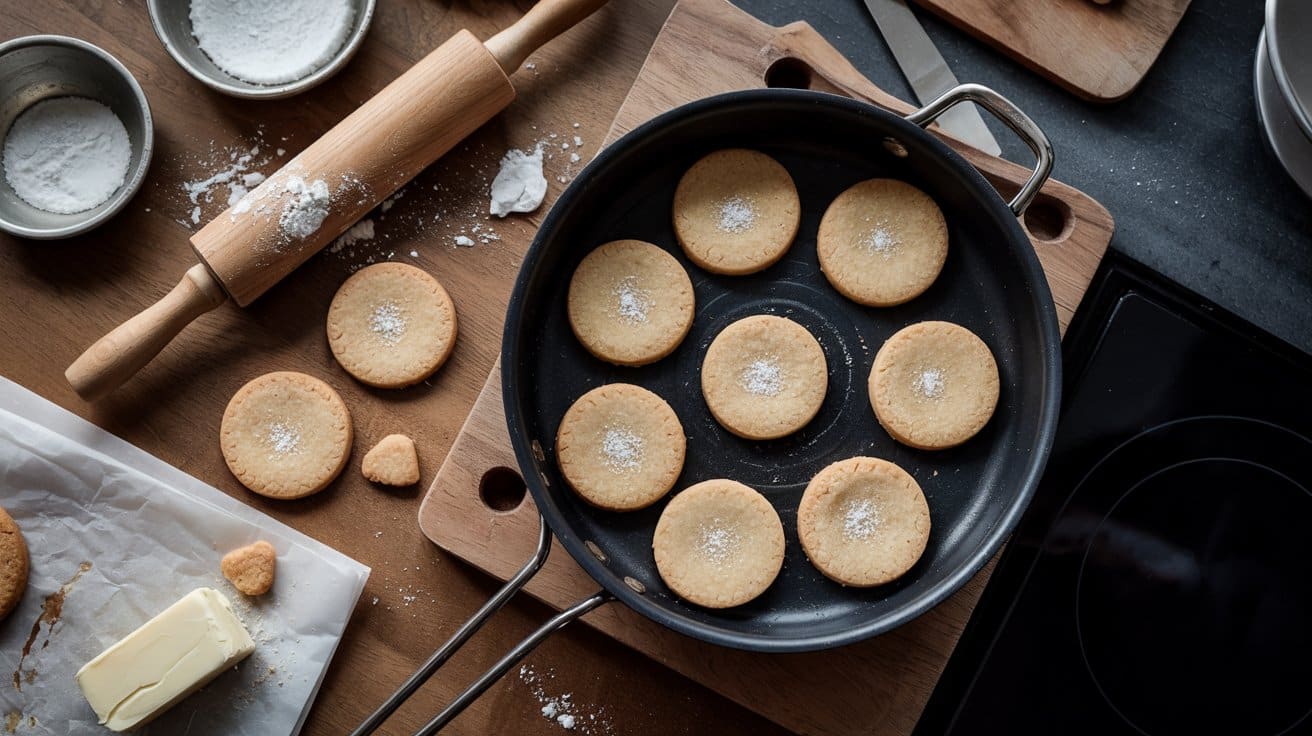
We make rich, buttery shortbread in a single skillet so you can skip the oven and cleanup. The cookies are tender with crisp edges and a nutty butter flavor, ideal for tea time or a simple dessert tray.
Why This Recipe Works
This method keeps everything in one pan and gives reliably tender, sandy shortbread texture. Cooking slowly on low heat firms the dough without browning it too quickly.
- One-pan mixing and cooking - You combine, press, and cook the dough in the same skillet to save steps and dishes.
- Low-heat setting for even texture - Gentle stovetop heat lets the shortbread set through without burning the bottom.
- Simple ingredient ratio - A classic butter-to-flour balance produces the crumbly, melt-in-your-mouth bite shortbread is known for.
- Quick ready time - Hands-on time is short and total cook-plus-rest time fits into an afternoon snack schedule.
Ingredient Swap Ideas
Swaps help adapt to diet needs or pantry shortages while keeping the same stovetop method. Try these options to change texture or accommodate preferences.
- Unsalted butter - Use a plant-based block butter measured the same way for a dairy-free version; flavor will be slightly different but the technique works.
- All-purpose flour - Try a cup-for-cup gluten-free flour blend to make the cookies gluten-free; expect a slightly crumblier texture.
- Granulated sugar - Swap for powdered sugar for a finer, softer crumb; sift the powdered sugar before mixing to avoid lumps.
- Vanilla extract - Use almond extract at half the amount for a nuttier profile that pairs well with tea.
Ingredients
- 1 cup (2 sticks) unsalted butter - softened.
- ½ cup granulated sugar.
- 2 cups all-purpose flour.
- ¼ teaspoon fine salt.
- 1 teaspoon vanilla extract.
Instructions
- Melt the butter in a 10-inch heavy skillet over low heat until fully liquid, about 2 minutes, then stir in the sugar until combined.
- Remove the skillet from heat and stir in the vanilla, then add the flour and salt and mix with a spatula until a soft dough forms; it should hold together when pressed.
- Press the dough evenly into the skillet with the back of a spatula to about ½-inch thickness, smoothing the top.
- Cover the skillet with a lid and cook over the lowest possible heat for 18-22 minutes, checking that the bottom does not darken; the edges should feel set and the center slightly firm.
- Turn off the heat and let the shortbread cool in the skillet 10 minutes, then transfer to a rack to cool completely before cutting into wedges or squares.
5. Nutella and Banana Oatmeal
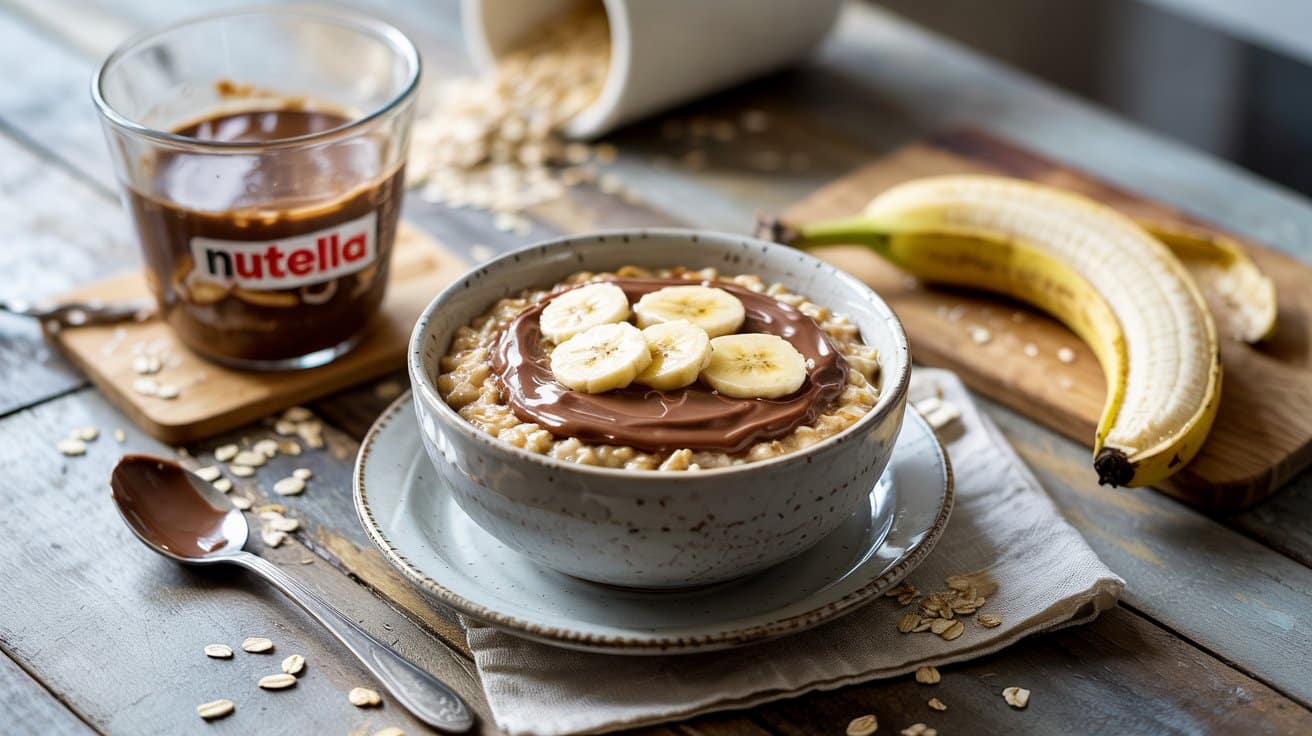
Warm, creamy oats meet mashed banana and a chocolate-hazelnut swirl for a cozy breakfast or simple dessert - or, if skipping bananas, try banana-free thick and creamy smoothie recipes instead.
Why This Recipe Works
This combination gives creamy texture and a bright banana note. It cooks quickly on the stovetop for fast serving.
- Chocolate-hazelnut swirl - A spoonful of the spread melts into hot oats to create a smooth, decadent ribbon of flavor.
- Mashed ripe banana - The banana breaks down into the porridge and naturally sweetens without extra sugar.
- One-pot creaminess - Cooking the oats and banana together produces thick, comforting oats with minimal stirring.
- Custom topping finish - Adding chopped nuts or extra spread at the end keeps some crunch and fresh contrast.
Ingredient Swap Ideas
Swaps let you adapt for dairy preferences or pantry limits while keeping the same texture and taste balance.
- Milk - Use almond milk or oat milk for a dairy-free version that still yields creamy oats.
- Rolled oats - Swap for quick oats and reduce cooking time by about 1-2 minutes for a softer texture.
- Nutella (chocolate-hazelnut spread) - Use peanut butter mixed with a teaspoon of cocoa powder to retain a nutty chocolate note.
- Banana - Use ½ cup unsweetened applesauce if you need lower banana intensity while preserving moisture.
Ingredients
- 1 cup rolled oats - old-fashioned oats for texture.
- 2 cups milk - dairy or plant-based for cooking.
- 1 large ripe banana - mashed with a fork.
- 3 tablespoons chocolate-hazelnut spread - for swirling.
- ¼ teaspoon salt - to balance sweetness.
- ½ teaspoon ground cinnamon - optional for warmth.
- 2 tablespoons chopped hazelnuts - for garnish; optional.
Instructions
- Combine oats, milk, salt, and cinnamon in a small saucepan over medium heat and bring to a gentle simmer.
- Stir in the mashed banana and cook, stirring occasionally, until the oats are thick and creamy, about 5-7 minutes.
- Remove the pan from the heat and stir half of the chocolate-hazelnut spread into the oats until mostly combined.
- Spoon the oatmeal into bowls and add the remaining spread on top in dollops, swirling slightly with a spoon for ribbons of chocolate.
- Sprinkle chopped hazelnuts over each bowl for crunch and serve warm.
6. One-Pot Apple Crisp

A single skillet turns tart apples and an oat crumble into a warm, comforting dessert you can make any weeknight. You get soft, cinnamon-spiced fruit topped with a golden oat crust.
Serve it warm for dessert or at a casual gathering - it pairs nicely with crisp cucumber salad recipes to refresh meals for lighter summer menus.
Why This Recipe Works
You get tender, spiced apples and a textured oat topping in one pan. The method keeps prep simple and cleanup minimal.
- Single-skillet finish - You cook the filling and bake the topping in an ovenproof pan so there's only one dish to wash.
- Soft, spiced apple filling - Apples simmer with sugar, lemon, and cinnamon until they're tender and slightly saucy.
- Oat-based crumble topping - Rolled oats mixed with flour and brown sugar bake into a crunchy, golden crust.
- Pan-to-table presentation - The skillet goes straight from the oven to the table for easy serving.
Ingredient Swap Ideas
Swaps let you adjust texture, dietary needs, or use what you already have. Choose substitutions that keep the apple filling moist and the topping bindable.
- Rolled oats - Use quick oats for a finer, less chewy topping; the topping will set more uniformly.
- All-purpose flour - Swap with whole-wheat pastry flour for a nuttier taste and similar structure.
- Brown sugar - Replace with coconut sugar for a deeper caramel note and lower moisture.
- Unsalted butter - Use solid coconut oil in the same amount for a dairy-free version that still binds the oats.
Ingredients
- 6 cups apples (about 5 medium) - peeled, cored, and sliced.
- 2 tablespoons unsalted butter - for cooking apples.
- ¼ cup granulated sugar - for the apple filling.
- 1 tablespoon lemon juice - brightens the apples.
- 1 teaspoon ground cinnamon - for the apple filling.
- ⅛ teaspoon ground nutmeg - for warmth.
- 1 cup rolled oats - old-fashioned oats.
- ¾ cup all-purpose flour - for the topping.
- ½ cup packed brown sugar - for the topping.
- ¼ teaspoon salt - balances sweetness.
- 6 tablespoons unsalted butter - melted for the topping.
Instructions
- Preheat the oven to 375°F and place a rack in the middle position.
- Melt 2 tablespoons butter in a 10-inch ovenproof skillet over medium heat; add apples, ¼ cup granulated sugar, 1 tablespoon lemon juice, 1 teaspoon cinnamon, and ⅛ teaspoon nutmeg, and cook 8-10 minutes until apples begin to soften.
- In a bowl, stir together 1 cup rolled oats, ¾ cup flour, ½ cup brown sugar, and ¼ teaspoon salt, then mix in 6 tablespoons melted butter until the mixture holds together in coarse crumbs.
- Evenly sprinkle the topping over the apples and gently press it down, then bake uncovered 20-25 minutes until the topping is golden and the filling is bubbling at the edges.
- Let the crisp rest 10 minutes before serving warm so the filling sets.
7. Stovetop Cheesecake
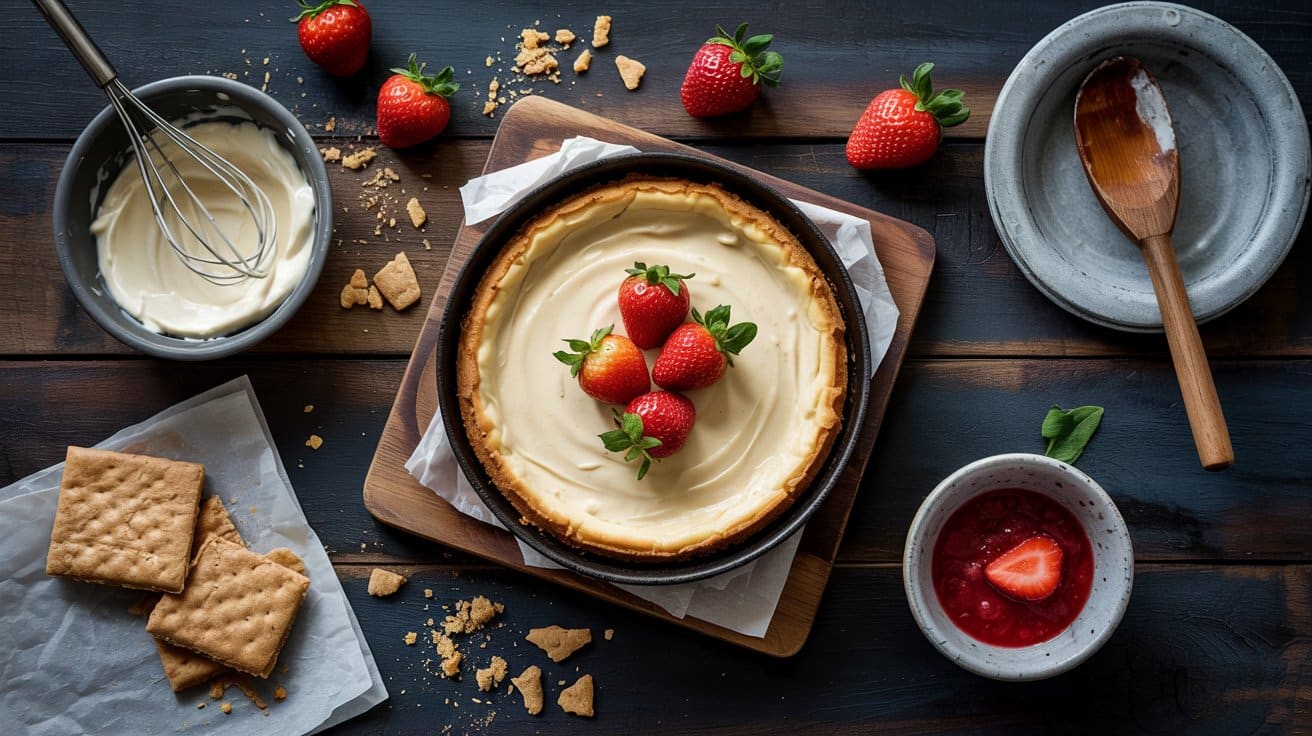
This quick stovetop method gives you a silky, set cheesecake without turning on the oven. It's bright with lemon and smooth from sour cream, making it a great make-ahead dessert for warm evenings or small gatherings.
You'll finish it in under 15 minutes on the stove, then chill until ready to serve.
Why This Recipe Works
This technique builds a custard-style filling on gentle heat for a very creamy texture. It avoids baking while still giving a firm, sliceable result after chilling.
- Gentle stovetop thickening - Cooking the filling slowly prevents graininess and yields a smooth, custard-like texture.
- Sturdy pressed crust - Cold-set graham crumbs with melted butter create a firm base without baking.
- Cornstarch stability - A bit of cornstarch helps the filling set reliably after chilling.
- Bright lemon finish - Lemon juice and zest cut the richness and keep the flavor lively when served chilled.
Ingredient Swap Ideas
Swaps help you adapt the recipe for what you have or dietary needs while keeping the same method and texture.
- Cream cheese - Use Neufchâtel or a blend of cream cheese and mascarpone for a slightly lighter or richer mouthfeel.
- Graham cracker crumbs - Substitute crushed digestive biscuits or vanilla wafer crumbs for a similar sweetness and structure.
- Sour cream - Replace with plain Greek yogurt for tang and a bit more protein while maintaining creaminess.
- Cornstarch - Use 1 tablespoon arrowroot powder for a clear, glossy set if you prefer a non-GMO alternative.
Ingredients
- 1 ½ cups graham cracker crumbs - finely crushed.
- 6 tablespoons unsalted butter - melted.
- 16 ounces cream cheese - softened to room temperature.
- ⅔ cup granulated sugar - for the filling.
- 2 tablespoons cornstarch - sifted.
- 2 large eggs - lightly beaten.
- ½ cup whole milk - room temperature.
- ½ cup sour cream - full-fat for best texture.
- 1 tablespoon lemon juice - freshly squeezed.
- 1 teaspoon vanilla extract - pure.
- Pinch of salt - to balance flavors.
Instructions
- Make the crust by mixing the graham crumbs and melted butter, then press into an 8-inch springform pan and chill 10 minutes.
- Whisk cream cheese, sugar, and cornstarch in a medium saucepan over low heat until smooth and slightly warm, about 4 minutes.
- Temper the eggs by whisking a few tablespoons of the hot mixture into the beaten eggs, then return the eggs to the pan and cook on low, stirring, until the mixture thickens and coats the back of a spoon, about 3-5 minutes.
- Remove from heat and stir in the milk, sour cream, lemon juice, vanilla, and a pinch of salt until fully combined.
- Pour the filling over the chilled crust, smooth the surface, then chill at least 4 hours or overnight until firm before slicing and serving.
8. Chocolate Lava Cake
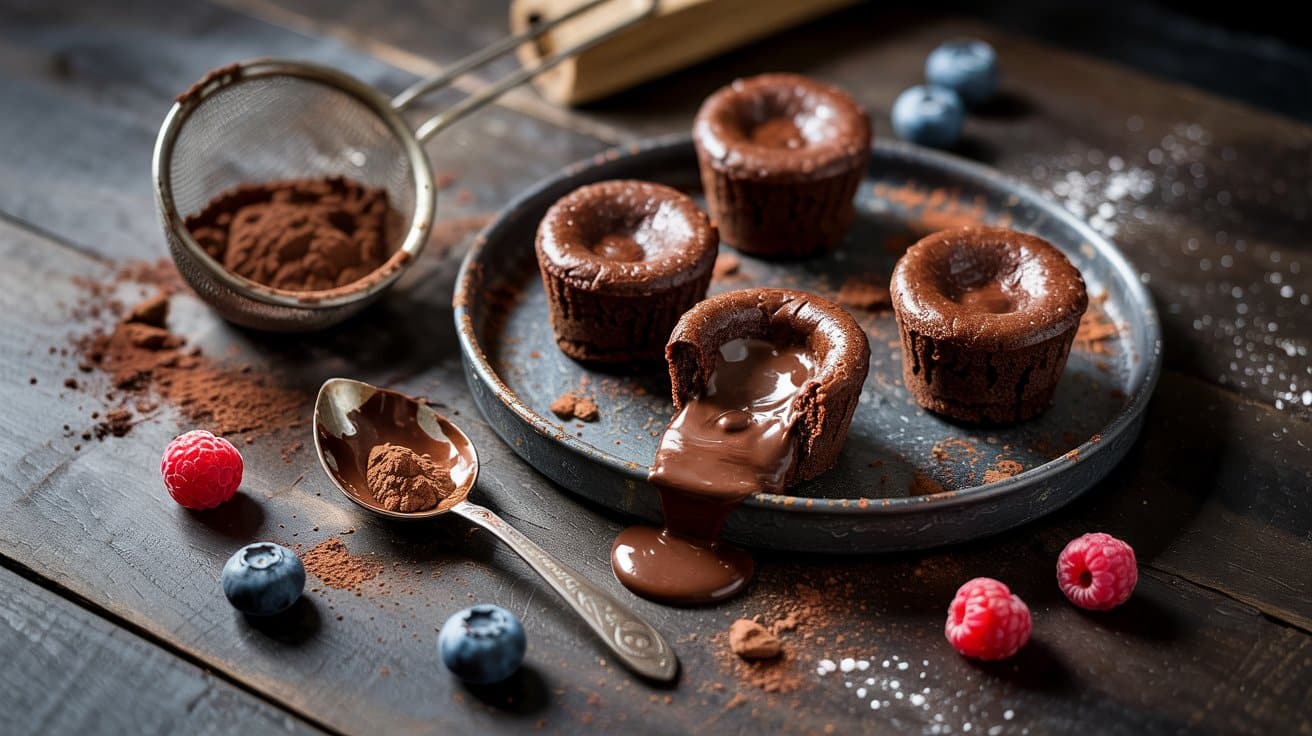
This stovetop version gives you a warm cake exterior with a molten chocolate center in under 30 minutes. You can serve it straight from the ramekin with vanilla ice cream or fresh berries for an easy after-dinner dessert.
Why This Recipe Works
This method creates a tender cake with a flowing center without using an oven. The water-bath steaming controls temperature so the center stays gooey while the edges set.
- Bain-marie steam finish - The water bath cooks the ramekins gently so the edges set while the center remains molten.
- Double-boiler chocolate melt - Melting chocolate with butter over simmering water prevents scorching and keeps the chocolate glossy.
- Extra yolk richness - Adding yolks gives a custardy texture that helps the center stay fluid.
- Minimal flour folding - Folding flour last preserves lift and yields a soft, tender crumb.
Ingredient Swap Ideas
Swaps help you adjust for diet or use what you have while keeping the molten center and texture intact.
- Bittersweet chocolate - Use semisweet chocolate of similar cocoa percentage to reduce intensity while preserving melt.
- Unsalted butter - Use equal coconut oil for a dairy-free option; expect a mild coconut aroma.
- All-purpose flour - Use a 1:1 gluten-free flour blend to make the cakes gluten-free without changing the method.
- Granulated sugar - Use coconut sugar or light brown sugar for a deeper caramel note while keeping structure the same.
Ingredients
- 4 oz bittersweet chocolate - chopped.
- ½ cup (1 stick) unsalted butter - cubed.
- 2 large eggs - room temperature.
- 2 large egg yolks - room temperature.
- ⅓ cup granulated sugar -.
- ¼ cup all-purpose flour - sifted.
- ⅛ teaspoon salt -.
- 1 teaspoon vanilla extract -.
- Butter for greasing - softened.
Instructions
- Melt the chopped chocolate and butter in a heatproof bowl set over simmering water, stirring until smooth, then remove from heat and cool slightly.
- Whisk the eggs, egg yolks, and sugar until pale and slightly thick, about 2-3 minutes, then stir in the vanilla.
- Fold the chocolate mixture into the egg mixture until combined, then fold in the flour and salt just until mixed.
- Grease four 6-ounce ramekins with butter and dust with cocoa or flour, then divide the batter evenly among them.
- Place the ramekins in a wide skillet on a trivet or folded towel, add hot water to reach halfway up the ramekins, cover, and simmer over low heat until edges are set and centers jiggle slightly, about 10-14 minutes.
- Remove ramekins from the water, rest 1 minute, run a knife around the edges, invert onto plates, and serve immediately.
9. Coconut Macaroons
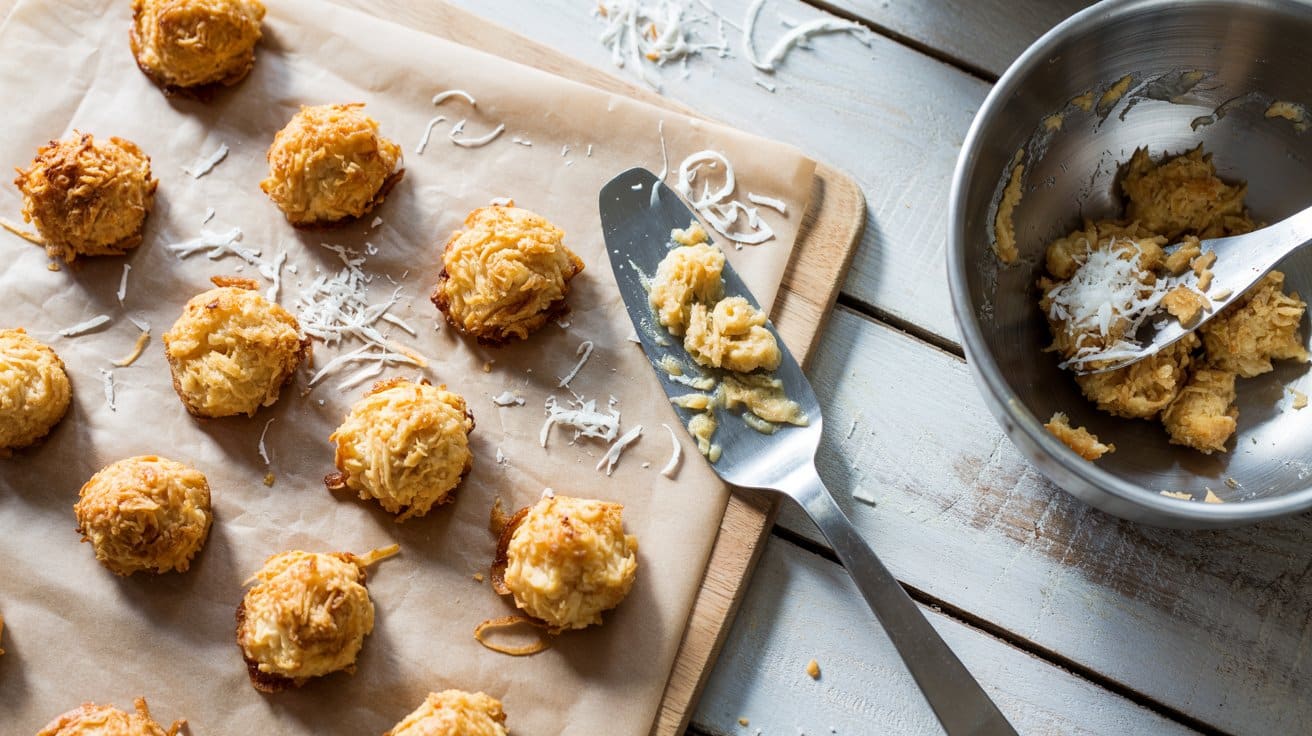
These chewy coconut macaroons are quick to pull together and bake in under 20 minutes. They give you a crisp, golden edge with a soft, moist center that pairs well with tea or as a small dessert after dinner.
The flavor is toasted-sweet coconut with a gentle vanilla note, and you can serve them plain or dipped in chocolate for a small treat.
Why This Recipe Works
These cookies deliver dependable chew and simple technique. You can make a batch from pantry staples with very little hands-on time.
- Chewy coconut center - A high coconut-to-binder ratio creates a moist, dense interior that holds shape while baking.
- Golden, crisp edges - Short baking time at moderate heat produces browned edges without drying the middle.
- Minimal ingredients - A few common pantry items give consistent results and easy shopping.
- Chocolate-dip option - Melting chocolate and dipping the bottoms adds a rich contrast without extra baking steps.
Ingredient Swap Ideas
Swaps let you adjust sweetness, texture, or dietary needs without changing the basic method. Use these to tweak taste or pantry limits.
- Sweetened shredded coconut - Swap with unsweetened shredded coconut plus ⅓ cup granulated sugar to retain sweetness and chew.
- Sweetened condensed milk - Swap with 1 cup coconut cream plus ⅓ cup maple syrup for a dairy-free option while keeping moisture.
- Vanilla extract - Swap with ½ teaspoon almond extract for a nutty flavor that complements coconut.
- Semisweet chocolate - Swap with dark or milk chocolate depending on preference; each melts smoothly for dipping.
Ingredients
- 14 oz sweetened condensed milk - one can.
- 4 cups sweetened shredded coconut - packed.
- 1 teaspoon vanilla extract - for flavor.
- ¼ teaspoon salt - balances sweetness.
- 4 oz semisweet chocolate - roughly chopped for melting (optional).
Instructions
- Preheat your oven to 325°F and line a baking sheet with parchment paper.
- Stir the condensed milk, vanilla, and salt in a bowl until combined.
- Add the shredded coconut and mix until all the coconut is coated and holds together.
- Drop heaping tablespoonfuls onto the sheet, spacing them about 1 inch apart.
- Bake 15-20 minutes until edges are golden; cool on the sheet 10 minutes, then transfer to a rack and dip bottoms in melted chocolate if using.
10. Caramel Sauce
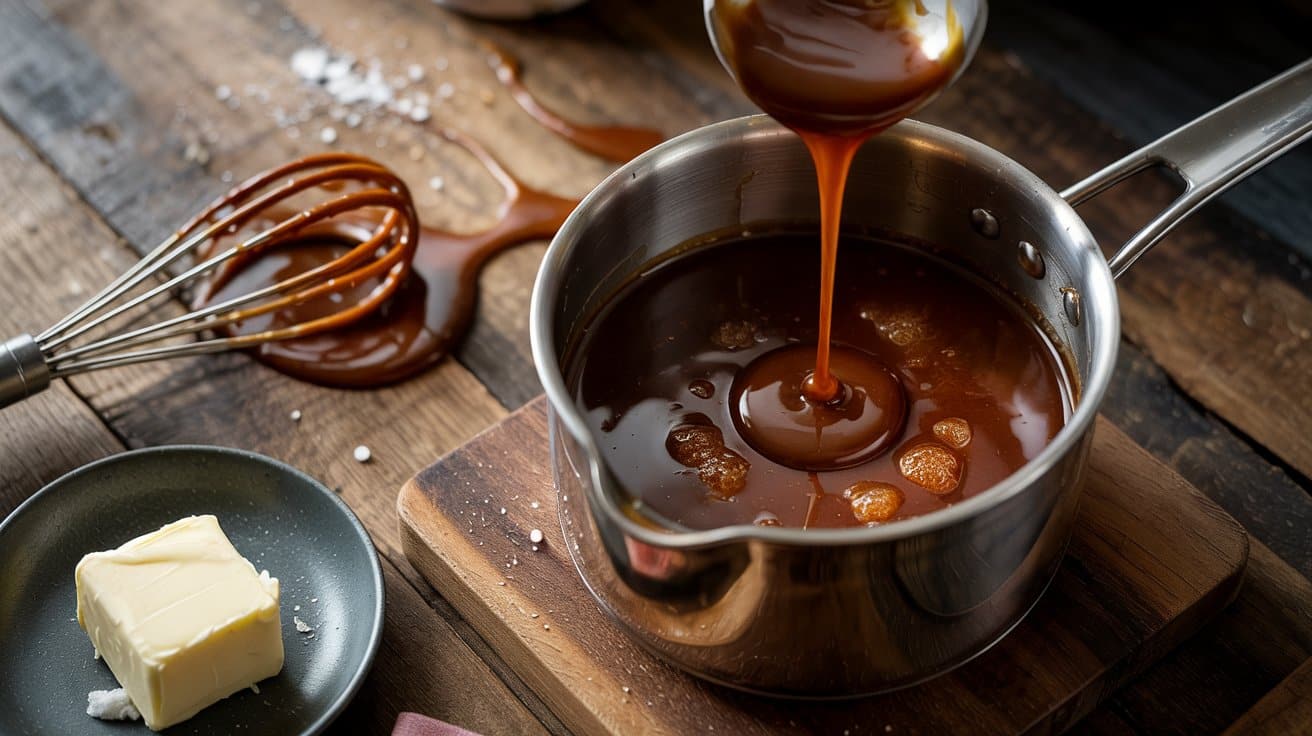
This rich, buttery sauce is made on the stovetop and gives a glossy, pourable finish that goes well with ice cream, fruit, pancakes, and cakes. It balances deep toffee notes with a touch of salt and vanilla, and you can have it ready in about 10 minutes.
Why This Recipe Works
It yields a smooth, glossy sauce with clear toffee flavor and a quick finish. The method gives you good control over color and texture.
- Visible color cue - You can watch the sugar darken to deep amber so the sauce develops warm, complex notes without burning.
- Butter-first emulsion - Adding butter before cream creates a silky, cohesive texture that carries flavor across desserts.
- Fast stovetop timing - The whole process takes roughly 10 minutes, which is convenient for last-minute drizzling.
- Fridge-friendly storage - It thickens as it cools and reheats smoothly, so you can make it ahead and reuse it for several treats.
Ingredient Swap Ideas
Swaps help adapt the sauce for diet choices or pantry limits while keeping the same method and result. Use the swaps below to adjust richness, sweetness, or flavor.
- Heavy cream - Use half-and-half for a lighter, thinner sauce that still coats desserts.
- Unsalted butter - Use salted butter and omit or reduce the added salt to keep seasoning balanced.
- Granulated sugar - Use light brown sugar for a molasses-forward flavor and a darker color, though the texture may be slightly softer.
- Vanilla extract - Replace with a splash of bourbon or dark rum for warm, aromatic notes that go with the caramel.
Ingredients
- 1 cup granulated sugar - for the caramel base.
- 2 tablespoons water - to help the sugar dissolve.
- 6 tablespoons unsalted butter - cut into pieces.
- ½ cup heavy cream - warm or at room temperature.
- ½ teaspoon fine sea salt - or to taste.
- 1 teaspoon vanilla extract - added off heat.
Instructions
- You heat the sugar and water in a medium heavy-bottomed saucepan over medium until the sugar dissolves, about 3 minutes.
- You increase the heat slightly and boil without stirring, swirling the pan occasionally, until the mixture turns deep amber, about 6-8 minutes.
- You remove the pan from heat and add the butter pieces, stirring until fully melted and combined.
- You slowly pour in the warm heavy cream while stirring, then return the pan to medium and simmer for 30-60 seconds until smooth and glossy.
- You remove the pan from heat and stir in the vanilla and salt.
- You cool the sauce for about 10 minutes, transfer it to a jar, refrigerate up to 2 weeks, and reheat gently before using.
11. One-Pot Butterscotch Sauce
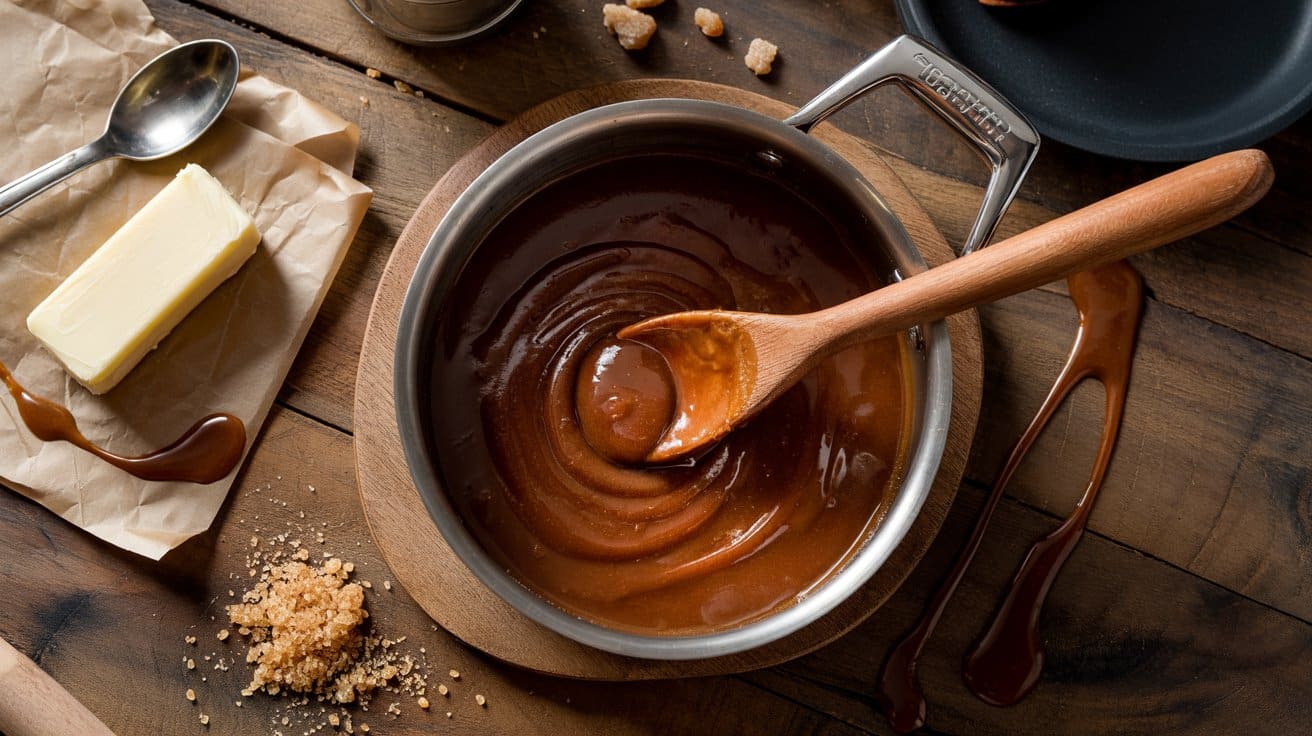
This glossy butterscotch sauce comes together in a single saucepan using pantry staples. You get deep brown-sugar caramel notes and a rich buttery finish that pairs especially well with ice cream, warm fruit desserts, or pancakes.
Why This Recipe Works
It concentrates brown sugar and butter for true butterscotch character.
The one-pan method keeps the process simple and easy to watch.
- Direct caramel control - You melt and stir the sugar in the same pan so you can monitor color and prevent burning.
- Stable texture - A splash of corn syrup prevents crystallization so the sauce stays smooth.
- Rich, balanced finish - Heavy cream and butter add creaminess without masking the molasses notes.
- Quick cool-to-serve - The sauce thickens as it cools, so it's ready to use within 15 minutes off the heat.
Ingredient Swap Ideas
Swaps let you adapt for pantry limits or dietary needs while keeping the same silky sauce texture.
- Heavy cream - Use ½ cup whole milk plus 2 tablespoons melted butter to mimic creaminess if you do not have heavy cream.
- Dark brown sugar - Substitute light brown sugar plus 1 teaspoon molasses to keep that molasses depth.
- Light corn syrup - Use 2 tablespoons maple syrup or honey to reduce refined syrup; expect a slightly different sweetness note.
- Unsalted butter - Use salted butter and omit the added pinch of salt to keep seasoning balanced.
Ingredients
- 1 cup packed dark brown sugar - packed.
- ½ cup (1 stick) unsalted butter - cut into pieces.
- ½ cup heavy cream - room temperature.
- 2 tablespoons light corn syrup - or maple syrup as noted above.
- ¼ teaspoon fine sea salt - adjust to taste.
- 1 teaspoon vanilla extract - added off the heat.
Instructions
- Melt the butter in a medium saucepan over medium heat until the foam subsides, about 1 minute.
- Add the brown sugar and corn syrup and stir until the sugar dissolves and the mixture comes to a gentle boil, about 3 minutes.
- Reduce heat to low and simmer, stirring occasionally, until the sauce is thickened and glossy, about 3-4 minutes.
- Remove from heat and slowly whisk in the heavy cream until smooth; be careful as it may steam.
- Stir in the salt and vanilla, then let the sauce cool slightly to thicken before serving or storing.
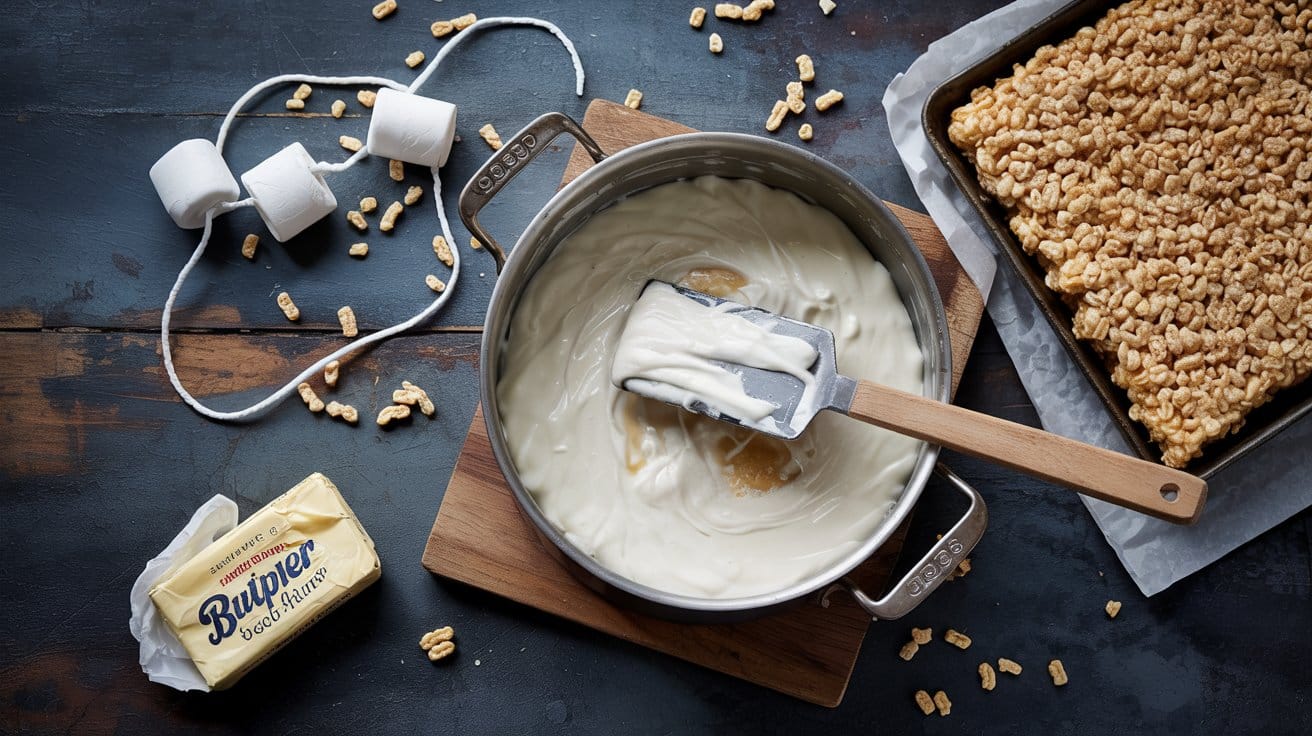
12. Rice Crispy Treats
You get a sweet, chewy center with crunchy cereal edges that work well for school lunches, bake sales, or an easy after-dinner snack - and they complement quick frozen treats without ice cream makers at summertime dessert tables.
Why This Recipe Works
These bars melt together quickly and set firm, so you can make a batch in under 30 minutes. The simple ingredient list keeps the texture light and nostalgic.
- Marshmallow-butter binding - Melted marshmallows and butter create a smooth, sticky matrix that holds the cereal without becoming soggy.
- Fast stovetop finish - The whole recipe cooks on the stove in minutes, so you spend less time prepping and more time serving.
- Light, airy crunch - The crispy rice cereal keeps the bars tender while adding a familiar snap in every bite.
- Simple cooling set - Chilling for about 30 minutes firms the bars enough to cut clean slices for serving.
Ingredient Swap Ideas
Swaps let you adapt for diet or flavor without changing the method. Use these to tweak texture or add a new note.
- Crispy rice cereal - Swap for a gluten-free crispy rice cereal to keep the same crunch for gluten-free diets.
- Unsalted butter - Swap half the butter for natural peanut butter to add a nutty depth and still bind the mixture.
- Marshmallows - Swap to mini marshmallows for faster, more even melting.
- Vanilla extract - Swap to almond extract in a smaller amount for a nutty aroma that pairs well with peanut butter additions.
Ingredients
- 6 tablespoons unsalted butter - cut into pieces.
- 10 ounces marshmallows - about one standard bag; use large or mini.
- 6 cups crispy rice cereal - measured before stirring.
- 1 teaspoon vanilla extract - for flavor.
- ¼ teaspoon salt - to balance sweetness.
Instructions
- Line a 9x13-inch pan with parchment or lightly grease it, then set aside.
- Melt the butter in a large pot over low heat until fully liquid, 1-2 minutes.
- Add the marshmallows and stir constantly until smooth and glossy, about 2-3 minutes; remove from heat and stir in vanilla and salt.
- Pour the cereal into the pot and fold gently until the cereal is evenly coated, working quickly so the mixture stays pliable.
- Transfer to the prepared pan, press evenly with a spatula or piece of parchment, cool until set (about 30 minutes), then cut into squares and serve.
13. Peach Cobbler on the Stove
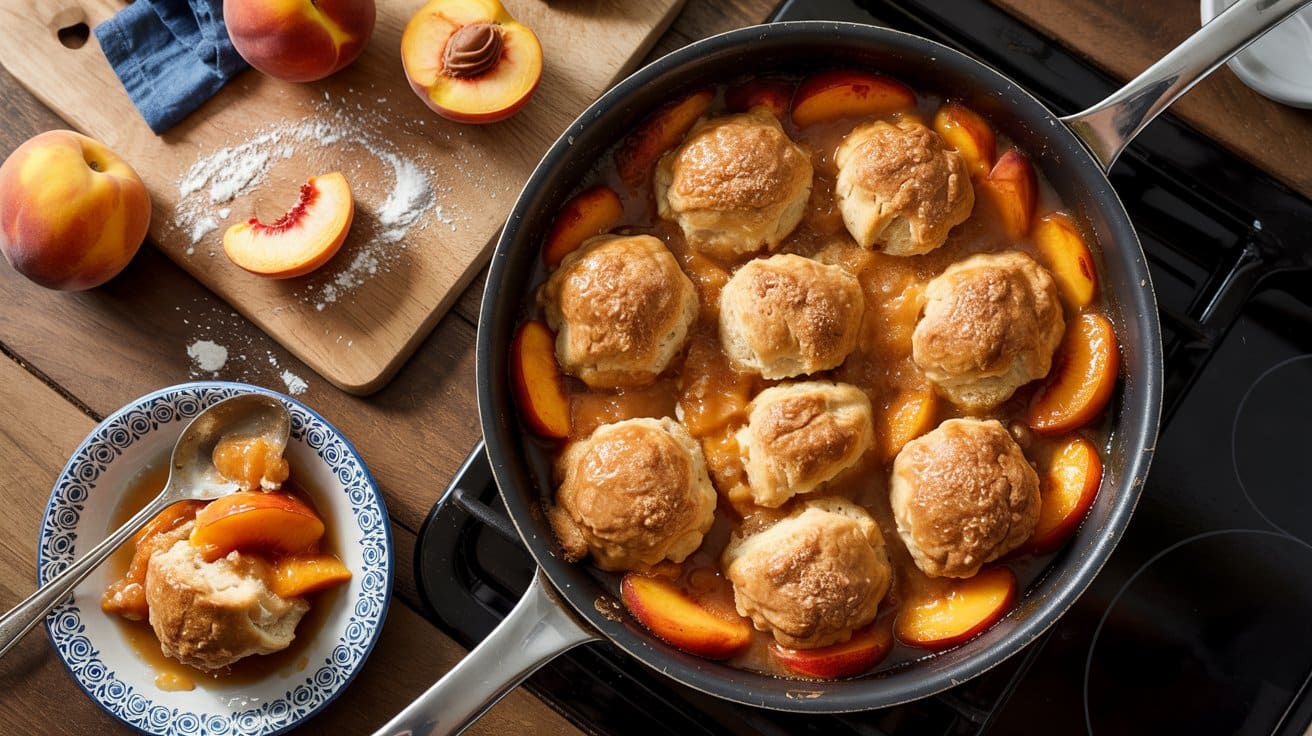
This stovetop cobbler gives juicy peaches and a tender biscuit topping without heating the oven. It comes together quickly and is ideal for warm-weather desserts or an easy weekend treat.
Serve warm with vanilla ice cream or whipped cream for contrast.
Why This Recipe Works
This method concentrates peach flavor and produces a soft, steamed topping quickly. You get a saucy filling and a cake-like top that cooks right on the stove.
- Juicy stovetop peaches - Peaches simmer in sugar and lemon until they release syrup that tastes bright and concentrated.
- Steam-set biscuit topping - Spoonable batter cooks through under a lid, creating a soft, cake-like crust without baking.
- Fast one-skillet finish - The whole dessert cooks in a wide skillet so you can watch doneness and serve straight from the pan.
- Balanced sweet-tart syrup - Lemon and a touch of cornstarch produce a glossy sauce that holds the fruit together for easy spooning.
Ingredient Swap Ideas
Swaps help you adapt for pantry limits or dietary needs while keeping the same method and flavor.
- Peaches - Use thawed frozen sliced peaches in the same amount for off-season baking; they keep a good texture after simmering.
- Cornstarch - Substitute arrowroot powder at the same measure for a clearer, slightly glossier sauce.
- Milk - Use buttermilk instead of milk for a tangier, more tender topping with a bit more rise.
- Butter - Swap with neutral oil or vegan butter for a dairy-free version; flavor will be slightly different but texture stays similar.
Ingredients
- 4 cups peaches - peeled and sliced.
- ½ cup granulated sugar - adjust to sweetness of fruit.
- 2 tablespoons cornstarch - for thickening the syrup.
- 1 tablespoon lemon juice - fresh is best.
- ½ teaspoon ground cinnamon - optional; adds warmth.
- 2 tablespoons unsalted butter - cut into small pieces.
- 1 cup all-purpose flour - for the topping.
- 2 teaspoons baking powder - for lift.
- ¼ cup granulated sugar - for the topping.
- ¼ teaspoon salt - for the topping.
- ¾ cup milk - whole or 2% for the batter.
Instructions
- Stir peaches, sugar, cornstarch, lemon juice, and cinnamon in a wide skillet until evenly coated.
- Cook over medium heat, stirring occasionally, until the mixture bubbles and the syrup thickens, about 5-7 minutes; reduce heat to low and scatter the butter over the fruit.
- Whisk flour, baking powder, sugar, and salt in a bowl, then stir in milk until a thick batter forms and no dry streaks remain.
- Drop heaping spoonfuls of batter over the hot peaches, covering as much surface as you can without stirring.
- Cover the skillet and cook over low heat until the topping is set and a toothpick inserted into the biscuit comes out clean, about 12-15 minutes; remove the lid and let rest 5 minutes before serving.
14. Stovetop Chocolate Fudge
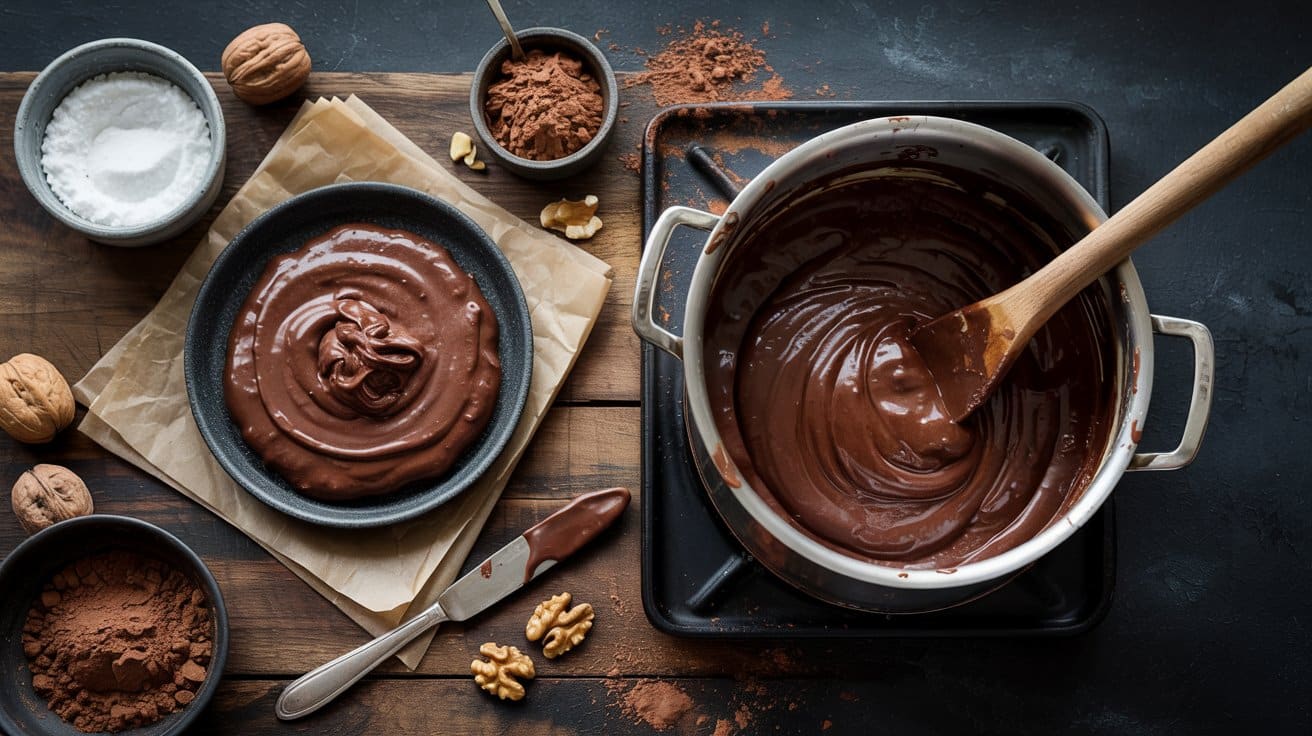
This quick stovetop fudge gives you rich, creamy chocolate without any baking. It sets firm in the fridge, so it's great for gifts, potlucks, or an after-dinner treat.
The flavor is deep and chocolate-forward, with a glossy finish and a simple, short ingredient list.
Why This Recipe Works
This method keeps the chocolate smooth and gives a reliable, sliceable texture. You finish it in the fridge, so timing and fuss are minimal.
- Low-heat melting - Gentle stovetop heat prevents the chocolate from seizing and keeps the texture silky.
- Condensed milk binder - Sweetened condensed milk creates a fudgy set without using a candy thermometer.
- Glossy, sliceable finish - A bit of butter and steady stirring produce a shiny surface that cuts cleanly.
- Fridge-ready setting - The fudge firms in 1-2 hours, so you can make it ahead for gatherings.
Ingredient Swap Ideas
Swaps let you alter sweetness, texture, or dietary needs without changing the method. Choose one swap at a time to keep the final texture consistent.
- Semi-sweet chocolate chips - Use chopped bittersweet chocolate (60-70% cacao) for a deeper, less sweet fudge; it melts and sets similarly.
- Sweetened condensed milk - Use 1 ¼ cups dulce de leche for a caramel-forward version; it has a comparable sugar-milk balance.
- Unsalted butter - Use coconut oil for a dairy-free finish and glossy texture; reduce the amount by 1 tablespoon if needed.
- Vanilla extract - Use ½ teaspoon instant espresso powder to deepen the chocolate notes without adding liquid.
Ingredients
- 1 (14-ounce) can sweetened condensed milk - room temperature.
- 3 cups semi-sweet chocolate chips - about 18 ounces.
- 2 tablespoons unsalted butter - room temperature.
- 1 teaspoon vanilla extract - for flavor.
- ¼ teaspoon fine sea salt - adjust to taste.
Instructions
- Line an 8x8-inch pan with parchment, leaving an overhang for easy removal, and lightly butter the paper.
- Combine the sweetened condensed milk, chocolate chips, and butter in a medium saucepan over low heat.
- Stir constantly until the chocolate is fully melted and the mixture is smooth, about 4-6 minutes; remove from heat.
- Stir in the vanilla and salt, then pour the mixture into the prepared pan and smooth the top.
- Chill in the refrigerator until firm, at least 1.5-2 hours.
- Lift the fudge from the pan using the parchment, slice into squares, and store covered in the fridge.
15. Sweet Potato Soufflé
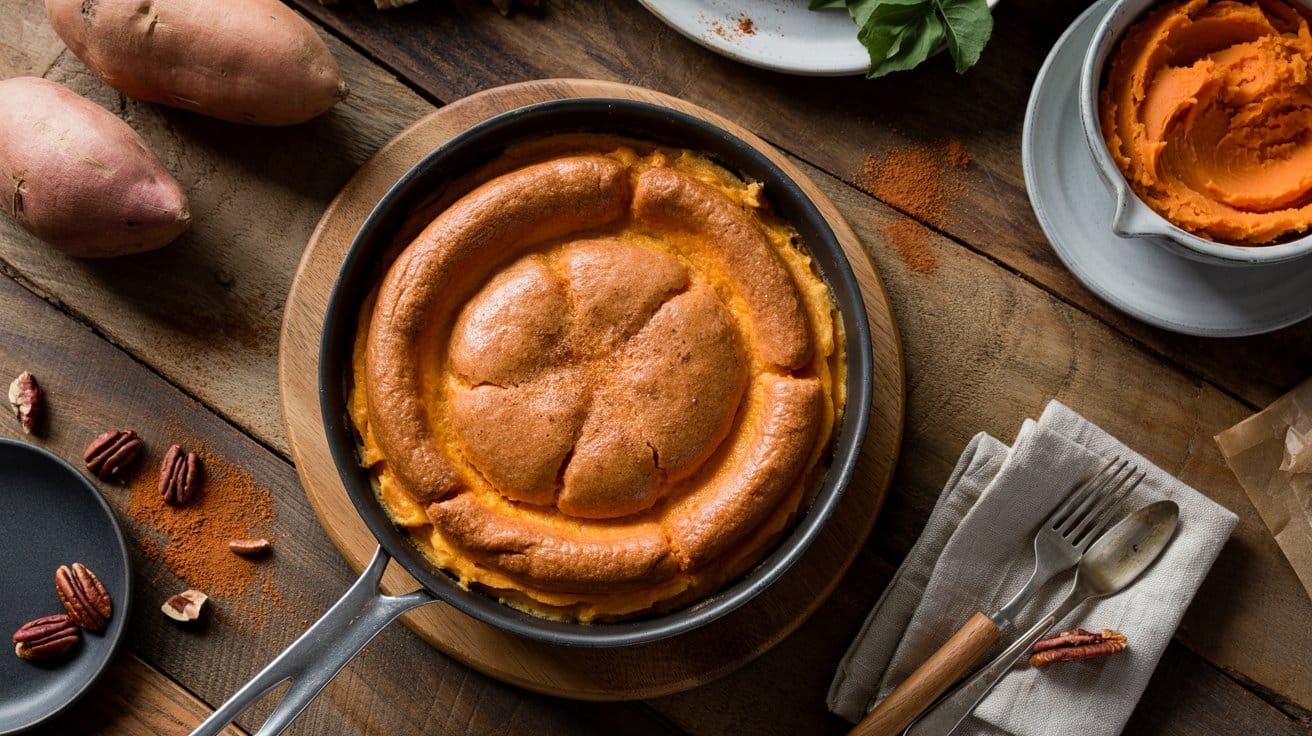
It brings warm spice and natural sweetness, ideal for holiday dinners or a weekend family dessert - and it pairs well with sweet and savory salads with nuts and cheese to balance richness.
Why This Recipe Works
This version combines a silky sweet potato base with fluffy egg whites for true soufflé texture. The spice and gentle sweetness keep the dish balanced and approachable for home cooks.
- Airy sweet potato lift - Whipped egg whites folded into the mash create a light, souffle-like rise that contrasts the creamy base.
- Concentrated sweet potato flavor - Cooking and mashing intensifies the tuber's natural sweetness so you need minimal added sugar.
- Warm spice accent - Cinnamon and nutmeg provide cozy, aromatic notes that pair naturally with sweet potato.
- Flexible timing - The mash can be made ahead and combined with whipped whites just before baking for easier service.
Ingredient Swap Ideas
Small swaps let you adjust for diet or pantry items without changing the method. Use these to match flavor or dietary needs while keeping structure intact.
- Whole milk - Swap unsweetened almond milk for a dairy-free option; it keeps moisture though flavor will be milder.
- All-purpose flour - Swap cornstarch (use half the amount) to preserve a lighter texture while adding stability.
- Granulated sugar - Swap light brown sugar for a deeper, caramel-like note that complements roasted sweet potato.
- Ground cinnamon - Swap pumpkin pie spice to introduce ginger and cloves for a warmer, spiced profile.
Ingredients
- 2 pounds sweet potatoes - peeled and chopped.
- 3 large eggs - separated.
- ½ cup whole milk - room temperature.
- ⅓ cup unsalted butter - softened.
- ⅓ cup granulated sugar - adjust to taste.
- 1 teaspoon vanilla extract -.
- ½ teaspoon ground cinnamon -.
- ⅛ teaspoon ground nutmeg -.
- ¼ teaspoon salt -.
- 1 tablespoon all-purpose flour - for structure.
- 2 tablespoons unsalted butter - melted for greasing ramekins or dish.
Instructions
- Preheat the oven to 375°F and grease a 1.5-quart baking dish or six 8-oz ramekins with the melted butter.
- Boil the sweet potatoes in a large pot of salted water until fork-tender, 15-20 minutes, then drain thoroughly.
- Mash the drained potatoes with softened butter, granulated sugar, flour, milk, egg yolks, vanilla, cinnamon, nutmeg, and salt until smooth; let cool slightly.
- Beat the egg whites to stiff, glossy peaks using a whisk or mixer.
- Fold one-third of the whipped whites into the sweet potato mixture to loosen, then gently fold in the remaining whites until just combined.
- Spoon the batter into the prepared dish and bake 25-30 minutes until puffed and the top is lightly golden and set; serve immediately.
16. Lemon Curd
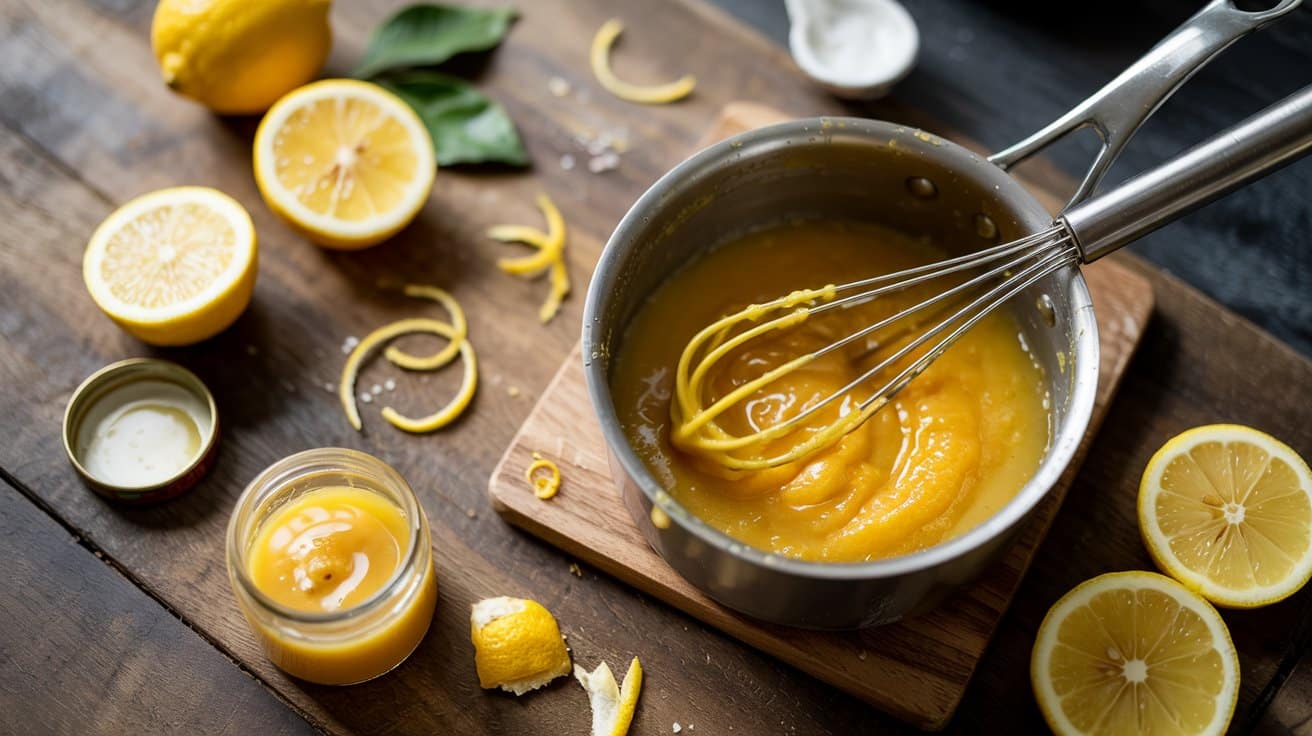
This small-batch lemon curd is bright, tangy, and silky, made on the stovetop in about 15-20 minutes. You can use it as a spread, tart filling, or a spoonable topping for yogurt and pancakes.
The stovetop method yields a smooth texture and concentrated lemon brightness that stores well in the fridge.
Why This Recipe Works
This recipe gives a glossy, stable curd with true lemon brightness. It uses simple techniques that you can finish on the stovetop without special equipment.
- Silky lemon custard - The combination of eggs and butter creates a smooth, spreadable texture that sets as it cools.
- Bright concentrated citrus - Fresh lemon juice and zest deliver noticeable tartness and aroma that cut through sweetness.
- Controlled gentle cooking - Cooking over low heat (or a double boiler) prevents curd from curdling while it thickens.
- Versatile small batch - The yield is enough for several uses and chills well for easy serving later.
Ingredient Swap Ideas
Swaps help you adjust texture, diet, or citrus flavor without changing the method.
- Granulated sugar - Use superfine (caster) sugar for faster dissolving and a slightly smoother finish.
- Unsalted butter - Swap with a vegan buttery spread added at the end for a dairy-free curd that still emulsifies.
- Fresh lemon juice - Use lime juice for a lime curd or half lemon/half orange for milder citrus notes.
- Eggs (3 large eggs + 1 yolk) - Use 4 large egg yolks for an extra-rich, thicker curd; cook gently to avoid overcooking.
Ingredients
- 1 cup granulated sugar -.
- 3 large eggs - at room temperature.
- 1 large egg yolk - at room temperature.
- ½ cup fresh lemon juice - about 2-3 lemons.
- 2 tablespoons lemon zest - finely grated.
- 6 tablespoons unsalted butter - cut into small pieces.
- ⅛ teaspoon fine salt -.
Instructions
- Whisk the eggs, egg yolk, sugar, lemon juice, lemon zest, and salt in a heatproof bowl until combined.
- Set the bowl over a simmering pot of water (double boiler) or use a heavy-bottomed saucepan over very low heat and whisk constantly.
- Cook and whisk for 8-12 minutes until the mixture thickens and coats the back of a spoon (or reaches about 170°F).
- Remove from heat and strain the curd through a fine-mesh sieve into a clean bowl to remove any cooked bits.
- Whisk in the butter pieces until fully incorporated, then cool slightly before transferring to jars; chill until set, about 2 hours.
17. Caramelized Bananas
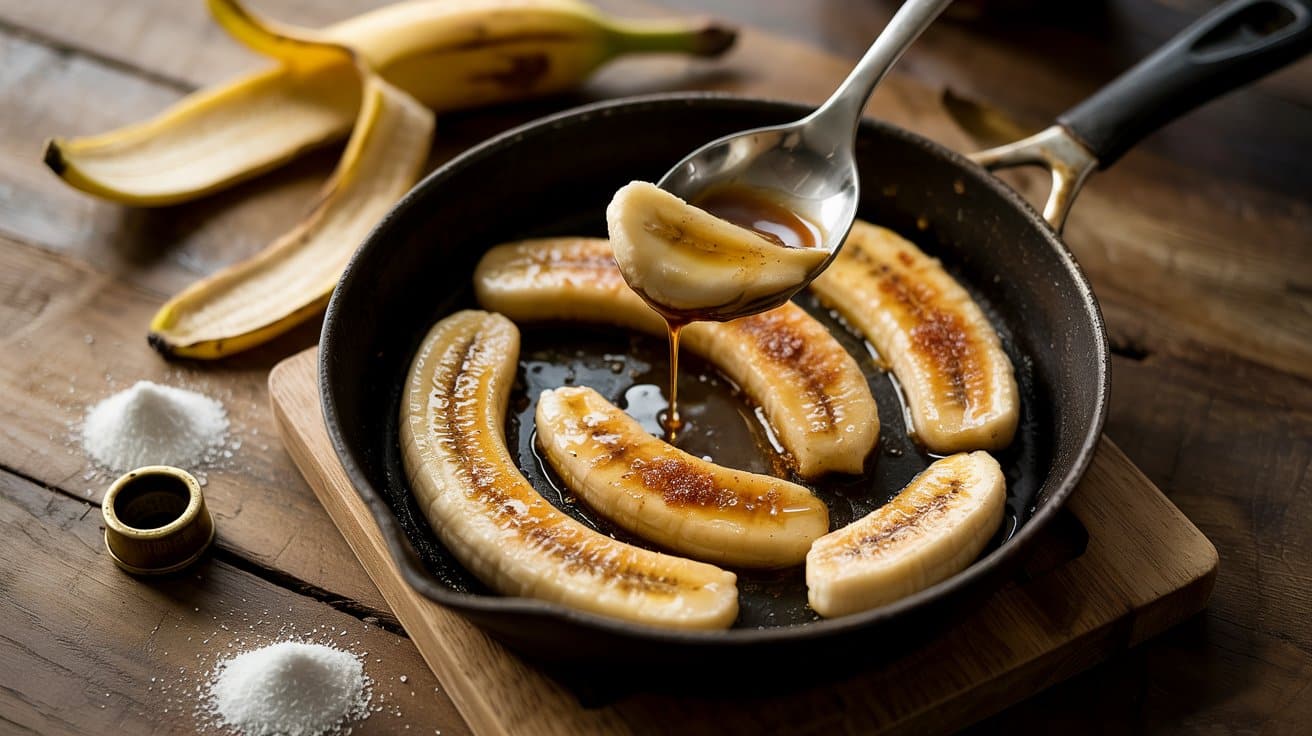
These syrupy banana slices are sweet, warmly spiced, and quick to make. You can finish them in minutes and serve them over vanilla ice cream, pancakes, or yogurt for an indulgent treat with minimal fuss.
Why This Recipe Works
These bananas brown quickly and form a glossy sauce that clings to each slice. The small ingredient list keeps the process fast and reliable.
- Quick golden glaze - Brown sugar and butter melt into a sticky sauce that coats the fruit and creates a shiny finish.
- Bright citrus balance - A splash of lemon juice cuts the sweetness and keeps the sauce from tasting flat.
- Soft yet holdable texture - Using ripe but firm bananas gives tender interiors while preventing mush during searing.
- Minimal stovetop steps - Everything cooks in one skillet so you can plate fast without extra pans.
Ingredient Swap Ideas
Simple swaps let you adapt for dietary needs or different flavor notes without changing the method.
- Bananas - Use slightly firmer plantains for a chewier texture that still caramelizes well.
- Unsalted butter - Swap with coconut oil for a dairy-free option that browns and adds richness.
- Packed brown sugar - Substitute maple syrup or coconut sugar for a different sweet profile that still creates caramel.
- Lemon juice - Replace with orange juice or a splash of dark rum for a brighter or boozy note that pairs with the caramel.
Ingredients
- 4 medium bananas - ripe but still slightly firm; sliced lengthwise or into ½-inch rounds.
- 3 tablespoons unsalted butter - for browning and sauce.
- ⅓ cup packed brown sugar - light or dark.
- 1 tablespoon lemon juice - fresh squeezed.
- ½ teaspoon ground cinnamon - optional but recommended.
- ½ teaspoon vanilla extract - for finishing.
- Pinch kosher salt - to balance the sweetness.
Instructions
- Heat a nonstick or stainless-steel skillet over medium heat and add the butter until it melts and begins to foam, about 1 minute.
- Stir in the brown sugar and cinnamon and cook until the sugar dissolves and the mixture is bubbling, about 1-2 minutes.
- Add the lemon juice and gently place the banana slices cut-side down in a single layer; cook until the undersides are golden brown, about 1-2 minutes.
- Carefully flip each slice and cook the other side 30-45 seconds while spooning the syrup over the bananas.
- Remove from the pan, stir in the vanilla and salt into the remaining sauce, spoon it over the bananas, and serve warm over ice cream, pancakes, or yogurt.
18. One-Pot Chia Pudding

This simple stovetop pudding gives you a creamier texture than overnight soaking and finishes faster for busy mornings. The flavor is gently sweet with warm vanilla, and it works well for breakfast, a make-ahead snack, or a light dessert.
You can serve it chilled with fruit, nut butter, or toasted seeds for contrast.
Why This Recipe Works
This method produces a silkier, more uniform pudding by activating the chia in warm milk and stirring as it thickens. It saves time compared with long cold-soak methods while keeping the same healthy nutrients.
- Creamy stovetop thickening - Heating the milk with chia breaks down the gel around seeds for a smoother mouthfeel.
- Stable texture for toppings - The pudding sets firm enough to hold fruit or nut butter without sliding apart.
- Quick set time - A short refrigeration after cooking produces ready-to-eat pudding in about an hour.
- Neutral base for flavors - Mild vanilla and a pinch of salt let you customize with citrus, cocoa, or spices easily.
Ingredient Swap Ideas
Swaps let you adjust dairy preference, sweetness level, or texture without changing the method. Choose replacements that match the pudding's liquid ratio.
- Milk (2 cups) - Use almond, oat, coconut, or dairy milk for a different flavor and creaminess while keeping the 2:1 liquid-to-chia balance.
- Maple syrup (2 tbsp) - Swap honey or agave at the same volume for comparable sweetness and a slightly different flavor note.
- Vanilla extract (1 tsp) - Replace with ¼ teaspoon ground cinnamon or ½ teaspoon citrus zest to change the profile without altering technique.
- Chia seeds (⅓ cup) - Use white or black chia interchangeably; both absorb liquid the same way and produce identical texture.
Ingredients
- ⅓ cup chia seeds - whole.
- 2 cups milk - dairy or plant-based for cooking.
- 2 tablespoons maple syrup - or honey/agave.
- 1 teaspoon vanilla extract - for flavor.
- Pinch of salt - about ⅛ teaspoon.
Instructions
- Warm the milk, sweetener, vanilla, and salt in a medium saucepan over medium heat until it steams and small bubbles form at the edges (about 3-4 minutes).
- Whisk in the chia seeds until evenly distributed, then reduce heat to low and simmer, stirring frequently, for 3-5 minutes until the mixture noticeably thickens.
- Remove the pan from heat and let sit for 5 minutes, then whisk briskly to break up any clumps and check texture.
- Transfer the pudding to a shallow container or individual jars, cover, and refrigerate for at least 1 hour or until fully set and chilled.
- Serve chilled with fruit, nut butter, toasted seeds, or a sprinkle of cinnamon as desired.
19. Cinnamon Roll Oatmeal
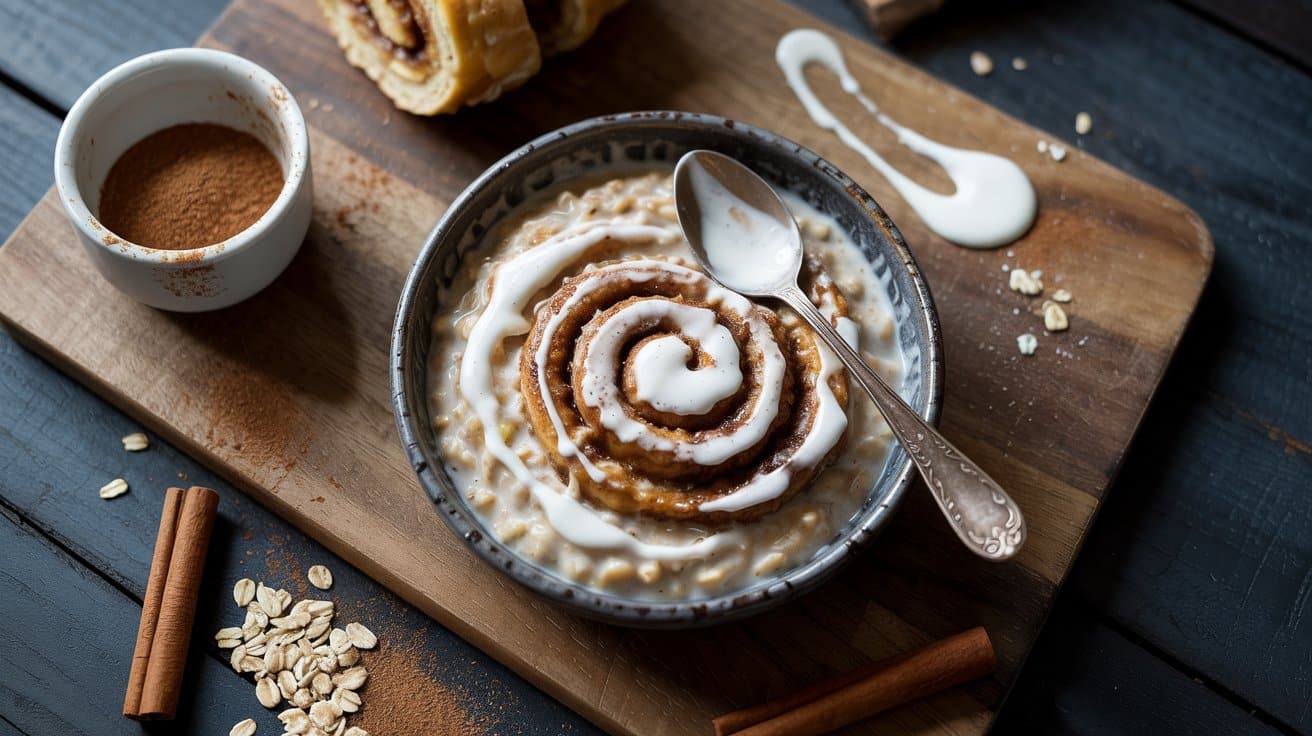
This warm, spiced oatmeal recreates the comforting cinnamon-sugar notes of a cinnamon roll in a simple bowl. You can make it on the stovetop in about 10 minutes for a creamy, sweet breakfast.
It's lovely for weekend brunch or a cozy weekday morning.
Why This Recipe Works
It captures classic cinnamon-roll flavor without baking. The texture stays creamy while you get a bright finish from the cream-cheese glaze.
- Cinnamon-sugar swirl - Brown sugar and cinnamon are stirred into the oats so each spoonful echoes a cinnamon roll's core flavor.
- Cream-cheese glaze finish - A small cream-cheese glaze adds tang and sweet creaminess that mirrors traditional icing.
- Stovetop, single pot - Everything cooks in one saucepan for quick cleanup and even texture.
- Adjustable richness - Milk and a bit of butter give a creamy mouthfeel that you can scale to your taste.
Ingredient Swap Ideas
Swaps let you adapt for dietary needs or pantry limits while keeping the cinnamon-roll profile. Each option preserves the creamy and spiced character.
- Milk - Use unsweetened almond or oat milk for a dairy-free version; the oats still cook to a creamy texture.
- Old-fashioned rolled oats - Swap for quick oats and reduce cooking time to about 2 minutes; texture will be softer.
- Brown sugar - Replace with maple syrup (use about 1½ tablespoons) for a natural sweetness that complements cinnamon.
- Cream cheese - Use plain Greek yogurt as a tangy, lighter glaze base that still gives a creamy finish.
Ingredients
- 1 cup old-fashioned rolled oats -.
- 2 cups milk - for cooking oats.
- 2 tablespoons packed brown sugar -.
- 1 teaspoon ground cinnamon - plus extra for serving.
- ½ teaspoon vanilla extract -.
- Pinch of salt -.
- 1 tablespoon unsalted butter -.
- 2 tablespoons cream cheese - softened.
- ¼ cup powdered sugar - for glaze.
- 1 tablespoon milk - for thinning glaze.
Instructions
- Warm the milk and butter in a medium saucepan over medium heat until it just begins to simmer.
- Add the oats and cook, stirring often, for 5 minutes or until thick and creamy.
- Stir in the brown sugar, cinnamon, vanilla, and a pinch of salt until fully combined and warmed through.
- Whisk the cream cheese, powdered sugar, and 1 tablespoon milk in a small bowl until smooth and pourable.
- Divide the oatmeal into bowls, spoon the glaze on top in a swirl, and sprinkle with a little extra cinnamon before serving.
20. Stovetop Brownies

These fudgy brownies cook entirely on the stovetop in a single heavy pan, so you get warm, gooey chocolate without heating the oven. They finish with a shiny, crackled top and a dense, moist center that's best served warm with a scoop of ice cream or a cup of tea.
Why This Recipe Works
This method keeps the brownies dense and moist by avoiding high, dry heat. You can make dessert quickly using one pan and a low flame.
- One-pan fudgy finish - The batter cooks gently in a single skillet so the interior stays dense and moist rather than cakey.
- Steam-assisted set - Covering the pan traps moisture and cooks the center through without drying the edges.
- Shiny crackled surface - Mixing sugar with melted butter and eggs creates a glossy top that breaks into delicate cracks.
- Quick warm serving - The brownies are ready to slice and serve within 30 minutes, ideal for last-minute dessert needs.
Ingredient Swap Ideas
Small swaps help adapt the recipe to dietary needs or pantry limits while keeping the texture intact. Use these options to preserve the fudgy result and chocolate focus.
- All-purpose flour - Use a 1:1 gluten-free flour blend to keep structure similar for gluten-free versions.
- Unsweetened cocoa powder - Substitute Dutch-process cocoa for a deeper, richer chocolate note.
- Unsalted butter - Replace with coconut oil or a light-flavored vegetable oil for a dairy-free option that still yields moist brownies.
- Chocolate chips - Swap for chopped dark chocolate for a smoother melt and richer pockets of chocolate.
Ingredients
- ½ cup unsalted butter - melted.
- 1 cup granulated sugar - for sweetness and glossy top.
- 2 large eggs - room temperature.
- 1 teaspoon vanilla extract - for balance.
- ⅓ cup unsweetened cocoa powder - sifted if lumpy.
- ½ cup all-purpose flour - spooned and leveled.
- ¼ teaspoon salt - to enhance chocolate flavor.
- ½ cup chocolate chips or chopped chocolate - semi-sweet or dark.
Instructions
- Melt the butter in a 10-inch heavy skillet over low heat until fully liquid, about 2 minutes.
- Stir in the sugar until the mixture looks smooth and slightly glossy.
- Let the pan cool for 1 minute, then whisk in the eggs one at a time and stir in the vanilla until smooth.
- Fold in the cocoa, flour, and salt until just combined, then stir in the chocolate chips.
- Return the skillet to the lowest flame, cover, and cook 18-22 minutes until the edges are set and a toothpick inserted near the center comes out with moist crumbs.
- Remove the lid, let rest 5 minutes, then slice and serve warm.
Frequently Asked Questions
Fresh herbs, a squeeze of citrus, and proper seasoning at each step make the biggest difference. Using high-quality base ingredients also improves the final result significantly.
Yes. Sheet pan meals, one-pot dishes, and no-cook options cut prep time significantly.
Most can be on the table in under 30 minutes with the right shortcuts.
The most common mistake is rushing the process - not tasting as you cook or skipping steps like resting, marinating, or proper temperature control. Following the order of steps matters more than speed.
What is the best way to get consistent results each time?
Consistency comes from following the recipe the same way each time - same pan size, same heat level, same resting time.
Taking notes on adjustments that worked helps replicate success.
one-pan roasted vegetable and sausage dinners offer hearty weeknight options that pair with many simple sides. hearty Instant Pot vegetarian stew recipes also bring comfort for cooler nights.

Andrew Gray is a passionate food writer and recipe creator who built Gusto Meadow to celebrate delicious, approachable cooking. With years of experience in restaurants and catering, he brings a grounded, real-world understanding of flavors, technique, and what truly works in a home kitchen.
At Gusto Meadow, Andrew focuses on fresh, seasonal ingredients and simple methods that anyone can follow. His goal is to make cooking feel fun, doable, and rewarding — whether you’re preparing a quick weeknight dinner or exploring something new.