The closest alternatives to Cooling Rack are Cooking Pan and Parchment Paper, DIY Cooling Rack, Crumpled-Foil Rack, Wood Slats, and Larger Plates.
Cooking Pan and Parchment Paper is the closest match - it has a similar flavor and works at a 1:1 ratio in most recipes.
For cooking, DIY Cooling Rack also works well - adjust the amount to taste since it may be slightly stronger or milder.
Yep, the cooling rack.
Sounds familiar, right? Suddenly, those cookies you lovingly crafted threaten to turn soggy.
Oh, the horror!
Ready to discover these baking hacks? These substitutes won't just save your cookies; they'll save the day.
Practical Cooling Rack Replacements
A cooling rack is an essential tool in the kitchen for allowing baked goods to cool evenly and prevent them from becoming soggy.
However, if you don't have a cooling rack on hand or need a substitute, there are several alternatives that can provide similar results - including roasting rack substitute options.
| Substitute | Key Characteristics | Usage |
|---|---|---|
| Cooking Pan and Parchment Paper | improves and allows air circulation around the baked goods | Place a piece of parchment paper on a cooking pan to cool the items |
| DIY Cooling Rack | Homemade option using wire racks or oven-safe grids | Create a makeshift rack using wire racks or oven-safe grids |
| Crumpled-Foil Rack | Provides airflow and improves baked goods | Crumple aluminum foil and shape it into a rack-like structure |
| Wood Slats | Natural material that allows air circulation | Place wood slats on a flat surface to cool the baked goods |
| Larger Plates | Uses the surface area of large plates to cool items | Place the baked goods on larger plates to allow for even cooling |
Here is a closer look at each option:
1 - Cooking Pan and Parchment Paper

Using a cooking pan and parchment paper is easy to "bake" off any baked goods.
You can also use the sides of the baking pan as a cooling rack by placing it on top of your counter or cutting board, but make sure that there's enough room for air to circulate underneath as well.
Then, layer your baked goods on top of the parchment paper.
There's no need to turn the oven back on and let it heat up again.
Ensure enough breathing room around your items so they do not get soggy with steam.
If you don't have parchment paper handy, use a regular cutting board.
The lines on the board help with cutting your goodies evenly after they've cooled off.
If avoiding cooking sprays, try Pam cooking spray alternatives for nonstick that work well with pans and parchment.
- Key Characteristics: This substitute improves the baked goods and allows air circulation, similar to a cooling rack. It is a simple and convenient option.
- Usage: Place a piece of parchment paper on a cooking pan, then transfer the baked goods onto the parchment paper to cool. The elevated position helps promote airflow and prevents the items from becoming too moist on the bottom.
2 - DIY Cooling Rack
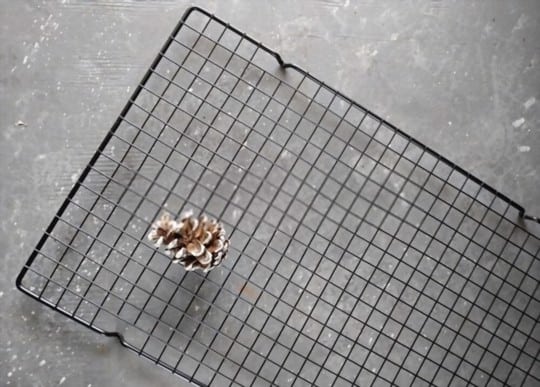
Making a DIY cooling rack is a great way to save money and still have something that will work for your needs.
All you have to do is find a metal grate that's sturdy enough not to warp when exposed to high heat.
Then, you'll need a wooden or plastic cutting board that can sit on top of it.
The board's edges should be far enough apart, so there's plenty of room for airflow underneath your items, but small enough so that the board doesn't slide around on top of it.
As long as you have these two items, then you'll be ready to get started.
Just place your cooked goods on top of the cutting board and allow them to cool in peace.
If the DIY rack is being used after a roast, pair it with rack of lamb side dishes for roasting to complete the meal.
- Key Characteristics: The DIY cooling rack involves using wire racks or oven-safe grids to create a makeshift cooling rack.
- Usage: Place wire racks or oven-safe grids on a flat surface, such as a baking sheet or countertop. Transfer the baked goods onto the wire racks or grids to cool. This option allows for proper airflow and even cooling.
3 - Crumpled-Foil Rack

If you don't have parchment paper handy, use a regular cutting board.
The lines on the board help with cutting your goodies evenly after they've cooled off.
You can also crumple up some aluminum foil and use it as a DIY cooling rack that's easy to set up and take back down again when you're done.
All you have to do is crumple up some aluminum foil and place it on top of a baking pan.
Make sure that you don't cover the entire surface area, but just enough that the foil isn't bunching together.
Then, place your items on top of the "rack" and wait for them to cool off.
- Key Characteristics: Crumpled aluminum foil can be shaped into a rack-like structure, providing airflow and elevation for the baked goods.
- Usage: Crumple aluminum foil into long strips and shape them into a rack by aligning the strips parallel to each other. Place the crumpled-foil rack on a flat surface, such as a baking sheet or countertop, and transfer the baked goods onto the foil rack for cooling.
4 - Wood Slats
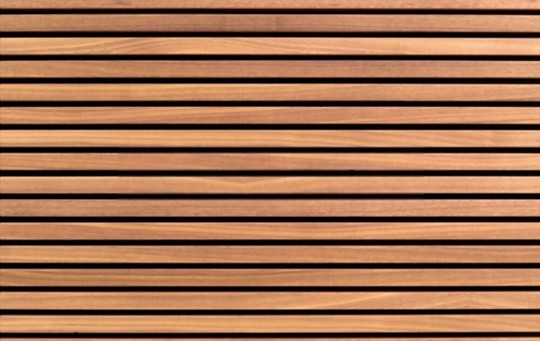
Using wooden slats is another easy way to cool baked goods without a cooling rack.
You can use wooden slats as a DIY cooling rack by simply placing them on top of the counter or table you'll be working on and placing your items on top of them.
Then, allow your goodies to sit and cool off in peace, so they aren't exposed to too much steam and don't get soggy.
You should make sure you place your items far enough apart, so they have an even amount of breathing room and don't get soggy with steam.
For recipes that call for unusual textures, see wood ear mushroom substitutes for similar texture.
- Key Characteristics: Wood slats allow air circulation around the baked goods and provide a natural cooling surface.
- Usage: Place wood slats on a flat surface, such as a baking sheet or countertop. Transfer the baked goods onto the wood slats to cool. The slats improve the items and allow for even cooling.
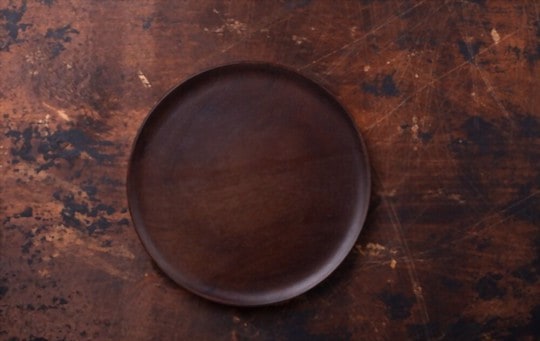
5 - Larger Plates
If you don't have parchment paper handy, use a regular cutting board.
The lines on the board help with cutting your goodies evenly after they've cooled off.
Another alternative that works well is to place your items on an oven-friendly plate and allow them to sit and cool off there.
Make sure that you keep your plates close by to be used promptly.
If you aren't in a hurry and want to let your items cool off slowly, then place the plate in an area where there's no airflow, and it'll take several minutes for them to cool off.
Roasting tools translate across recipes; roasting rack substitute options can fill similar roles in the oven. For plated meals after roasting, rack of lamb side dishes for roasting lists compatible accompaniments.
- Key Characteristics: Using larger plates uses the surface area to cool the baked goods evenly.
- Usage: Place the baked goods on larger plates, making sure there is enough space between each item to allow for airflow. This method works well for smaller batches or single-layered items.
Frequently Asked Questions
Cooking Pan and Parchment Paper is the best substitute for Cooling Rack because it shares a similar flavor and texture. Use it at a 1:1 ratio in any recipe that calls for Cooling Rack.
Yes, and the results are often hard to tell apart. Cooking Pan is the go-to replacement.
For variety, Parchment Paper and DIY Cooling Rack adds its own twist to the dish.
Sometimes. Blending two partial substitutes - one for flavor and one for texture - gets closer to the original.
This works best when neither alone fully replicates what you need.
Not always. Some substitutes are processed or have a strong raw flavor that disappears with heat.
Check whether the original is typically used raw before assuming the substitute will work the same way.